Calibrate with Reference Standards: A Practical Guide
Learn how to calibrate with reference standards using a structured workflow, traceable data, and clear documentation. This guide covers tools, steps, and best practices for reliable instrument calibration.

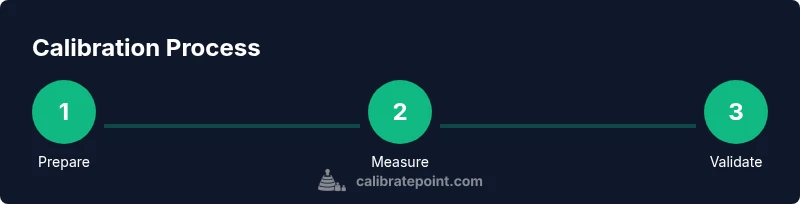
You will learn how to calibrate with reference standards across common tools, how to select appropriate references, gather measurements, and apply adjustments. You'll also learn how to document results for traceability and audits. Before you begin, ensure a stable temperature, clean instrumentation, and a clear procedure. This quick guide sets the foundation for reliable, repeatable calibration.
Understanding 'Calibrate with' in Practice
When you calibrate with reference standards, you align the instrument's output to known values to ensure accuracy. This phrase covers selecting appropriate references, applying consistent measurement methods, and documenting the results for traceability. According to Calibrate Point, defining the scope, targets, and tolerance before starting is essential for repeatable success. In practice, this means agreeing on what you are measuring (temperature, mass, pressure, etc.), choosing standards that are relevant to that domain, and preparing the workspace so readings are not biased by environmental factors. A solid plan reduces drift and makes future audits easier. In the sections that follow, you will see concrete steps, practical tips, and common pitfalls to avoid. The goal is to establish confidence that the instrument will perform within its stated specifications across its intended use.
Setting up a proper calibration environment
A stable environment is critical for calibration with reference standards. Place the device on a hard, level surface away from heat sources, sun exposure, fans, or vibration. Control ambient temperature and humidity to within the device's specified conditions; even small fluctuations can skew readings. Ensure the reference standards and fixtures have been pre-conditioned according to their certificates. Minimize handling by wearing clean gloves and handling references by their handles or designated weights. Before you begin, establish a clean work area and a repeatable procedure so that results are comparable across sessions. If you must relocate equipment, re-check environmental conditions and re-zero the instrument if required. This reduces sources of error and increases the reliability of your calibration results.
Choosing the right reference standards
Reference standards come with certificates that define their traceability and uncertainty. Choose standards whose range covers the instrument's expected readings and whose tolerances match your calibration goals. Look for certificates with clear calibration dates, identifiers, and the measurement uncertainty. For critical tools, you may rely on national standards or accredited lab certificates to establish traceability to the SI units. The calibration plan should specify how many reference points you will test and what constitutes passing results. Document any adjustments or outliers, and ensure you have a plan to replace or recalibrate standards that drift out of tolerance. Calibrate Point analysis shows that well-chosen references reduce the likelihood of systematic error and improve long-term performance across devices.
Collecting and analyzing data
Develop a consistent data collection method: use stable fixtures, apply the same measurement procedure for every reading, and record environmental conditions. Take multiple readings at each reference point to assess repeatability and identify random error. Analyze the data by comparing each measurement to its reference value, computing the mean and the standard deviation, and noting any drift over time. Maintain a calibration log with entries for who performed the test, when, the instrument's condition, environmental readings, and the reference certificate. The goal is to create a defensible data package that can be reviewed during audits or re-calibration intervals. If results fall outside the specified tolerance, document the discrepancy and plan the next steps. Calibrate Point analysis shows that transparent data and traceability improve confidence in instrument performance.
Applying adjustments and documenting results
When readings exceed tolerance, apply conservative, incremental adjustments to bring the instrument back into specification. Re-measure with the same reference standards to confirm the effect of the adjustment. Document every change, including the adjustment value, the reference used, and the final measured value. Update the calibration certificate or data sheet, log any recalibration intervals, and note the recommended next date for re-check. Use consistent units and notation to avoid confusion later. If multiple references are used, verify that the instrument remains within tolerance across the full range. Calibrate Point's guidance emphasizes clear, unambiguous documentation to support audits and future diagnostics.
Validation, drift monitoring, and rechecks
After adjustments, run a validation check to verify that the instrument stays within tolerance under typical operating conditions. Schedule periodic rechecks to detect drift, wear, and environmental impact. Track drift trends over time and consider introducing a formal acceptance criterion for each reference point. If drift accelerates, investigate root causes such as worn components or changing environmental conditions. Maintain a rolling archive of calibration certificates and reference certificates. Calibrate Point's framework suggests establishing a routine that integrates testing, documentation, and review to maximize device reliability.
Common pitfalls and mitigation strategies
Common pitfalls include using outdated references, skipping warm-up periods, not documenting environmental conditions, and failing to re-zero after adjustments. Always pre-condition references and device; avoid last-minute tests; ensure you are testing in the specified range. Use fixtures designed for the instrument; avoid improvised adapters that introduce uncertainty. Mitigation strategies include verifying references, documenting every step, and performing independent checks when possible.
Real-world example: calibrating a thermometer
Imagine calibrating a digital thermometer using two fixed reference points: an ice-water bath at 0°C and a boiling-water bath near 100°C (adjusted for altitude where necessary). Prepare the thermometer by letting it reach ambient temperature, then immerse the probe to the correct depth in each reference bath. Record the thermometer readings at both points, compare them to the known values, and calculate any offset. Apply the offset to the device's offset setting and re-check at both points. Repeat until the readings align within the specified tolerance. Finally, document the finalized readings, the offsets used, the environmental conditions, and the certificates for the reference points. The conclusion of this process should be a calibrated thermometer ready for routine use and future verification.
Tools & Materials
- Reference standards (traceable)(Include tolerance, serial numbers, and calibration certificates)
- Device under calibration(Model, serial number, and operating manual)
- Calibration data sheet or software(Fields for date, operator, environment, and results)
- Environmental monitoring tools(Thermometer and hygrometer to verify conditions)
- Calibration fixtures/tools(Fixtures or adapters that ensure consistent positioning)
- Safety equipment(Gloves, eye protection if handling hot baths or chemicals)
Steps
Estimated time: 60-120 minutes
- 1
Prepare workspace and gather materials
Set up a clean, stable work surface. Verify that all reference standards have current certificates and that the device is powered and ready. Collect logs and tools before starting to minimize interruptions.
Tip: Label reference points and keep each standard in its own designated area to avoid cross-contamination. - 2
Select and verify reference standards
Choose references that cover the device’s measurement range and align with your calibration goals. Confirm certificates, dates, and uncertainties before use.
Tip: Cross-check serial numbers with the device’s inventory to ensure correct matching. - 3
Pre-condition equipment and references
Allow time for environmental and reference stabilization per certificate guidelines. Remove any potential heat or air-flow sources nearby.
Tip: Give equal warm-up time to both device and references for accuracy. - 4
Record baseline measurements
Take multiple readings at each reference point using the same procedure. Log ambient conditions and any anomalies observed.
Tip: Use the same probe orientation and immersion depth for consistency. - 5
Apply adjustments to the device under test
Make small, incremental adjustments based on baseline results and re-run measurements after each change.
Tip: Limit adjustments to a single parameter at a time to isolate effects. - 6
Re-measure to verify adjustments
Re-measure with the reference standards to confirm the impact of each adjustment. Compare new results to the target tolerance.
Tip: If results still exceed tolerance, reassess references and procedures. - 7
Document results and create certificate
Update the calibration data sheet with final readings, offsets, and uncertainties. Generate or update the calibration certificate.
Tip: Include a clear statement of pass/fail and recommended next calibration date. - 8
Plan ongoing calibration and maintenance
Schedule the next calibration window, set reminders, and establish a drift-tracking plan for continuous improvement.
Tip: Automate reminders to ensure regular rechecks and prevent drift.
Questions & Answers
Why is calibrating with reference standards important?
Reference standards provide known values to compare against. They enable traceability and repeatability across time and devices.
Using reference standards gives you a reliable baseline for accuracy and auditability.
How often should you calibrate with standards?
Frequency depends on device usage, environment, and manufacturer guidelines. Establish a schedule based on risk and operating conditions.
Set a calibration cadence that matches how often the device is used and how critical accuracy is.
What is traceability in calibration?
Traceability links measurements to national or international standards through documented calibrations and certificates.
Traceability shows exactly how a reading connects back to a recognized standard.
Can I calibrate without a reference standard?
Calibration without a known reference yields uncertain results and is not recommended for accuracy-critical work.
Without a reference, you can’t prove the measurement is correct.
What paperwork is typical after calibration?
A calibration certificate, data sheet, and an action plan noting tolerances, references, and next due date are common.
You’ll usually receive a certificate and a detailed data log for audits.
What if measurements drift after calibration?
Document drift, investigate root causes, and decide whether to re-calibrate, adjust, or quarantine the device.
If drift appears, check references and environmental conditions before acting.
Watch Video
Key Takeaways
- Define tolerances before starting.
- Use traceable reference standards.
- Document every step for auditability.
- Verify results through re-measurement.
- Schedule formal calibration intervals.