How to Calibrate a GE Washer: Step-by-Step Guide
Learn how to calibrate a GE washer with a safe, step-by-step method. This guide covers when calibration is needed, tools, a detailed procedure, common issues, and maintenance tips to keep your machine performing at peak efficiency.

According to Calibrate Point, calibrating a GE washer improves sensor accuracy for water level, drum balance, and spin timing, leading to better cleaning and energy efficiency. This guide covers when calibration is needed, required tools, a safe step-by-step process, and common mistakes to avoid. You’ll enter calibration mode, run test cycles, and verify results for reliable, repeatable performance.
Calibration fundamentals for GE washers
GE washers rely on sensors and control boards to regulate water fill, drum balance, and spin timing. Calibration is the process of verifying and adjusting these sensors so readings match actual conditions. When calibration is out of spec, cycles can overfill or underfill, the drum can become unbalanced, and spin speeds may vary, leading to longer cycle times and reduced cleaning efficiency. According to Calibrate Point, calibration helps optimize energy use and extend appliance life by ensuring sensors read accurately across typical loads. This section explains what calibration covers, how it improves performance, and when you should consider recalibrating after a repair or firmware update.
Calibration for GE washers typically centers on three data streams: water level sensing (the pressure switch), load sensing and auto-fill logic, and motor timing for spin cycles. Some models also monitor temperature sensor feedback to prevent overly hot washes. Understanding these signals helps you identify which parts of the calibration process to target and what tools you may need. Always consult your model's service manual for model-specific steps; calibration procedures can vary by year and firmware.
Tip: If your model supports user-initiated calibration, follow the official steps precisely. Deviating from the specified sequence can lead to unintended behavior or reset data that isn’t easily retrievable without professional help.
Tools, materials, and safety considerations
Before starting, gather the items below and review safety considerations. Calibration work involves electrical components and water connections, so avoid performing the task if you’re unsure about any step.
- Items: Philips head screwdriver, flat-head screwdriver, electrical tape or zip ties, a flashlight, a soft cloth, a copy of your GE washer model’s service manual, optional multimeter for sensor checks, protective gloves.
- Safety considerations: Unplug the washer from the wall outlet before touching any internal parts. Shut off the hot and cold water supply to prevent leaks. Work in a dry area and keep the area well-lit. Do not attempt calibration if you observe damaged power cords, burned smells, or damaged wiring; call a professional.
- Model-specific notes: Some GE models restrict calibration to service technicians or firmware updates. If your model isn’t listed as user-calibration capable, skip to maintenance or consult GE support.
Step-by-step overview: Calibration process at a glance
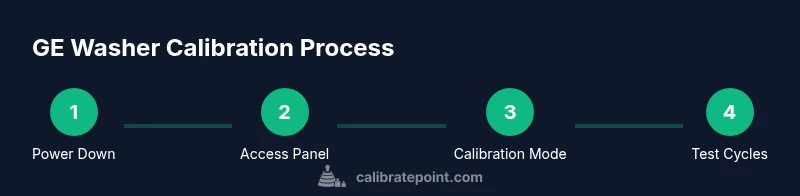
Calibrating a GE washer generally follows a logical sequence: power down and access the calibration interface, enter calibration mode, run targeted tests for each sensor, observe readings, exit calibration, and run a verification wash. The process is designed to validate sensor outputs against known reference values and confirm that adjustments—if any—produce the expected results. Treat this as a diagnostic routine that can reveal miscalibrated sensors, loose connections, or mounting issues that affect performance.
This overview is not a replacement for the model-specific procedure in your service manual. If your model lacks a dedicated calibration mode for user access, focus on inspection, panel reseating, and level adjustments described in the maintenance section. In all cases, document the results so you can compare readings over time and assess trends.
Common calibration issues and how they impact performance
Miscalibrated sensors can lead to several telltale symptoms: overfilling or underfilling during the wash, inconsistent drum rotation speeds, excessive vibration during spinning, and longer cycle times. Temperature regulation may drift, causing hotter or cooler washes than intended. If you notice these signs, calibration is a logical first diagnostic step before replacing parts. Also, firmware updates can reset calibration data, so performing a recalibration after updates is prudent. In addition, a level floor or worn suspension components can mimic calibration problems, so verify the physical setup first.
Maintenance after calibration: keeping readings accurate
After calibration, establish a routine to maintain accuracy. Recheck levelness and door/drawer alignment, inspect hoses for wear, and clean drum seals and sensors regularly to prevent debris buildup. Keep a log of calibration dates and results; periodic checks every 6–12 months—or after major repairs—help preserve accuracy. If your model includes a self-diagnostic feature, run it periodically to catch drift and address it promptly. Finally, avoid heavy loads immediately after calibration; allow the system to settle and verify readings with a quick test cycle.
Tools & Materials
- Screwdriver set (Phillips #2)(For panel screws and service access panels)
- Torx/flat-head screwdriver(Model-dependent fasteners)
- Multimeter (optional)(Check sensor voltages if your model supports it)
- GE washer model service manual(Reference the calibration sequence specific to your unit)
- Flashlight(Illuminate dark interior panels)
- Soft cloth or towel(Protect surfaces and absorb spills)
- Electrical tape or zip ties(Temporary wiring management during the procedure)
Steps
Estimated time: 60-90 minutes
- 1
Power down and prepare
Unplug the washer from the wall outlet and shut off the hot and cold water supply. Move the machine away from the wall enough to access rear and control panels. Ensure the area is dry, well-lit, and free of loose objects.
Tip: Keep a dry cloth handy to wipe moisture and prevent slips during panel removal. - 2
Access the calibration interface
Remove the front or rear access panel as specified in your model’s service manual. Locate the calibration interface, service port, or procedure slot used for entering testing or service modes. If you cannot locate it, stop and consult GE support.
Tip: If panels are stubborn, use a small amount of gentle pressure and avoid forcing screws. - 3
Enter calibration mode
Follow the exact sequence documented for your model to enter calibration mode. Some GE models require a button sequence, while others use a service code via the control panel. If your model doesn’t support user calibration, skip to maintenance checks.
Tip: Double-check the sequence before applying it; an incorrect sequence can exit calibration or reset settings. - 4
Test water level sensor and fill
With no load, observe the washer as it fills. Check that the water level aligns with the expected level for a small-load cycle. If readings are off, adjust or reseat the pressure sensor connections per the service manual.
Tip: Note any audible hums or delays during fill that could indicate a stuck valve or sensor fault. - 5
Test drum balance and spin timing
Run a test cycle to observe drum balance and spin speed. A misbalanced drum can cause vibration and inaccurate spin times. Inspect mounting springs, shocks, and the drum for wobble; tighten or replace parts as needed.
Tip: Use a bubble level on the washer top to verify floor level; an unlevel unit can masquerade as a calibration issue. - 6
Exit calibration mode and run a verification wash
Exit the calibration mode exactly as instructed and run a full or quick verification wash. Compare actual performance—fill accuracy, rinse quality, and spin efficiency—with expectations. If results are off, repeat the calibration sequence or inspect connections again.
Tip: Document readings during verification to track consistency over time. - 7
Document results and plan follow-up
Record the sensor readings, cycle times, and any adjustments made. If readings drift again after a few cycles, there may be an underlying hardware fault requiring professional service. Consider scheduling a service check if issues persist.
Tip: Take photos of sensor placements and wiring before reassembly for future reference.
Questions & Answers
What is calibration for a GE washer, and why is it needed?
Calibration ensures the washer’s sensors (water level, load sensing, and spin timing) read accurately, which helps achieve correct fill, balanced drums, and efficient cycles. It’s especially important after repairs or firmware updates.
Calibration helps ensure the washer reads water levels and spin timing correctly for reliable performance.
Can I calibrate a GE washer myself, or should I call a technician?
Many GE models offer user calibration with documented steps. If your model requires specialized service mode or shows signs of hardware fault, consult GE support or a technician.
Some GE models support user calibration; others may require professional service.
What signs indicate calibration is needed?
Signs include inconsistent water fill, unbalanced spins, excessive vibration, longer cycle times, or temperatures that don’t match the program selection.
Watch for inconsistent fill, unbalanced spins, and longer cycles.
Is calibration the same as leveling the washer?
Calibration adjusts sensor readings, while leveling corrects the machine’s physical orientation. Both are important; improper leveling can affect calibration results.
Calibration updates readings; leveling corrects the machine’s position.
What should I do if calibration fails?
If calibration fails, recheck connections, reseat sensors, and ensure the floor is level. If problems persist, consult GE support or a service professional.
Recheck wiring, reseat sensors, and consider professional help if the issue persists.
How often should I recalibrate after a firmware update?
Calibrate after major firmware updates or significant repairs to ensure sensors align with new software logic.
Recalibrate after firmware updates or major repairs.
Are there safety precautions I should follow during calibration?
Yes. Always unplug the unit, shut off water, and work in a dry area. If you see damaged cords or leaks, stop and contact a professional.
Unplug, shut water, work dry; stop if you see damage.
Watch Video
Key Takeaways
- Verify safety before starting calibration.
- Follow model-specific calibration steps precisely.
- Calibration improves sensor accuracy and energy efficiency.
- Document results and monitor performance over time.