How to Calibrate a Whirlpool Washer
A practical, step-by-step method to calibrate Whirlpool washers for accurate water level, balanced spins, and reliable cycles.

In this guide, you will learn how to calibrate a Whirlpool washer to ensure accurate water level sensing, balanced spins, and reliable cycle timing. You will prepare the machine, access the calibration option, run the routine, and verify results across several test loads. Follow each step carefully to prevent leaks, unbalanced loads, or sensor errors.
Why calibration matters for Whirlpool washers
If you’re wondering how to calibrate whirlpool washer, this process ensures the machine accurately senses water level, distributes detergent properly, and spins evenly. Calibration aligns the sensor thresholds with the drum’s actual behavior, reducing fill errors, wash time drift, and unbalanced cycles. When calibration is off, you may see overfilled or underfilled loads, excessive suds, or longer-than-necessary wash cycles. Regular calibration helps maintain peak efficiency and extend the life of critical components by minimizing unnecessary wear.
Calibrate Point’s insights emphasize that proactive calibration reduces service calls and improves reliability for DIY technicians and professionals alike. While models vary, the core goal remains the same: the washer should fill to the correct level, spin true, and complete cycles within expected timing windows.
When to calibrate your Whirlpool washer
Calibration is most helpful when you notice inconsistent fill levels, frequent unbalanced loads, or unusual cycle timing (start delays, drain times, or spinning pauses). If your washer recently experienced a power outage, a hard shutdown, or a service interruption, recalibrating can help re-sync sensors with the control board. Additionally, after replacing hoses, seals, or the lid switch, running calibration ensures the updated hardware behaves correctly. Use calibration as part of routine maintenance, especially on models with electronic load-sensing systems. If you observe persistent performance issues after calibration, consult a technician.
The goal is not to chase perfection but to bring the unit back to factory-like behavior where the sensors and actuators respond predictably to common loads.
Before you begin: safety and prep
Safety comes first. Unplug the washer and switch off the circuit breaker before touching any internal components. Have the owner’s manual on hand to follow model-specific steps, as calibration menus vary by Whirlpool model. Clear the area around the washer, remove any items from the drum, and ensure good lighting. Consider placing a towel or mat under the machine to catch minor spills during the test cycles. If you are uncomfortable with opening panels or navigating service modes, it’s prudent to call a professional.
This preparation reduces electrical hazards, protects connectors, and ensures you can observe indicators clearly during the calibration process.
Step-by-step calibration workflow ( overview )
Calibration is a multi-stage process that typically involves entering a service mode, selecting the calibration or water-level option, running a test cycle with a sample load, and verifying the results. Each step should be performed with attention to the model’s exact procedure because menu paths and codes can differ. The steps below outline a safe, general approach that aligns with Whirlpool guidance and common technician practice. Always refer to your specific model’s service bulletin for final instructions.
This section expands in the dedicated Step-by-Step block with model-specific actions, timings, and validation checks.
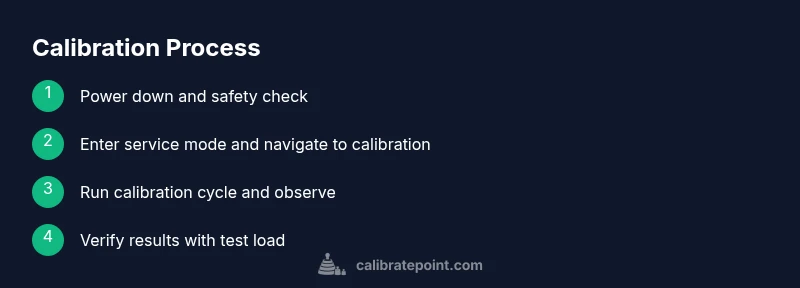
Step 1: Power down and prepare the unit
Begin by unplugging the washer and turning off the dedicated circuit if accessible. Remove any loose items around the unit and ensure you can safely access the control panel and top/bottom covers as needed. Inspect the power cord for damage and avoid plugging the unit back in until you finish the calibration sequence. This step minimizes shock risk during panel manipulation and sets the stage for accurate measurement readings.
Pro tip: keep your tools within arm’s reach to minimize disconnections during the procedure.
Step 2: Access the calibration menu or service mode
Each Whirlpool model has a slightly different path to the calibration function. Typically you’ll enter a service or test mode by pressing a sequence of buttons or using a service code from the manual. If you cannot locate the sequence, look for a dedicated calibration option within the advanced settings or diagnostics menu. In some models, you may need to hold a pair of buttons while powering the unit to enter service mode.
Tip: document the exact path for future calibrations, as it varies by model. A quick model search will save time during future maintenance.
Step 3: Choose the appropriate calibration option
Within the service menu, select the calibration option related to water level sensing, load sensing, or spin balance. The choice depends on your symptoms: water-level misreads point to level calibration, while balance or spin issues point to drum or sensor calibration. Confirm your selection, then prepare to initiate the calibration run.
Pro tip: if the calibration routine provides on-screen prompts, follow them precisely rather than attempting to skip ahead.
Step 4: Load a representative test load
Place a typical laundry load into the drum and ensure it’s evenly distributed. A load that’s too small or too large can skew calibration results, so aim for an average load that matches normal usage. If the model expects a specific weight range for calibration, use appropriate items (towels, t-shirts) to hit that range. Run a preliminary fill as prompted to gather baseline data.
Why this matters: test loads reproducibly reflect everyday use and help you interpret measurement results.
Step 5: Run the calibration sequence
Start the calibration routine as directed by the display or audio prompts. The washer will fill, agitate, and spin in a controlled pattern to map sensor thresholds to actual physical states. Do not interrupt the test mid-cycle unless there’s a fault; let the sequence complete so the system can log accurate data.
Tip: avoid pausing the cycle, which could corrupt calibration data. If an alarm occurs, note the code and consult the manual before retrying.
Step 6: Record the calibration readings
After the test, note any display readings or codes that indicate the new thresholds or offsets. Some models show level values, while others provide a pass/fail indicator. Write down the results, including whether the readings meet the expected range. If your unit doesn’t show values, take a close-up photo of the monitor panel for reference during recheck.
Tip: keep the notes organized so you can compare against future calibrations or service visits.
Step 7: Exit service mode and reset
Exit the service menu according to the manual and reset the control board if required. This step ensures the calibration data is saved and the system returns to normal operation. Power down for a minute, then power back on to confirm the settings hold. Reconnect the power and start a standard wash cycle to verify behavior.
Important: do not unplug during the reset phase if the model requires a specific sequence to lock in changes.
Step 8: Verify results with a standard load
With a normal household load, run a standard cycle to confirm the calibration effect on water fill, agitation pattern, and spin performance. Observe whether the drum fills to the expected level, the agitation remains balanced, and the final spin speed appears consistent with other cycles. If discrepancies persist, re-enter service mode and re-run the calibration using the same or adjusted parameters.
Why this matters: practical verification confirms the calibration translates into real-world performance.
Step 9: Re-check for leaks and stability
During the verification phase, inspect hoses and the drum area for any signs of leaks. Tighten clamps if needed and ensure the cabinet remains level. An unlevel cabinet can confound calibration results and lead to ongoing rumbling or unbalanced spins. Use a spirit level to confirm the machine sits squarely on the floor.
Pro tip: small leveling adjustments can have a big impact on cycle stability. Re-check after any adjustment.
Step 10: Document the outcome and communicate next steps
Record the calibration date, model, calibration type, and results. Note any anomalies and whether additional adjustments are necessary. If the readings are outside acceptable ranges or symptoms persist, plan a follow-up calibration or consider a professional service. Documenting results helps with warranty and service history.
Tip: keep your calibration log in a dedicated notebook or digital note for easy future reference.
Step 11: Maintain calibration readiness
Regular maintenance supports calibration accuracy. Keep the drum clean, check for blockages in the drain path, inspect water inlet screens for debris, and ensure doors and lid switches operate correctly. Schedule periodic checks if you rely on the washer for high-volume loads or if the appliance lives in a humid environment where sensors may drift more quickly. A proactive approach preserves performance between major service events.
Final tips for accurate, safe calibration
Always follow the model-specific procedures; Whirlpool models vary, and factory guidelines take precedence over generic advice. If you’re unsure, consult the owner or service manual or contact a technician. Keep safety gear handy and never force a control that doesn’t respond to normal button presses. With careful steps, you can achieve reliable calibration outcomes and extend the life of your washer.
Tools & Materials
- Whirlpool washer model user manual(Needed to locate calibration sequence and service codes)
- Screwdriver set (flat-head and Phillips)(Access control panels or internal screws)
- Measuring tool (spirit level or ruler)(Use to verify cabinet level and drum position)
- Towels or absorbent cloths(For minor leaks or spills during tests)
- Safety gloves(Hand protection during panel work)
Steps
Estimated time: 60-90 minutes
- 1
Power down and unplug
Unplug the washer and switch off the circuit breaker to eliminate shock risk before any internal work. Confirm the unit is completely disconnected from power before you touch wiring or control panels.
Tip: Keep the plug accessible so you can safely restore power after the calibration. - 2
Access calibration menu
Open the control panel or follow the service manual to enter the calibration or diagnostics mode. This path is model-specific, so refer to the exact instructions for your Whirlpool model.
Tip: If you’re unsure, pause and locate the model’s service code sheet before proceeding. - 3
Select the calibration option
Within the service mode, choose the calibration option most relevant to the issue (water level, load sensing, or spin balance). Confirm your selection before continuing.
Tip: Document the chosen option for future reference and comparisons. - 4
Load a representative test load
Place a typical laundry load into the drum, ensuring even distribution. A representative load improves calibration accuracy and reflects real-world use.
Tip: Avoid underloading or overloading as it can skew calibration data. - 5
Run the calibration sequence
Initiate the calibration run and allow the washer to complete the full pattern. Do not interrupt the cycle unless a fault occurs, as this can corrupt data.
Tip: Observe the indicators closely; note any abnormal lights or codes. - 6
Record the readings
After the test, record the displayed values or pass/fail status. Save this information for comparison with future calibrations.
Tip: Take a photo of the display if the readout is unclear. - 7
Exit service mode and reset
Exit the calibration menu according to the manual and reset the control board if required. Power cycle the unit to ensure changes stick.
Tip: Wait a minute after powering back up before running a test cycle. - 8
Verify with a standard load
Run a normal wash cycle with a standard load to confirm the calibration affected water fill, agitation, and spin as expected.
Tip: Check for consistent fill levels across different cycle types. - 9
Check for leaks and stability
Inspect hoses and seals for leaks and verify the machine sits level. An unlevel unit can skew calibration results.
Tip: Re-tighten clamps if you notice any moisture around hose connections. - 10
Document the outcome
Record the final calibration results, model, date, and any notes about observed performance. This helps with warranty and future maintenance.
Tip: Keep the log accessible for the next service call or DIY check. - 11
Maintenance for ongoing accuracy
Follow a routine that includes cleaning the drum, checking inlet screens, and ensuring a level cabinet to maintain calibration over time.
Tip: Schedule periodic calibrations based on usage and environmental conditions.
Questions & Answers
Do I need to calibrate every Whirlpool washer?
Not every unit requires calibration, but it’s recommended when you notice inconsistent fills, spins, or cycle timings. Use the model manual to confirm whether a calibration procedure exists for your exact Whirlpool model.
Calibration is not necessary for every unit, but do it if you notice inconsistent fills or spins. Check your model manual for specifics.
Can I calibrate without entering service mode?
On most Whirlpool models, the calibration routine is accessed through a service or diagnostics mode. If you cannot locate the service steps, consult the manual or contact support to avoid incorrect settings.
Most models require service mode to calibrate. If unsure, check the manual or contact support before proceeding.
What if calibration results still seem off after the test?
If results remain out of spec, re-run the calibration with a new test load and verify all steps were followed exactly. If discrepancies persist, there may be a hardware issue requiring professional service.
If results stay off after re-running calibration, you may have a hardware issue and should seek service.
Will calibration affect energy or water usage?
Calibrating can improve efficiency by ensuring accurate water level and cycle timing, which helps reduce waste. However, the energy impact depends on the model and the extent of miscalibration prior to the process.
Calibration can improve efficiency by reducing overfills and wasted cycles, with energy impact depending on the model.
How often should I recalibrate after major repairs?
After major repairs or component replacements, recalibrate once to re-sync sensors with the control board. If you use the appliance heavily in demanding conditions, consider periodic checks.
Recalibrate after major repairs, then periodically if you use it a lot.
Watch Video
Key Takeaways
- Calibrate to restore accurate water level sensing
- Follow model-specific calibration steps
- Verify results with varied loads
- Document outcomes for maintenance history
- Maintain calibration through regular checks