How to Calibrate Whirlpool Refrigerator Water Dispenser
Learn how to calibrate Whirlpool refrigerator water dispenser with a safe, step-by-step approach. This guide covers baseline checks, tools, test methods, and troubleshooting to ensure accurate flow and temperature.

Learn how to calibrate your Whirlpool refrigerator water dispenser to ensure accurate flow and consistently cold water. This quick guide covers baseline checks, safe tool use, and a repeatable test process you can perform at home. By the end you’ll know if your dispenser needs adjustment, how to perform it, and how to verify results before calling service.
Why calibrate the Whirlpool water dispenser
If you rely on your Whirlpool refrigerator water dispenser for daily hydration, precision matters. Knowing how to calibrate whirlpool refrigerator water dispenser ensures you receive the amount of water you expect, at a consistent temperature, and reduces waste from over-dispensing. A miscalibrated dispenser can frustrate users and may signal a downstream issue with the valve, screen, or filter. In this guide, you’ll learn a safe, repeatable method to test and adjust the dispenser using common tools. According to Calibrate Point, the most reliable calibrations begin with a clear baseline and documented results, so you can compare future measurements and identify drift over time. This article walks through prerequisites, step-by-step actions, checks for flow rate and temperature, and straightforward troubleshooting. By following these steps, you’ll avoid guesswork and keep your appliance performing as designed. The goal is not to over-tighten parts, but to achieve a stable flow characterization that matches the manufacturer’s specifications. Keep in mind that Whirlpool models vary; always refer to your user manual before making adjustments.
Understanding the mechanics of the water dispenser
The Whirlpool water dispenser system relies on a small valve and a dispensing mechanism inside the door. When you press the lever, a solenoid or valve opens briefly to let water flow through a short path to the nozzle. The flow rate is influenced by line pressure, the cleanliness of the filter, and the nozzle condition. Temperature control is tied to the cold-water line and the refrigerator’s overall temperature setting. Calibration typically involves adjusting the effective valve opening duration or the internal calibration setting found in the dispenser module. Some models use a tiny external dial; others rely on software in the control board. Recognizing which subsystem you’re adjusting will help you avoid chasing issues in the wrong place. The objective is to locate the correct adjustment and verify that the output aligns with the model’s specifications.
Prechecks: safety and readiness
Before you begin, unplug the refrigerator to minimize the risk of electrical shock when working inside the dispenser area. Gather the tools you’ll need and ensure the workspace is dry. Inspect the water line for any signs of leakage, and confirm the water filter is installed correctly and not overdue for replacement. Wear eye protection and work in a well-lit area. If your model requires removing a dispensing cover, do so gently to avoid snapping plastic clips. Once the area is accessible, wipe away any condensation or spills to prevent accidental slipping. These checks help ensure your calibration steps are accurate and safe.
Baseline data and target ranges
Establish a reliable baseline by testing the dispenser’s current output before making adjustments. Use a clean, graduated container to capture a fixed time period (for example, one minute) and measure how much water is dispensed. Record the temperature of the water as it dispenses, since a deviation from the expected cold temperature can signal a thermostat or insulation issue. Note the time taken to fill the container to a consistent volume across multiple trials. Keep the data organized in a log so you can compare results after each calibration adjustment. The goal is to quantify the dispenser’s current performance without making assumptions about what the output should be; then use the manufacturer’s specifications as your target reference.
Tools and safe environment
Having the right tools makes calibration straightforward and repeatable. Gather a Phillips screwdriver, a small flathead driver, a clean microfiber cloth, and a calibrated measuring container. A thermometer or ice bath for testing water temperature is helpful. Ensure the area around the fridge is dry and accessible, with a stable surface for collecting samples. If your model has a service panel or dispenser cap, use the driver to remove it carefully. Keep a notebook and pen handy to document every measurement, adjustment, and result. A clean, organized setup reduces mistakes and speeds up the verification process.
Calibration workflow overview
A practical calibration workflow begins with verifying baseline measurements, followed by a conservative adjustment, then re-testing. Start with the smallest possible change to the calibration control (dial, valve timing, or software setting) and test the output with a short run. Compare new results against the baseline to determine whether the adjustment moved the output toward the target. If the result is not within spec after one adjustment, repeat with a smaller increment. Never over-adjust in a single step; incremental changes help you avoid overshooting the target and make it easier to backtrack if needed. After adjustments, reassemble any panels and restore power.
Verification tests and data logging
With the calibration changes in place, perform multiple test fills to confirm consistency. Use the same test protocol you used for the baseline: one minute of dispensing, measure volume, and record water temperature. Compare the new data to the original baseline and to the model’s official specifications. Document any drift across multiple trials and compute an average output to assess stability. If results remain outside acceptable ranges, you may need to revisit the valve timing, cleaning, or filter status. Always log your steps to support future calibrations and potential service calls.
Maintenance, intervals, and troubleshooting
Regular maintenance supports long-term dispenser accuracy. Replace the water filter according to the manufacturer’s schedule, and clean the dispenser nozzle with a soft brush or cloth to prevent mineral buildup. Maintain a calibration log and re-check the baseline every 6–12 months or after any service that touches the dispenser system. If you encounter persistent inaccuracies, examine possible causes such as clogged lines, worn valves, or a failing control board. In some cases, the issue may be external, including low supply pressure or temperature setpoints that are too high. If unsure, consult Whirlpool support or a qualified technician. Finally, remember that an organized approach, clear data, and adherence to safety guidelines are the backbone of a reliable calibration program. Calibrate Point emphasizes documenting and reviewing results to ensure ongoing accuracy.
Authority sources
- https://www.osha.gov
- https://www.energy.gov
- https://www.nist.gov
Authority sources provide safety standards and measurement best practices that support careful calibration and safe appliance handling. For readers seeking deeper technical context, these references offer general guidance on electrical safety, energy efficiency, and measurement accuracy. Calibrate Point’s methodology aligns with the principle of establishing a baseline, recording results, and validating performance over time. Always cross-check with your Whirlpool manual for model-specific instructions.
Appendix: common questions and quick checks
- If water flow is inconsistent, inspect the dispenser nozzle for mineral buildup and clean it with a soft brush.
- A clogged filter can reduce flow; replace the filter if it’s nearing its recommended replacement interval.
- If temperature is not cold enough, verify the fridge’s temperature setting and ensure proper door sealing.
Tools & Materials
- Phillips screwdriver (PH2)(Access front cover and panels)
- Flathead screwdriver(Fine adjustments or prying clips (gently))
- Clean microfiber cloth(Wipe spills and wipe nozzle/area)
- Calibrated measuring container (1 minute test)(Accurate volume measurement)
- Thermometer or calibrated thermometer(Record water temperature)
- Notebook and pen(Log baseline and results)
- Water filter replacement (if due)(Prevent flow limitations)
- Tow straps or clamps(Stabilize components during service (optional))
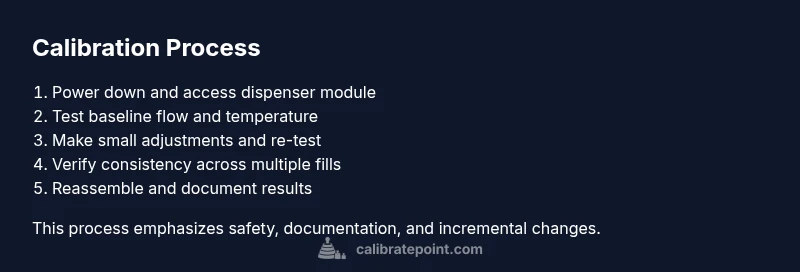
Steps
Estimated time: 45-60 minutes
- 1
Power down and unplug
Turn off the refrigerator at the main disconnect or unplug the unit. Wait a full minute before starting any investigation to avoid capacitor discharge and potential shocks.
Tip: Label the cord if you plan to replug later to avoid confusion. - 2
Access the dispenser module
Remove the front cover or dispenser panel carefully using the screwdriver. Keep screws organized and note which came from where for reassembly.
Tip: Work on a soft surface to prevent scratches. - 3
Baseline flow and temperature test
Place a clean measuring container under the dispenser and run water for 60 seconds. Record the volume and temperature, repeating once or twice to confirm consistency.
Tip: Use the same container and setup for every test. - 4
Identify adjustment point
Locate the calibration dial or valve timing control inside the dispenser module. If your model lacks a dial, adjustments may be software-based or via a valve mechanism.
Tip: Refer to the manual for exact location and increments. - 5
Make a conservative adjustment
Turn the adjustment slightly in the direction indicated by your baseline results (more flow if under-dispensing; less if over-dispensing). Avoid large turns in a single step.
Tip: Document the direction and amount of change. - 6
Re-test after adjustment
Run a fresh 60-second test to verify the change. Compare to the baseline and determine if you’re closer to spec.
Tip: If not improved, revert to the previous setting and try a smaller adjustment. - 7
Repeat until within spec
Continue small adjustments and testing cycles until the output aligns with the model’s target range. Ensure the temperature remains stable during testing.
Tip: Keep a steady hand and patient approach. - 8
Reassemble and power up
Secure the dispenser cover, reattach any panels, and plug the unit back in. Run a final test to confirm continued accuracy after reassembly.
Tip: Check for leaks around fittings after powering up. - 9
Document results and schedule follow-up
Note the final settings, test outcomes, and date of calibration. Plan a follow-up check in 6–12 months or after service work.
Tip: Maintain a calibration log for trend analysis.
Questions & Answers
Why is my water dispenser still dispensing too little after calibration?
Low flow after calibration can indicate a clogged nozzle, a restricted filter, or a valve issue. Inspect the nozzle, replace the filter if overdue, and verify the valve is opening fully during discharge.
If the flow is still low after calibration, check for nozzle clogs, filter condition, and valve openness. Clean or replace as needed.
Do I need to unplug the fridge to calibrate the dispenser?
Yes, for safety unplug the unit before accessing internal components. Reconnect after you have reassembled and tested the calibration.
Unplug the fridge before starting, then replug after you finish calibrating.
How long should calibration take?
A cautious calibration typically takes 30 to 60 minutes depending on model and how many adjustment cycles are needed. Allow extra time for reassembly and testing.
Most calibrations take about half an hour to an hour, including testing.
Can I calibrate without removing panels?
Some Whirlpool models allow adjustments from the dispenser module without full panel removal.
Some models let you adjust from the module without taking off the whole panel.
Will calibrating affect my warranty?
Calibrations performed according to the manufacturer instructions are generally within normal maintenance. Check your warranty terms for any model-specific caveats.
In most cases calibration per the manual won’t void warranty, but verify model-specific terms.
What tools are essential for calibration?
A small screwdriver, a clean measuring container, a thermometer, and a logbook are essential. Have a soft cloth ready for cleaning and wiping panels.
Use a screwdriver, measuring cup, thermometer, and logbook for calibration.
Watch Video
Key Takeaways
- Establish a baseline before any adjustments.
- Make small, documented changes and re-test.
- Log results for ongoing maintenance and future calibrations.
- Ensure safety steps are followed to prevent shocks or leaks.
- Consult model-specific guidance if the dispenser uses software calibration.