Calibrate Google Maps Android: A Practical GPS Calibration Guide
Learn how to calibrate Google Maps on Android to improve location accuracy, compass alignment, and reliable navigation with a step-by-step approach.

Calibrating Google Maps on Android improves location accuracy, compass orientation, and route reliability. In practice, you’ll verify precise location permissions, enable high-accuracy location, and perform a compass calibration using on-screen prompts. By following these steps, you’ll see steadier blue-dot movement and fewer misdirections in urban canyons and open roads.
Why calibrating Google Maps on Android matters
calibrate google maps android effectively improves how the app interprets your direction and position. When the compass and GPS data align, the blue dot moves smoothly, routes stay accurate, and navigation feels more trustworthy in crowded city streets or rural roads. The Calibrate Point team finds that most location issues stem from stale sensor data, permission gaps, or weak signals, and a structured calibration workflow can address all three. Regular checks help ensure long-term reliability for professional technicians and DIY enthusiasts alike.
Understanding the Android location stack
Android devices determine location by combining GPS signals, Wi‑Fi access points, cell tower data, and device sensors like the digital compass and accelerometer. Each source has strengths and weaknesses depending on the environment. For example, GPS excels outdoors with a clear sky view, while indoor spaces benefit from Wi‑Fi triangulation. Calibrating Google Maps android relies on keeping all sources aligned and ensuring the device’s sensors are functioning properly.
Common causes of inaccurate location data
Several factors can degrade map accuracy: (1) poor sensor health or outdated firmware, (2) restricted permissions or disabled location services, (3) battery saver or speed-limiter modes that reduce sensor polling, and (4) environmental interference such as tall buildings or metal structures. Understanding these causes helps you target the right remedy, whether that is a compass calibration, a settings tweak, or a software update.
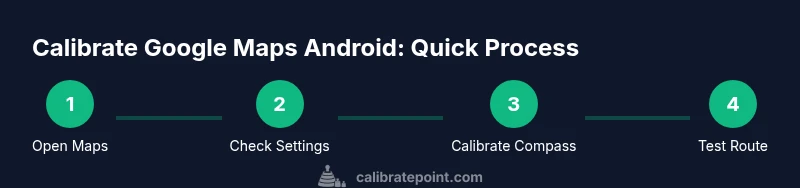
Step-by-step calibration overview
The following steps are designed to be practical and repeatable. They cover compass calibration, permissions, and environment checks. After completing them, you should re-test with a simple route to observe improvements in the blue dot’s responsiveness and direction. If problems persist, proceed to the troubleshooting steps in the dedicated Step-by-Step guide.
Best practices, pitfalls, and safety considerations
Follow these best practices to maximize accuracy while avoiding common mistakes. Keep your device away from metal surfaces during calibration, perform gestures slowly, and test in open areas with a clear sky. Do not attempt calibration while driving or operating a vehicle, and avoid updates or resets in the middle of critical navigation tasks. Regular maintenance, like periodic compass checks, helps sustain calibration gains.
Authority sources and further reading
For deeper background on sensor calibration and location accuracy, consult these resources:
- USGS: https://www.usgs.gov/
- NIST: https://www.nist.gov/
- Android Developers: https://developer.android.com/
These sources provide foundational context on how sensors, location data, and calibrations interact in modern mobile devices.
Tools & Materials
- Android smartphone with Google Maps installed(Updated to the latest version; ensure GPS is active)
- Stable internet connection (Wi‑Fi or cellular)(Calibration steps may fetch location data and prompts)
- Precise location permission granted to Maps(Allow location access and precise location)
- Compass prompts (if prompted by Maps)(Follow on-screen prompts to complete calibration)
- Device with functioning compass sensor(Some devices may have hardware compass issues)
Steps
Estimated time: 20-40 minutes
- 1
Open Google Maps and inspect the blue location dot
Launch Google Maps, tap the blue dot to reveal location details, and verify the accuracy indicator. If the dot sits between streets or appears jittery, this signals potential calibration or permission issues. This initial check helps you decide whether to proceed with sensor-focused steps.
Tip: Move the phone slowly to observe how the arrow responds; note any obvious misalignment. - 2
Verify Android location settings for high accuracy
Open Android Settings > Location and set the mode to High accuracy (or device/location mode that prioritizes GPS, Wi‑Fi, and mobile data). Ensure Google Location Accuracy or similar options are enabled so Maps can access multiple data sources. These settings provide the data foundation Maps relies on for routing and orientation.
Tip: If you can't find High accuracy, enable the best available option and then re-open Maps. - 3
Calibrate the compass in Google Maps
If Maps prompts you to calibrate the compass, follow the on-screen instructions and perform a figure-eight motion with the device in a flat, steady manner until the indicator confirms calibration. This process aligns the internal orientation sensor with real-world directions, improving map rotation accuracy.
Tip: Keep the device away from metal surfaces and magnetic cases during calibration. - 4
Test a simple route and observe the blue dot
Enter a simple destination and start navigation to observe how the blue dot tracks your movement. Watch for lag, jitter, or misalignment between the map and your actual heading. If discrepancies persist, move to the next steps rather than forcing a route.
Tip: Test in an open area with a clear view of the sky to maximize GPS signals. - 5
Refresh or reset location data sources
Restart Maps or the device to reset sensors and data caches. You can also toggle Location permissions off and back on for Maps. This can clear stale data that contributed to drift.
Tip: After a restart, re-open Maps and re-run the test route. - 6
Enable Google Location Accuracy improvements
In Settings > Google > Location, enable Improve Location Accuracy (Wi‑Fi scanning, Bluetooth scanning). These features help Maps triangulate position more reliably in challenging environments.
Tip: Allow a few minutes for the changes to take effect, then re-test. - 7
Update apps and device firmware
Check for updates to Google Maps and to the Android OS. Updates often include sensor and location-service improvements that enhance calibration results. Keep your system current for best compatibility.
Tip: Enable automatic updates if possible; manually check if you rely on precise timing. - 8
If problems persist, check hardware sensors
If the compass or GPS hardware may be faulty, consider testing with a third‑party compass app or contacting service support. Inconsistent sensor data can require professional diagnostics or device replacement.
Tip: Document symptoms and timing to show support staff when needed.
Questions & Answers
What exactly does compass calibration do in Google Maps on Android?
Compass calibration aligns the device’s orientation sensor with real-world directions, reducing errors when Maps rotates the map. It helps the blue dot show the correct heading during navigation.
Calibration aligns the compass with real directions, so Maps shows the correct heading.
Do I need to calibrate every time I use Maps?
Not necessarily. Calibrate when you notice drift or misalignment. Regular checks are helpful but not required before every use.
Only recalibrate if you notice drift; otherwise occasional checks are fine.
Can calibration fix GPS drift in all situations?
Calibration helps when sensor data is misaligned, but GPS drift can also be caused by obstructions or weak signals. Environment matters.
Calibration helps, but it isn’t a magic fix for every drift scenario.
Is calibration different on Pixel vs Samsung devices?
Core steps are similar across Android devices, but manufacturer-specific prompts or menus can vary. Follow on-screen guidance for your device.
Steps are similar, but the exact prompts may differ by brand.
What if the compass calibration feature isn’t available?
Check Maps settings, ensure Google Play Services is up to date, and verify Location permissions are granted. If still unavailable, rely on device sensor tests.
If the feature isn’t available, check permissions and updates or run a sensor test.
Watch Video
Key Takeaways
- Calibrate compass for accurate orientation.
- Enable high-accuracy location mode.
- Use the figure-eight motion for compass calibration.
- Test with real routes to verify improvements.
- Keep device sensors and maps updated.