Calibrate iPhone GPS: A Step-by-Step Guide
Learn how to calibrate iPhone GPS to improve location accuracy for maps, navigation, and fitness apps. This guide covers compass calibration, iOS settings, testing methods, and troubleshooting.

In this guide you will learn how to calibrate iPhone GPS to improve location accuracy for maps, navigation, and fitness apps. You’ll start with built‑in tools like Compass calibration and Maps tests, then verify improvements with practical checks. The steps cover essential iOS settings, testing methods, and safe best practices for consistent results.
Why calibrate iPhone GPS matters
Accurate GPS data is foundational for reliable maps, navigation, ride-sharing apps, and fitness trackers. When your iPhone’s GPS drifts, you might see misaligned routes, wrong “nearby” results, or speed readings that don’t match reality. Calibrate iphone gps regularly ensures your device reports coordinates with higher fidelity, reducing frustrating drift during outdoor activities and professional fieldwork. According to Calibrate Point, routine calibration helps counter sensor drift and software quirks that creep in with time. For DIY enthusiasts and technicians, a clear calibration routine translates to fewer troubleshooting sessions and more confidence in every location-based task.
Common causes of GPS drift on iPhone
GPS drift on iPhone can stem from several sources: weak satellite visibility in tall buildings or dense urban canyons, magnetic interference from metal or certain phone cases, software bugs after OS updates, or misconfigured privacy/location settings. Even indoor workouts, driving tunnels, or heavy cloud cover can momentarily degrade accuracy. Understanding these causes helps you target the right fix rather than chasing random results. Calibrate Point’s analysis shows that most drift cases are resolved by a combination of compass recalibration, ensuring Location Services are fully enabled, and keeping iOS up to date.
Quick checks before you calibrate
Before you start calibrating, verify essential settings: enable Location Services globally, allow system services to access your location, and ensure the Compass calibration option in Settings is on. If you use VPNs or privacy apps, temporarily disable them during calibration since they can skew location data. Put your iPhone in a clear outdoor area with a good sky view if possible, as satellite visibility dramatically influences results. These checks lay a solid foundation for an effective calibration and minimize wasted effort.
Compass calibration: how it works and how to do it
Compass calibration is the core of calibrating iPhone GPS. The compass sensor uses magnetic fields to establish orientation, which in turn helps some location functions align with the map. To calibrate, open the built‑in Compass app and follow the on‑screen prompts to move the phone in a specific pattern (circles and figure‑eights) until the calibration indicator completes. Perform this in a bright outdoor space if you can, and repeat after moving between different environments. A well‑calibrated compass improves directional accuracy for many navigation tasks and supports more reliable GPS readings in real time.
Maps-based validation: verify improvements with Apple Maps
After compass calibration, test GPS accuracy using Apple Maps. Open the map, drop a pin on a known landmark, and compare the pin’s location with your real position. If the pin aligns within a few meters, you’re likely calibrated. For best results, test in multiple environments (open sky, urban canyons, and indoors with partial sky visibility) to understand how the GPS behaves in different contexts. Document any residual drift and plan a re‑calibration if needed. These practical checks help you quantify calibration success without specialized equipment.
Software maintenance and app considerations
Calibration is not a one‑and‑done task; software maintenance matters too. Keep iOS updated to the latest stable version, as updates include location‑handling improvements. Periodically restart the device to clear transient sensor issues, and review app permissions for location access. If you rely on third‑party apps for navigation or fitness, verify they’re updated and configured to use high‑accuracy GPS modes. This maintenance keeps GPS performance consistent over time and reduces the likelihood of reappearing drift.
Using third‑party tests and sanity checks
Beyond Maps, consider reputable third‑party GPS test utilities to sanity‑check accuracy. These tools typically measure signal strength, number of satellites in view, and reported coordinates against known references. Use them cautiously: some apps may use different baseline assumptions, so compare results across multiple tests. The goal is not to replace native GPS data but to confirm that calibrated iphone gps leads to stable, realistic readings across contexts.
Bringing it all together: real‑world results and ongoing care
After completing calibration steps, observe how your GPS behaves in real‑world tasks like driving, hiking, or field data collection. If routes align with road networks, speed readings correspond to known values, and geotagged photos land near expected places, you’ve achieved meaningful improvement. Keep a simple calibration cadence: perform compass calibration and a quick map check every few weeks or after major OS updates. Calibrate Point emphasizes routine checks to maintain GPS reliability over the device’s lifetime.
Troubleshooting and when to seek professional help
If drift persists after following these steps, reassess environmental factors—revisit strong magnetic sources, roofed outdoor testing spots, and satellite visibility. Hardware issues (dead satellites, magnetometer faults) may require service. For professional support, follow Apple’s official troubleshooting paths or consult authorized service providers. In many cases, a clean OS update and fresh test cycle resolve lingering issues, but persistent drift may indicate a hardware fault that needs attention.
Tools & Materials
- iPhone with latest iOS(Ensure you are on iOS 15+ for best compass calibration features.)
- Apple Maps and Compass app(Built-in apps used for calibration and validation.)
- Location Services enabled(Global settings must allow location and system services.)
- Stable outdoor testing area(Open sky view improves satellite visibility for initial calibration.)
- VPN or privacy apps temporarily disabled(Disabling these during calibration avoids potential spoofing of location data.)
- Charger or fully charged battery(GPS calibration can take time; ensure power is sufficient.)
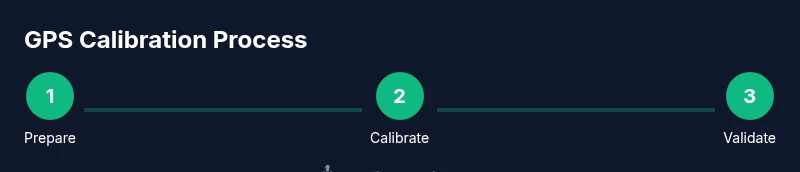
Steps
Estimated time: 20-40 minutes
- 1
Prepare your device and environment
Power on your iPhone, ensure a clear view of the sky, and close nonessential apps. This minimizes background processes that could affect GPS readings. Confirm you have Location Services enabled and that Compass calibration is allowed to run in the background.
Tip: Choose an outdoor or high‑sky view area for the initial compass calibration. - 2
Enable essential settings
Go to Settings > Privacy & Security > Location Services and ensure it is On for the Maps and Compass apps. Confirm System Services > Compass Accuracy is allowed to use location data. Disable VPNs if active during calibration.
Tip: A quick reboot after enabling settings can help apply changes cleanly. - 3
Calibrate the compass using the built‑in app
Open the Compass app and follow the on‑screen instructions to move your device in circular patterns and figure‑eights until the calibration indicator completes. Repeat in different orientations to cover all axes.
Tip: Perform calibration away from metal objects to avoid interference. - 4
Test GPS accuracy with maps
Launch Apple Maps, drop a pin on a known landmark, and compare the pin position with your real location. Do this in multiple environments to gauge accuracy across conditions.
Tip: Note any persistent offset; a small discrepancy is normal in weak signal areas. - 5
Run a quick third‑party sanity check
If you have a trusted GPS testing app, perform a basic test to verify signal strength and satellite count. Do not rely on one test alone; look for consistent results across tests.
Tip: Cross‑check with multiple tests to confirm trends rather than single spikes. - 6
Validate results and plan follow‑ups
Assess whether drift has decreased compared to prior sessions. If needed, repeat compass calibration and Maps checks after OS updates or major activity changes.
Tip: Maintain a short log of test outcomes to track improvements over time.
Questions & Answers
Do I need to reset all location settings before calibrating?
No full reset is required. Ensure Location Services and Compass access are enabled, then perform the Compass calibration and map tests. If issues persist, a targeted reset of location privacy can help, but use that as a last step.
You don’t need to reset everything—just enable location services and perform compass calibration, then test with Maps.
Will calibrating GPS drain battery quickly?
Calibration itself uses modest power, mainly while the compass and GPS sensors are active. Plan for a short session and charge afterward if you see high drain during testing.
Calibration uses a bit more GPS activity, but it’s usually not a major drain. Charge when needed.
How often should I calibrate iPhone GPS?
Calibrate when you notice drift or after OS updates. Monthly checks are reasonable for devices in professional use, while casual users may calibrate as needed.
Calibrate when you notice drift or after updates; a routine every few weeks is fine for regular use.
Can GPS calibration fix Maps navigation drift completely?
Calibration improves baseline GPS accuracy, but persistent drift may stem from hardware or environmental factors. If drift remains, consider hardware checks or Apple support.
It can improve accuracy, but not guarantee perfect navigation in every case.
Does indoor calibration work well for GPS?
Indoor environments can limit satellite visibility, reducing calibration effectiveness. Outdoor re‑calibration often yields better results.
Indoors is tough for GPS—outdoors usually gives the best calibration results.
What if drift persists after calibration and testing?
If drift persists, check for metal interference, verify a clean OS update, and consider seeking Apple support for potential hardware issues.
If drift doesn’t go away, check for interference and consider professional help if needed.
Watch Video
Key Takeaways
- Calibrate iPhone GPS to improve maps accuracy
- Use Compass calibration + Maps tests for validation
- Keep iOS and apps up to date for best results
- Repeat calibration after major updates or hardware changes