How to calibrate phone GPS
Learn how to calibrate your phone GPS to improve location accuracy. This educational guide covers when to calibrate, built-in tools, outdoor testing, and maintenance tips for reliable navigation and apps.

This guide walks you through how to calibrate your phone GPS to improve location accuracy. You’ll learn when calibration is needed, the main methods across iOS and Android, and a practical step-by-step routine you can repeat anywhere. By following these steps, you’ll reduce drift, improve map alignment, and get more reliable results from navigation and fitness apps.
Understanding GPS calibration and why it matters
Global Positioning System (GPS) accuracy on smartphones can drift due to atmospheric conditions, signal reflections from buildings and terrain, and how the device fuses data from multiple sensors. Calibrating your phone GPS helps align the reported location with real-world position, improving navigation, map accuracy, and augmented reality experiences. According to Calibrate Point, regular calibration reduces location drift and restores confidence in location data across apps. This section explains what GPS calibration is, how devices compute position, and common symptoms of degraded accuracy—location jumps, slow satellite lock, or phantom positions. It also clarifies what calibration can fix and when hardware or software issues require deeper checks.
When GPS calibration matters most
Calibration is most helpful when you use maps for driving, biking, hiking, or outdoor photography where precise positioning matters. If you notice your phone’s blue dot jumping around in familiar areas, reporting inaccurate route progress in fitness apps, or AR features misplacing virtual objects, calibration is worth attempting. Calibrate Point’s guidance emphasizes a repeatable routine rather than a one-off fix, since GPS performance can drift with long-term use, weather, and firmware updates. Keep expectations practical: calibration can improve alignment, but it won’t overcome a damaged GPS antenna.
Quick checks before you begin
Before touching settings, perform a few quick checks: ensure your device OS is up to date, reboot if you haven’t restarted in a while, and verify that location permissions are enabled for the apps you care about. Check that airplane mode isn’t intermittently toggling on, and avoid calibrating near large metal structures or power lines, which can distort signals. If you rely on GPS for critical work, consider testing in a few different outdoor locations to rule out a local signal anomaly. These checks establish a clean baseline for accurate calibration.
Step 1: Locate GPS calibration options on iOS and Android
On iOS, you typically calibrate by running a map-based activity and enabling precise location, while iPhone users often rely on the built-in Location Services and Maps’ location accuracy indicators. Android devices vary by manufacturer, but most offer a Location or Privacy setting with a “High accuracy” mode and calibration prompts within Maps or Google apps. Start by opening your device Settings → Privacy or Location → Location services, then confirm apps have permission to access coarse and precise location. On Android, you may also find calibration prompts inside Maps or Google app settings after certain updates. The goal is to ensure the device is using high-accuracy sources like GPS, Wi‑Fi, and cellular data in combination when possible.
Step 2: Use built-in calibration tools and map data
Many phones rely on map data and sensor fusion rather than a single ‘calibrate’ button. Begin by opening a map app (Maps on iOS, Google Maps on Android) and performing a few common maneuvers: walk smoothly for a few minutes, scroll the map while moving, and observe how quickly the blue dot locks to your actual position. Some devices provide a dedicated compass calibration or a “Calibrate” option within the compass app. Follow the on-screen prompts, which typically involve moving the phone in circular motions or tracing shapes to verify magnetometer accuracy. Pair calibration steps with a routine outdoor test to gather fresh satellite data.
Step 3: Calibrate with compass and outdoor testing
A reliable compass calibration is essential for stable GPS performance, because magnetometer rotation can affect how the device orients your position on the map. Find an open outdoor area away from vehicles and metallic structures. Initiate the compass calibration, then perform the standard multi‑motion exercise (circles, figure eights) as prompted. After calibration, test by walking a short distance in a straight line and comparing the reported position to your actual path. Repeat if needed, especially after a firmware update or exposure to strong magnetic fields. Outdoor testing helps ensure the calibration holds under real-world conditions.
Step 4: Test accuracy across apps and refine
Once calibration steps are complete, test GPS accuracy across multiple apps: maps, rideshare, outdoor fitness, and augmented reality. Check whether the reported position aligns with your actual location on a visible landmark and note any drift or offset. If one app shows consistently better accuracy than another, re-check app permissions, ensure the app uses high accuracy mode, and consider re-running the calibration process. Periodic re-tests after routine device usage or firmware changes help maintain reliability across the ecosystem of apps you depend on.
Step 5: When hardware issues may be involved
If GPS accuracy remains poor after repeated calibration attempts, consider hardware factors. A damaged antenna, external case interference, or degraded battery performance can degrade sensor data fusion. Check for physical damage, moisture ingress, or a swollen battery that could affect internal components. In critical workflows, contact the device manufacturer support or a qualified technician for diagnostics. Calibration cannot fix physical faults, but systematic checks help isolate whether the problem is software-driven or hardware-related.
Step 6: Common pitfalls and how to avoid them
Avoid calibrating near metal structures, elevators, garages, or dense urban canyons where signal reflections skew results. Don’t rely on a single test location; GPS performance varies with sky visibility and environmental multipath. Be wary of rogue calibration prompts from deceptive apps; use trusted settings and official map apps. Keep your device updated, and remember that a fresh reboot after calibration helps the system re‑align sensors with new configuration data.
Advanced tweaks for developers and power users
For advanced users, enable developer options to view location services diagnostics and satellite status. Some devices allow you to force raw GNSS data sampling, or to enable a high‑accuracy mode for a temporary period during field testing. If you’re integrating GPS-calibration into a workflow, consider logging timestamped location fixes and satellite visibility to quantify improvement. These practices are especially valuable for technicians and engineers who rely on repeatable, measurable calibration results.
Maintenance: keeping GPS accuracy over time
GPS calibration isn’t a one-time fix. Regular maintenance includes periodic re-testing after updates, re-enabling high accuracy modes if disabled, and performing calibration after long travel or battery replacement. Create a simple checklist: OS updates, test outdoors, verify map alignment, and record results. By treating calibration as an ongoing practice, you’ll preserve reliability for navigation, fieldwork, and measurement tasks over the device’s lifetime.
Tools & Materials
- Smartphone with GPS(Ensure the device is charged and updated to the latest OS version)
- Maps app (built-in or Google Maps/Apple Maps)(Used for test rides and calibration prompts)
- Compass app or built‑in compass/gyroscope access(Needed for magnetometer calibration prompts)
- Outdoor testing spot(Open area away from tall structures for best satellite visibility)
- Phone tripod or stable stand (optional)(Helps steady the device during tests)
Steps
Estimated time: 30-45 minutes
- 1
Open location settings and enable high accuracy
Open your device settings, go to Location or Privacy, and turn on High Accuracy or the equivalent for your OS. This ensures the device can combine GPS, Wi‑Fi, and cellular data for best results. If your OS prompts a confirmation, accept it to allow background access for location services.
Tip: Setting the device to high accuracy is the most impactful first step; skip this only if you have special privacy constraints. - 2
Initiate compass calibration outdoors
In an open area, open the compass tool or the map app’s calibration prompt and follow the prompts to perform compass calibration maneuvers (circles, figure eights). This refreshes magnetometer alignment and helps location data fusion.
Tip: Avoid metal fences or vehicles during calibration to prevent magnetic interference. - 3
Walk a short route to test initial accuracy
Take a 50–100 meter walk in a straight line while watching the map’s blue dot. Compare the path to your actual route; minor offsets are normal, but large jumps indicate misalignment.
Tip: Hold the phone steady in landscape or portrait orientation to minimize optical drift. - 4
Recalibrate if drift persists
If the dot remains offset, re-run the compass calibration and perform another outdoor test. Some devices benefit from repeated calibration cycles after updates or app installations.
Tip: Document results after each cycle to track improvements over time. - 5
Test across multiple apps
Open Maps, a fitness app, and a rideshare app to compare GPS reporting. Consistent accuracy across apps indicates robust calibration; inconsistencies may point to app permissions or background activity settings.
Tip: Double-check app permissions to ensure each app can access precise location data. - 6
Check for hardware issues
If accuracy remains poor after calibration, verify there is no physical damage to the antenna, moisture, or swollen battery. Consider professional diagnostics if problems persist.
Tip: Avoid attempting internal repairs yourself if you’re unsure of hardware integrity. - 7
Perform a firmware and app refresh
Update the device firmware and the mapping/navigation apps. Sometimes GPS drift is caused by outdated sensor fusion algorithms that are corrected in software updates.
Tip: Back up your data before major updates to prevent loss. - 8
Document and re-test periodically
Keep a simple log of calibration attempts and outdoor tests. Re-test after major changes (system updates, new case, or environment changes) to ensure ongoing reliability.
Tip: Set a reminder to re-test monthly in stable environments. - 9
Consider professional tools for critical work
For fieldwork or surveying, consider accessories or professional apps that offer dedicated GNSS validation features and logging capabilities to quantify accuracy improvements.
Tip: Do not rely on consumer-grade calibration alone for high-stakes measurements.
Questions & Answers
What is GPS calibration and why is it important for phones?
GPS calibration aligns the device’s reported location with real-world positions by refining sensor fusion. It improves map accuracy, navigation, and AR experiences, but cannot fix hardware damage. Regular calibration helps maintain reliability over time.
GPS calibration helps your phone tell where you are more accurately. It improves maps and navigation, but won’t fix a broken antenna; hardware issues may require service.
Is GPS calibration different on iOS and Android?
Both platforms rely on sensor fusion and compass calibration, but steps differ by device and app. Use the built-in location settings and compass prompts for each OS and rely on high accuracy modes where available.
iOS and Android use similar ideas, but steps vary by device. Use the built-in location settings and follow compass prompts.
How long should calibration take?
A typical calibration and outdoor test take about 30 minutes, including checks across multiple apps. If issues persist, allocate additional time for re-calibration and hardware checks.
About 30 minutes for a full calibration and test, with extra time if you need to re-test or check hardware.
Will calibration fix GPS drift in all apps immediately?
Calibration can reduce drift across most apps, but results depend on signal conditions and app permissions. Some apps may show slower recalibration after updates.
It helps most apps, but results depend on the environment and app settings.
When should I seek hardware help?
If repeated calibration does not improve accuracy, or you notice physical damage to the device, consider professional diagnostics. Calibration cannot fix a faulty antenna.
If calibration doesn’t help after several attempts, seek professional hardware diagnostics.
Watch Video
Key Takeaways
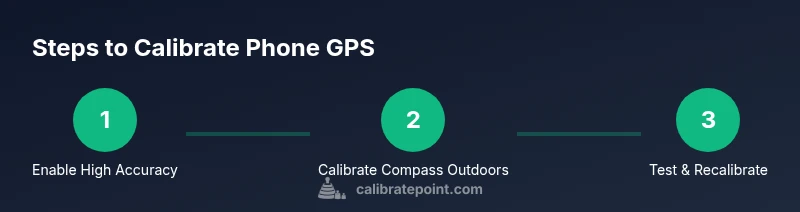
- Initialize high-accuracy location mode.
- Calibrate compass outdoors with prompts.
- Test across multiple apps to validate results.
- Log calibrations and re-test after updates.
- Seek hardware checks if issues persist.