How to Calibrate the Z Axis on a 3D Printer
A practical, in-depth guide to calibrating the Z-axis on a 3D printer. Learn bed leveling, offset adjustments, and test prints for flawless first layers.

To 3d printer calibrate z axis, you’ll first level the bed and verify nozzle-to-bed distance across the print area. Then set an accurate Z-offset and run a test print, adjusting until the first layer adheres evenly. Have 0.1 mm feeler gauge or printer paper ready for precise measurement. Also check corner consistency and re-level before final prints.
Why Z-Axis Calibration Matters
According to Calibrate Point, the Z-axis alignment is the backbone of print quality. When the nozzle sits too close, the first layer may be smushed or blocked; if it sits too high, lines split and adhesion suffers. Calibrate Point's findings emphasize consistent Z distance across the build plate to avoid under-extrusion, z-wobble, and uneven layers that degrade dimensional accuracy. In the modern workflow, a precise Z-axis calibration translates to reliable material bonding, fewer failed prints, and easier post-processing. This section explains how bed leveling and Z-offset adjustments work together to produce predictable results, especially on printers with adjustable bed springs or automatic bed leveling sensors. Throughout, you’ll see how small changes in 0.05–0.1 mm can have outsized effects on first-layer quality and repeatability.
Tools You'll Likely Need
Before you start, gather essential tools and optional aids. A stable work surface helps prevent drift during measurements. A 0.1 mm feeler gauge is perfect for precise spacing, but printer paper can substitute for coarse checks. You’ll also want a hex/Allen wrench compatible with your printer’s endstop and bed screws, a caliper or ruler for quick measurements, and a test print file that features a flat, uniform first layer.
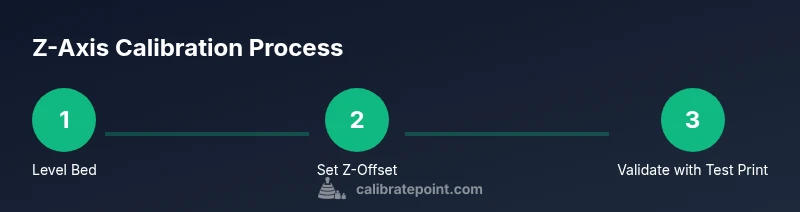
Step-by-Step Approach to Z Calibration Overview
The general approach combines physical bed leveling, Z-offset tuning, and verification prints. Start with a known reference (like a standard calibration file or a simple square grid). Then measure the nozzle clearance at multiple corners and the center. If measurements vary beyond your target tolerance, adjust the bed level or Z-endstop, then re-test. Finally, validate with a small test object to confirm consistent extrusion height across the surface.
Common Pitfalls and How to Avoid Them
Many users misread the first-layer height or assume a single corner measurement applies everywhere. Always re-check after any adjustment, because bed rigidity can change with temperature and time. A dirty nozzle or a warped bed can create illusionary gaps, so clean the bed and re-run a calibration if prints look inconsistent. Don’t rush the process; a careful, repeatable routine yields dependable results over time.
Validation Tests: Confirming Z Axis Correctness
After adjusting, print a simple bed-level test pattern such as a single-layer square or a dense grid. Observe the line fidelity, adhesion edge, and corner consistency. If you notice variations, repeat leveling and re-measure at each target point. A successful calibration shows a uniform first layer across the entire build area with even extrusion.
Tools & Materials
- Allen wrench set(To adjust Z-axis endstop and bed screws)
- Caliper or ruler(For precise measurements across the bed)
- 0.1 mm feeler gauge(Precise spacing between nozzle and bed)
- Printer paper (8.5x11 inch or A4)(Alternative to a feeler gauge for coarse checks)
- Clean, level print bed(Remove debris and allow bed to cool before measurement)
Steps
Estimated time: 20-45 minutes
- 1
Warm up and prepare
Power on the printer and preheat the nozzle to printing temperature for the material you plan to use. This helps ensure the nozzle height is measured under typical operating conditions. Allow the bed to cool slightly if it has recently heated.
Tip: Use a warm bed for consistent contact; avoid measuring on a completely cold or hot surface. - 2
Level the bed manually
Disable auto-leveling if active and manually adjust the bed screws. Start at the center and then check the four corners with a sheet of paper or a feeler gauge. The goal is a tiny drag of the paper at each point, indicating proper clearance.
Tip: Perform measurements at room temperature to minimize thermal expansion effects. - 3
Set the initial Z-offset
Using your printer’s move menu, jog to the center of the bed and move the nozzle down until you feel light resistance with the gauged spacer. Record the offset value; this serves as the starting point for fine-tuning.
Tip: Document the raw offset; you will adjust it during test prints. - 4
Run a single-layer test print
Print a small, flat test pattern that uses a single-layer height. Observe the first layer for gaps, scraping, or excessive squishing. If issues appear, pause and adjust the Z-offset or re-level the bed.
Tip: Choose a simple pattern (a 20x20 mm square) to quickly assess height consistency. - 5
Reconcile corner and center height
Once you’re satisfied at the center, re-check the corners. Small differences may require minor bed shims or tightening of screws to reduce tilt. Adjust gradually in 0.05 mm increments.
Tip: If you notice more divergence after tightening, re-check the bed’s flatness and supports. - 6
Validate with a full-width test
Print a larger calibration object that spans the bed width. Look for consistent extrusion height across entire surface. If not, repeat leveling and offset steps, as necessary.
Tip: Use a standard calibration model to compare results across machines. - 7
Document your final settings
Record the final Z-offset value, bed-tramming notes, and any iterative changes. This helps you reproduce the same setup on future maintenance or after upgrades.
Tip: Keep a calibration log; it saves time during filament changes or hardware updates. - 8
Regular re-checks
Re-run a basic Z check whenever you replace the nozzle, upgrade the bed, or notice print issues. Thermal cycles and mechanical wear can shift Z geometry over time.
Tip: Schedule a monthly quick check if you print often.
Questions & Answers
What is the purpose of calibrating the Z axis on a 3D printer?
Calibrating the Z axis ensures the nozzle maintains the correct distance from the print bed, producing a clean first layer and consistent extrusion. This reduces failed prints and improves dimensional accuracy.
Calibrating the Z axis keeps the nozzle at the right height, giving you a clean first layer and better print quality.
Can I use printer paper instead of a feeler gauge?
Yes. Printer paper can substitute for a coarse check. For precise calibration, use a 0.1 mm feeler gauge or a calibrated spacer when possible.
You can start with printer paper, but for precision, use a 0.1 millimeter feeler gauge.
How often should I recalibrate the Z axis?
Recalibrate after hardware changes, such as nozzle replacement or bed upgrades, and whenever you notice first-layer issues or shifting prints.
Recalibrate after hardware changes or whenever first-layer quality drops.
What causes Z-axis drift during printing?
Z-axis drift can result from loose bed screws, a tilted bed, worn Z-endstops, or thermal expansion changing the geometry during long prints.
Drift happens when screws loosen, the bed tilts, or the axis geometry shifts with heat.
Should I perform Z calibration with the printer hot or cold?
Calibrate primarily at operating temperature or a controlled ambient temperature to reflect normal printing conditions; some steps may be performed cold for baseline checks.
Calibrate mostly at the normal operating temperature to reflect real prints.
What if a test print shows warping in the first layer?
Re-check bed level, re-measure Z-offset, and confirm nozzle cleanliness. Warping often signals height inconsistencies or poor bed adhesion.
If the first layer Warps, recheck the bed level and nozzle cleanliness and re-run a test.
Watch Video
Key Takeaways
- Level the bed before adjusting Z offset
- Use 0.1 mm feeler gauge or paper for valid spacing
- Test with consistent patterns across the bed
- Document final Z-offset and bed settings
- Re-check regularly to maintain accuracy