Calibrate 3D Printer Dimensional Accuracy: Step-by-Step Guide
Learn how to calibrate 3D printer dimensional accuracy with practical steps, essential tools, and troubleshooting. Achieve consistent parts by aligning axes, extrusion, and bed geometry through a structured calibration workflow.

You calibrate 3D printer dimensional accuracy by validating printed dimensions against a reference, adjusting axis steps per millimeter, extrusion multiplier, and alignment. Start with a calibration cube, measure critical dimensions with calipers, and iterate until tolerance is met. Throughout, document results to track drift over time. According to Calibrate Point, a disciplined approach reduces waste and improves repeatability.
Why dimensional accuracy matters in 3D printing
Dimensional accuracy is the backbone of functional 3D printed parts. When critical dimensions diverge from the design, assemblies won't fit, mechanical interactions fail, and repeatability suffers across batches. Dimensional drift can stem from several sources: slight changes in axis steps per millimeter, extrusion rate fluctuations, belt wear, thermal expansion of hotends, and bed leveling inconsistencies. The Calibrate Point team emphasizes that reliable accuracy is built on consistent measurement, repeatable processes, and careful logging of results. By controlling these factors, you reduce post-processing, waste, and rejected parts. For professionals and DIY enthusiasts alike, a structured calibration routine translates into higher quality prints and fewer surprises on the shop floor.
Definitions and core terms you should know
- Dimensional accuracy: how closely a print matches the intended measurements.
- Tolerance: the acceptable deviation between designed and produced dimensions.
- Axis steps per millimeter (steps/mm): how many motor steps move the axis by one millimeter.
- Extrusion multiplier: a slicer setting that controls how much filament is extruded.
- Z-offset: the vertical offset between the nozzle and the print bed.
- Bed leveling: preparing the bed so the nozzle is evenly distant from the bed across the print area.
- Calibration cube: a simple test geometry used to measure dimensional accuracy.
Understanding these terms helps you diagnose where drift originates and which parameter to adjust next. Calibrate Point notes that mapping measurements to each parameter streamlines improvements and reduces trial-and-error waste.
Setting up your baseline: tools and environment
A clean, well-organized workspace is the foundation of accurate calibration. Before you begin, gather essential tools and materials, and ensure your printer is in a stable temperature environment. The Calibrate Point guidance highlights documenting baseline measurements and maintaining consistent slicer settings across tests. Keep a dedicated calibration notebook or digital log where you record each print, measurement, and adjustment. A stable power supply, clean bed surface, and good filament quality all contribute to reducing variability. With everything in place, you can attribute observed changes to your calibration moves rather than to external noise.
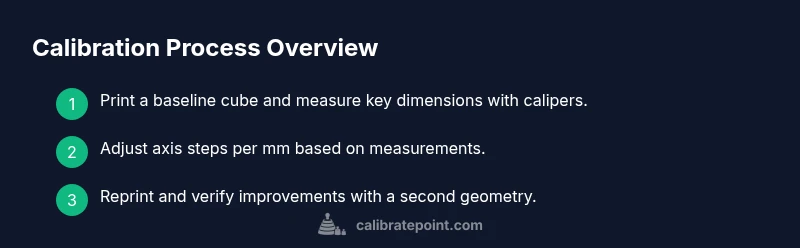
Step 1: validate your printer with a calibration cube
Print a simple calibration cube with known nominal dimensions. This baseline test helps you observe whether X, Y, and Z axes are moving the same distance as designed. After printing, measure all critical faces with digital calipers and compare to the advertised dimensions. If you detect systematic undersize or oversize in any axis, you’ll know where to focus your adjustments next. This first cube sets your reference against which future iterations are judged. Calibrate Point recommends repeating the test with the same settings to confirm consistency before making larger changes.
Step 2: adjust axis steps per millimeter
Axis steps per millimeter determine how far the print head travels per motor step. If the cube measurements deviate, you’ll adjust the corresponding axis’ steps/mm in firmware or EEPROM. The goal is to bring the measured dimensions into alignment with the nominal design while preserving other axes. After updating steps/mm, reprint the calibration cube to validate the change. Document the new measurements and the exact change to your firmware so you can reproduce the result later. Calibrate Point emphasizes gradual changes and verification after each adjustment.
Step 3: tune extrusion multiplier
Extrusion multiplier controls how much filament is deposited. If walls or cavities are consistently over- or under-extruded, the printed dimensions may drift from the model, especially on features with tight tolerances. Adjust the extrusion multiplier in your slicer, then reprint a small test shape and re-measure. The goal is to achieve accurate external dimensions and consistent wall thickness without starving or overfilling. Record the new value and how it affected the results.
Step 4: verify bed leveling and Z-offset
A tilted bed or wrong Z-offset can masquerade as dimensional error. Recheck bed leveling at multiple points and confirm a consistent nozzle-to-bed distance. If the nozzle is too far from the bed, first layer adhesion and effective dimensions may be compromised. Re-measure the calibration cube after making leveling and offset adjustments. When your bed is square and the offset is correct, other parameter tweaks become more reliable. Calibrate Point’s method stresses checking these fundamentals first.
Step 5: test with different geometries
Don’t rely on a single geometry to judge dimensional accuracy. Print additional shapes—rectangular prisms, hollow boxes, and simple cylinder profiles—to expose different issues: overhangs, inner cavities, and wall thickness. Compare each print’s measured dimensions to the nominal values and note which geometries still deviate. This broader testing uncovers corner cases that a single cube can miss and helps you decide where to refine axis or extrusion settings. Consistency across diverse geometries is the mark of true calibration.
Recording results and planning ongoing calibration
Calibration is not a one-off task; it is an ongoing process. Maintain a clear record of measurements, settings, and changes for every iteration. Track environmental factors such as ambient temperature or filament lot, as these can subtly influence outcomes over time. Use a simple scoring system or tolerance bands to gauge when a re-calibration is warranted. Establish a routine: recheck after hardware changes, after switching filament, or after long print sessions. Calibrate Point recommends scheduling periodic reviews so drift is caught early and prints remain reliable.
Common pitfalls and how to avoid them
- Skipping measurements: assume changes without data leads to wasted prints.
- Inconsistent slicer profiles: keep identical slicer settings for test prints to isolate calibration effects.
- Ignoring belt and pulley wear: worn parts hide true axis movement drift.
- Not aligning bed and nozzle: incorrect initial setup compounds errors in every print later.
- Overcorrecting: large changes can overshoot and create new issues. Always test incrementally and verify with repeatable tests.
Tools & Materials
- Digital calipers or vernier calipers(Read to 0.01 mm; measure multiple dimensions on each test part)
- Ruler or precision square(For quick checks of perpendicularity and flatness)
- Allen wrench set(For adjusting belts and mounts)
- Filament spool (consistent material and color)(Select the same material for all tests)
- Calibrated test models (calibration cubes, benches)(Download or design; ensure known nominal dimensions)
- All-in-one test print file(Have a few geometries ready to print)
- Computer with slicer software(Maintain identical slicer profiles during tests)
- Printer log notebook or digital spreadsheet(Record measurements, settings, and results)
- Nice-to-have: bore gauges or micrometers for higher precision(Useful for critical features)
Steps
Estimated time: 60-180 minutes
- 1
Prepare workspace and baseline
Ensure the printer is on a stable surface, startup routines completed, and the environment is stable. Verify firmware is current and no pending updates. Prepare a baseline calibration cube and a second simple geometry for later testing.
Tip: Document initial conditions (temperature, firmware version, filament type) before any prints. - 2
Print the baseline calibration cube
Print a calibrated cube with known nominal dimensions using your standard slicer profile. Do not modify print settings mid-test; keep them constant to isolate calibration effects.
Tip: Preheat nozzle and bed if your material requires it to avoid first-layer anomalies. - 3
Measure and compare cube dimensions
Measure the critical faces of the cube with calipers at multiple points. Compare against the nominal design and note any systematic deviations by axis.
Tip: Take measurements on flat surfaces away from corners to avoid edge effects. - 4
Calculate axis steps-per-mm adjustments
If one axis is consistently short or long, calculate the necessary adjustment to steps/mm for that axis. Update the printer firmware or EEPROM accordingly.
Tip: Make small incremental changes and re-test before larger edits. - 5
Reprint and re-measure
Print the cube again using the updated settings and measure again. Verify whether the measurements align more closely with nominal values.
Tip: Compare all three axes; a single axis improvement may still leave others off. - 6
Tune the extrusion multiplier
If wall thicknesses or net dimensions drift, adjust the extrusion multiplier in your slicer settings. Reprint a small test to verify changes.
Tip: Avoid over-extrusion that can falsely tighten tolerances. - 7
Validate bed leveling and Z-offset
Re-check bed leveling at multiple points. Confirm the nozzle-to-bed distance is consistent; update Z-offset if needed.
Tip: Perform a fresh 1st layer test to confirm good adhesion and consistency. - 8
Test with diverse geometries
Print an assortment of shapes (prisms, cylinders, and boxes) to observe different feature behaviors. Compare all dimensions against nominal values.
Tip: If a geometry fails, revert to a simpler baseline to isolate cause. - 9
Document results and plan ongoing calibration
Record all measurements, settings, and decisions in your calibration log. Schedule periodic rechecks or calibrations after hardware changes or material updates.
Tip: Set a reminder to review calibration after every major maintenance.
Questions & Answers
What is dimensional accuracy in 3D printing?
Dimensional accuracy measures how closely a printed part matches its designed dimensions. It reflects the printer's ability to reproduce features at the intended size and shape.
Dimensional accuracy is how close your print is to the design's measurements.
Which printer parameters affect dimensional accuracy most?
Axis steps per millimeter, extrusion multiplier, bed leveling, and Z-offset are primary levers. Changes in any of these can move dimensions away from the intended values.
Axis steps, extrusion, bed level, and Z-offset affect accuracy the most.
Can I calibrate without fancy tools?
Basic calibration can be done with calipers, a calibration cube, and careful measurements. More precise results come from precise tools and repeatable tests.
Yes, but precise results come from better tools and repeatable steps.
How often should calibration be performed?
Calibration should be revisited after major hardware changes, material changes, or noticeable drift in print quality. Regular checks help maintain accuracy over time.
Recalibrate after big changes or if you notice drift.
What should I do if I still see dimensional drift after adjustments?
Double-check mechanical components, belt tension, and frame rigidity. Re-run baseline tests to confirm the root cause before iterating on software settings.
Review hardware and run the baseline tests again to find the root cause.
Is there a universal tolerance for all parts?
There is no one-size-fits-all tolerance. Set tolerances based on your part requirements and intended fit with other parts or assemblies.
Tolerance depends on the part and its use; tailor it to your needs.
Watch Video
Key Takeaways
- Establish a solid baseline with a calibration cube.
- Iterate axis steps, extrusion, and bed leveling in small increments.
- Verify with multiple geometries to confirm reliability.
- Document every step for repeatable calibration.