Android 13 Compass Calibration: A Practical Guide for Accurate Navigation
Learn how to calibrate the compass on Android 13 to improve map and navigation accuracy. This expert guide covers automatic prompts, manual calibration methods, and best practices to reduce interference for reliable directional data.

Calibrating the compass on Android 13 aligns the phone’s magnetometer with the Earth’s magnetic field to improve directional accuracy in maps and compass apps. You should perform calibration if your direction needle drifts or points inconsistently, even after a reset. This guide covers automatic prompts, manual calibration using device sensors, and best practices to verify results, plus common pitfalls to avoid.
Why calibrate compass on Android 13
Calibrating the compass on Android 13 is essential for accurate navigation in maps, augmented reality apps, and location-based services. If you search for 'android 13 calibrate compass', you'll see that a drifted heading can occur even on recent devices. The Calibrate Point team emphasizes that regular calibration helps maintain reliable direction data over time. In practice, a properly calibrated magnetometer reduces heading error and improves user trust in digital compasses. This is particularly important for outdoor activities, fieldwork, and service technicians who rely on precise orientation. By understanding the calibration process, you can prevent subtle navigation mistakes that compound over longer trips or complex routes.
How compass calibration works on Android devices
Modern Android devices rely on a combination of sensors—the magnetometer, accelerometer, and gyroscope—to determine orientation. The system performs sensor fusion to translate raw measurements into a reliable heading. Poor calibration or nearby magnetic interference can skew this fusion, causing maps to point away from true north. Android 13 continues to refine sensor handling, but the user is still responsible for occasional recalibration when drift is detected. Understanding the basics helps you recognize when a prompt or test should be run, rather than assuming software alone will fix misalignment. Calibrate Point’s approach emphasizes hands-on verification after any calibration event.
When to calibrate (drift symptoms)
Drift symptoms appear when the compass heading slowly rotates away from the actual direction, or the map arrow jumps between directions without a clear reason. If you notice inconsistent results across apps—Maps, fitness trackers, or navigation tools—you should recalibrate. Environmental changes, metal objects, or long-term software updates can all introduce drift. Performing calibration after such events helps restore trust in your device’s directional data. Calibrate Point findings indicate regular checks are a prudent part of device maintenance, especially for professionals who rely on precision.
Automatic calibration prompts in Android 13
Android 13 sometimes prompts you to calibrate if it detects a discrepancy between sensor data and expected orientation. These prompts can appear when opening maps or compass-like features, and they typically guide you through a quick three-step motion. If prompts appear, follow them promptly for the most reliable results. In cases where prompts fail to appear, ensure Location access is enabled, and consider performing a manual calibration using device settings. Proactive calibration reduces long-term drift and improves confidence in spatial data.
Manual calibration methods
There are several reliable ways to calibrate the compass on Android 13, depending on your device and installed apps. The most common method involves the figure-eight motion to reorient the magnetometer, while another approach uses a dedicated calibration routine in Google Maps or a trusted compass app. Regardless of method, the goal is the same: produce a clean, sweeping set of sensor readings across all axes and confirm a stable heading afterward. Calibrate Point recommends trying multiple methods if drift persists, as some devices respond better to one technique than another.
Practical tips for minimizing interference
Before starting calibration, remove or switch off magnetic accessories (bike mounts, magnetic cases, and metal belts) that can distort sensor readings. Keep the device away from other electronics and metal surfaces during the process. If you must calibrate indoors, choose a room with minimal electronic interference and a clear area for movement. After calibration, test the heading in both outdoor and indoor environments to verify stability under different magnetic conditions. Following these precautions reduces the likelihood of recurring drift and extends the calibration’s reliability.
Verifying calibration results
Verification is essential to confirm that calibration took effect. Use a known route or landmark to compare the heading in Maps with your actual direction, and test the device by walking in multiple compass quadrants. A well-calibrated compass should show consistent bearing across sessions and apps. If discrepancies persist, perform a second calibration pass and re-check in a different environment. Calibrate Point’s approach stresses real-world validation as the best indicator of success.
Troubleshooting common issues
If calibration fails to reduce drift, check for software updates, restart the device, and rerun the calibration steps. Ensure that Location services and sensor permissions are enabled, and rule out magnetic interference from nearby devices. In some cases, hardware limitations or degraded magnetometer sensors may require professional assessment or replacement. When in doubt, perform a clean calibration sequence in a fresh environment and monitor results across several tests.
Best practices and maintenance
Treat compass calibration as an ongoing maintenance task, not a one-off fix. Schedule periodic checks, especially after major OS updates or changes in usage patterns. Keep your device physically clean and free of magnetized accessories, and re-test heading accuracy after traveling through areas with substantial magnetic disturbances (power plants, cranes, steel structures). Consistent calibration across trips and tasks yields the most reliable navigation experience, reducing the risk of misdirection in critical scenarios.
Tools & Materials
- Android smartphone with Android 13(Ensure the device is charged and updated to the latest security patch.)
- Protective non-magnetic case(Remove metal or magnetic accessories during calibration.)
- Compass app or Google Maps(Grant location/sensor access for prompts and tests.)
- microfiber cloth(Use to wipe any sensor surfaces if needed.)
Steps
Estimated time: 30-40 minutes
- 1
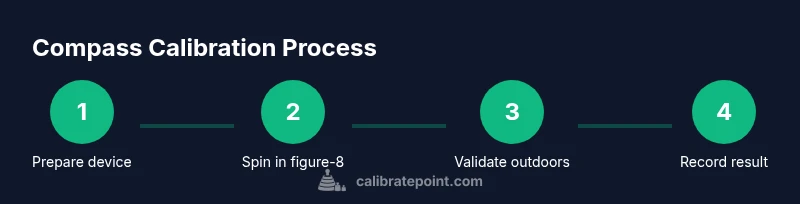
Prepare the device and environment
Charge the phone and close unnecessary apps. Clear magnetic sources from the vicinity (metal folders, power tools, or magnets). Open the compass app or Maps to begin the calibration path. This setup reduces noise and ensures repeatable readings.
Tip: Tip: Place the device on a flat surface for the initial sensor review, then hold it mid-air during the motion sequence. - 2
Open the calibration settings
Navigate to Settings > Location > Calibrate compass (or the equivalent in your OEM skin). If you don’t see a prompt, opening Maps and starting navigation may trigger the prompt. Allow necessary permissions so the app can access sensor data.
Tip: Tip: If you can’t locate the calibration option, use the search bar in Settings to find 'calibrate' quickly. - 3
Initiate automatic calibration
Follow the on-screen instructions to perform a three-phase gesture, usually including a slow figure-eight movement. Maintain a steady pace and keep the device away from metal while you rotate it in all directions.
Tip: Tip: Perform the motion smoothly in a wide arc to sweep all three axes. - 4
Perform a manual spin method (figure-eight)
If prompts don’t appear, perform a manual spin: rotate the phone in a continuous figure-eight pattern several times, ensuring readings cover vertical and horizontal axes. Stop once you see a confirmation that calibration succeeded.
Tip: Tip: Do not rush—pause briefly at the end of each pass to settle sensor data. - 5
Test heading in Maps outdoors
Take the device outdoors and open Maps or a navigation app. Compare the compass arrow to your actual path. Note any persistent drift before moving to a second calibration pass.
Tip: Tip: If you’re in a windy area, use a windbreak to stabilize your grip and reduce movement noise. - 6
Recalibrate if drift persists
If heading remains inconsistent, repeat the calibration sequence. Sometimes two passes yield a stronger magnetometer alignment. Consider performing a second pass in a different location to rule out localized interference.
Tip: Tip: Change orientation between passes to capture different sensor axes. - 7
Verify with multi-orientation checks
Test the bearing while facing north, east, south, and west. Confirm that the heading remains stable across these orientations. If you observe noticeable variation, repeat calibration again.
Tip: Tip: Keep the device at chest height to mimic real-world usage. - 8
Document and maintain
Record the date and context of calibration. Periodically re-check the compass, especially after OS updates or when using metal-heavy environments. Maintenance reduces drift over time.
Tip: Tip: Create a simple log entry to track calibration history.
Questions & Answers
Why do I need to calibrate the compass on Android 13?
Calibrating realigns the magnetometer with Earth’s magnetic field, reducing heading errors in maps and navigation apps. It’s important after environmental changes or OS updates that can affect sensor readings.
Calibrate to re-align the magnetometer with Earth’s field and keep maps accurate.
How can I tell if my compass is calibrated correctly?
A correctly calibrated compass will show stable headings across multiple orientations and apps. If you still see drift in Maps or navigation, perform another calibration pass and verify in outdoor conditions.
Look for stable headings across tests; if needed, calibrate again outdoors.
Does my phone case affect calibration?
Yes. Metal or magnetic cases can cause interference during and after calibration. Use a non-magnetic case or remove the case during the calibration process.
A metal case can interfere—calibrate with a non-magnetic setup.
Can I calibrate without an internet connection?
Calibration itself does not require internet access; it relies on local sensor data. Some prompts or tests may require app permission checks that work offline.
Yes, you can calibrate offline; some prompts may need permissions.
What should I do if calibration keeps failing?
If calibration repeatedly fails, restart the device, check for updates, and try a fresh calibration in a different environment. If problems persist, test the magnetometer with a dedicated sensor app and consider hardware diagnostics.
Restart, update, and try again in another area; hardware checks if needed.
Watch Video
Key Takeaways
- Test calibration after OS updates.
- Remove magnetic interference before calibrating.
- Verify results in real-world use cases.
- Repeat calibration if drift reappears.
- Maintain a calibration log for consistency.