Android Compass Calibration: A Practical Step-by-Step Guide
Learn how to android calibrate compass on Android devices with a practical, step-by-step guide. Improve map accuracy and AR app reliability using proven calibration techniques.

By following this guide, you will be able to android calibrate compass on most Android devices, improving map alignment, AR experiences, and outdoor navigation. The process involves preparing your device, using the built-in compass calibration flow, and validating accuracy after calibration. You should expect to spend about 15-25 minutes in total, with a few short practice runs to confirm results.
Overview: Why Calibrating Your Android Compass Improves Accuracy
The compass on Android devices relies on a magnetometer to sense Earth's magnetic field. Over time, nearby magnets, metal objects, or everyday use can cause subtle misalignments, leading to drift in direction readings. For DIY enthusiasts and professionals who depend on accurate headings for map apps, augmented reality, or surveying tasks, android calibrate compass is a practical skill. This guide explains the why, when, and how of compass calibration on Android, with actionable steps, safety considerations, and troubleshooting tips. By calibrating regularly and following best practices, you can minimize drift and keep navigation reliable in the field.
When to Calibrate
Signal drift or inconsistent headings are common indicators that calibration is due. You should consider calibrating after a firmware update, when you notice map arrows pointing in the wrong direction, or after transitioning from indoor to outdoor environments with strong magnetic interference. If you use AR apps or drone piloting on your Android device, erratic compass readings can compromise safety and precision. Regular calibration acts as a maintenance habit to maintain sensor accuracy over time.
Tools and Signals: What You Need
- Android device (phone or tablet) with a functional magnetometer
- A built-in compass app or a reputable calibration app
- A stable, magnetically quiet environment (away from metal furnishings and electronic devices)
- Sufficient battery life or a charger nearby
- Optional: a notebook or app to log calibration results for future reference
Pro tip: Before you start, disable unnecessary apps that may access location sensors to avoid background sensor noise that could affect readings.
Step-by-Step Process: Basic Calibration in Android
-
Open the device’s compass app or a calibration-friendly app and ensure you have a clear view of the sky if using magnetic field prompts. This establishes a known baseline before any movement. tip: Keep the device steady for a moment to let sensors initialize.
-
Move the phone in a figure-8 pattern to excite the magnetometer and trigger the calibration routine. This motion helps the system sense multiple magnetic vectors for a robust calibration. tip: Use a wide, deliberate arc to cover all axes.
- Rotate the device slowly through all orientations—portrait, landscape, and upside down—to engage the sensor across different angles. This ensures the calibration data captures the full magnetic field profile. tip: Maintain a comfortable grip and avoid rapid, jerky movements that could blur sensor readings.
- Follow any on-screen prompts exactly. Some Android builds will request multiple passes or show a success indicator once calibration completes. tip: If prompts stall, exit the app and retry from step 1 to reset the calibration flow.
- Test the reading with a map or compass app to confirm improved direction accuracy. Compare the heading to a known reference (e.g., a landmark or a digital compass). tip: Take several readings and average them for a more reliable check.
- If drift persists, perform a repeat calibration focusing on underrepresented orientations (e.g., flat on a table, then held vertically). tip: Calibrating away from metallic surfaces significantly improves consistency.
- Optional: reset calibration data within the app if you suspect corrupted sensor data. This can help restore a clean baseline for fresh calibration. tip: Only reset when necessary to avoid losing a good calibration state.
- Close and reopen navigation or AR apps to ensure they pick up the new calibration state. tip: Rebooting the device can also clear stale sensor caches that might mask calibration gains.
- Record the calibration results and any notable improvements. This creates a personal log you can refer back to before critical tasks.
Advanced Calibration: When and How
Advanced Android users may explore device-specific calibration tools or developer options that expose sensor parameters. In most cases, the built-in calibration flow is sufficient, but advanced users might discover OEM utilities for magnetometer reset, fusing calibration scans with other sensors, or returning to factory sensor baselines. Always back up data before attempting deeper calibrations, and consult the device’s support resources to avoid unintended changes. Advanced calibration is usually optional and should be approached with caution.
Common Mistakes and How to Avoid Them
- Calibrating near metal objects or electronics can skew results. Move to a magnetically quiet area before starting.
- Rushing the figure-8 motion leads to incomplete calibration data. Take deliberate, multiple passes.
- Skipping the final validation step may leave you unaware of residual drift. Always test after calibration.
- Relying on a single app readout can give a false sense of accuracy. Cross-check with multiple apps or a physical reference where possible.
Testing After Calibration
Test under real-world conditions by using the calibrated compass in a map app, GPS navigation, or an AR game. Compare headings against known landmarks or a second browsing device as a reference. If you notice drift, re-run the calibration process with additional passes in forgotten orientations (flat, held sideways, and upright). Regular testing reinforces calibration quality over time.
Troubleshooting: Persistent Drift
If drift persists after multiple calibrations, consider the following checks: ensure no nearby magnets or metal objects are influencing readings, test in a different location, verify the magnetometer by testing on another app, and confirm the device firmware is up to date. If issues continue, contact the device manufacturer’s support for hardware diagnostics.
Maintaining Calibration Over Time
Calibrations are not permanent; drift can occur gradually. Create a simple schedule to re-calibrate every few weeks or after major software updates or travel across different magnetic environments. Document the outcomes, note any repeated issues, and adjust your workflow accordingly. Regular calibration helps keep navigation and AR features trustworthy.
Tools & Materials
- Android device (phone or tablet)(Any current Android version; check for a magnetometer sensor.)
- Built-in compass app or calibration-friendly app(Prefer apps that explicitly show a calibration prompt and follow-on-screen instructions.)
- Stable, magnetically quiet environment(Stand away from metal objects, electronics, and strong magnets.)
- Sufficient battery life or charger(Calibration can take 15–25 minutes; ensure power to avoid interruptions.)
- Notebook or digital log(Record results, orientation notes, and any observed drift for future reference.)
Steps
Estimated time: 15-25 minutes
- 1
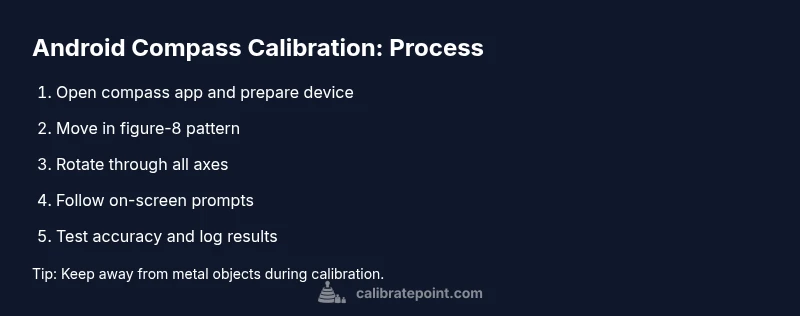
Open compass app
Launch the device’s built-in compass app or a calibration-friendly alternative. Ensure sensor access is enabled and the app is ready to guide you through calibration prompts. This step establishes the baseline for the calibration session.
Tip: Keep the device steady for a moment to let the sensors initialize. - 2
Move in a figure-8 pattern
Rotate the device in wide figure-8 motions to engage the magnetometer across multiple magnetic vectors. This movement helps expose the sensor to different orientations for robust calibration.
Tip: Use deliberate, smooth turns rather than quick jolts. - 3
Rotate through all axes
Switch between portrait, landscape, and inverted orientations to cover all angular positions. This ensures calibration data reflects the full magnetic environment of the device.
Tip: Don’t rush; complete several cycles in each orientation. - 4
Follow on-screen prompts
Many devices will prompt you to perform specific motions or confirm calibration success. Adhere to prompts to ensure a clean calibration state.
Tip: If prompts stall, close the app and retry from step 1. - 5
Test accuracy after calibration
Use a map or compass app to verify heading alignment against a known reference. If readings still drift, repeat the procedure with extra passes in missing orientations.
Tip: Take several readings and average results for reliability. - 6
Re-calibrate if drift persists
If drift remains, re-run the process focusing on orientations where readings seem weakest. Persistent drift may indicate environmental interference or sensor drift over time.
Tip: Consider a factory reset of sensor data only as a last resort. - 7
Reset calibration data if needed
If you suspect corrupted data, reset calibration data in the app and start anew. This avoids compounding errors from prior configurations.
Tip: Back up any important sensor data before resetting. - 8
Restart apps and device
Close navigation or AR apps and reopen them to ensure the new calibration state is loaded. Rebooting can clear caches that obscure improvements.
Tip: A full device restart can help when calibrations don't seem to take effect. - 9
Log results for future use
Document the calibration outcome, any issues observed, and the conditions during testing. This log will help you gauge calibration effectiveness over time.
Tip: Keep a simple checklist to track changes when you recalibrate.
Questions & Answers
Why does my Android compass drift after calibration?
Drift can occur due to environmental interference, magnetic objects nearby, or sensor aging. Recalibrating in a magnetically quiet area and testing across multiple orientations helps reduce drift.
Drift usually comes from environmental interference or sensor aging. Try recalibrating in a clean area and test from multiple orientations.
Do I need to calibrate the compass every time I use a map app?
Not necessarily. Calibrate when you notice consistent heading errors or after device updates, then verify accuracy with a quick test using known references.
Not every time. Calibrate when you notice heading errors and verify with a quick test after calibration.
How can I verify calibration accuracy?
Compare compass headings in a map app with known landmarks or a physical compass. Repeat readings and look for consistency across several trials.
Check by comparing the map heading to landmarks and taking multiple readings for consistency.
Can third-party apps improve Android compass calibration?
Most devices perform best with the built-in calibration flow, but reputable third-party apps can aid visualization or provide additional diagnostic checks.
Some apps help visualize calibration and offer extra checks, but built-in calibration remains the most reliable.
Will calibration affect other sensors?
Calibrating the magnetometer primarily adjusts compass readings and should not affect unrelated sensors. If a device exhibits broad sensor issues, broader diagnostics may be needed.
Calibration mainly affects the compass; other sensors are typically unaffected unless there are wider hardware issues.
Is GPS used during calibration?
GPS data is not required for compass calibration. Calibration relies on magnetometer readings and orientation changes.
GPS isn't needed for compass calibration; magnetometer readings drive the process.
Watch Video
Key Takeaways
- Calibrate regularly to minimize heading drift
- Use figure-8 and multi-axis rotations for robust data
- Validate with multiple references after calibration
- Avoid magnetic interference during calibration