Calibrate 3D: Comprehensive Step-by-Step Guide
A practical, step-by-step guide to calibrate 3d systems—from printers to scanners—featuring reference artifacts, measurement methods, and QA tips, by Calibrate Point.

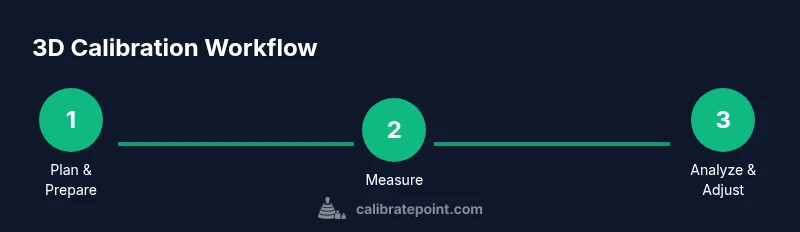
Goal: Learn how to calibrate a 3D system—printer, scanner, or measurement rig—to achieve accurate dimensions and repeatable results. This guide covers a practical workflow, reference artifacts, data collection, and deviation analysis. You’ll need a calibrated reference artifact, precise measuring tools, a controlled workspace, and basic data analysis software. Calibrate Point provides practical, step-by-step guidance.
Why calibrate 3d equipment matters
Calibrate 3d processes to ensure dimensional accuracy across your workflow. When devices like 3D printers, laser scanners, or coordinate-measuring setups drift, parts won't assemble correctly, tolerances widen, and QA checks fail. According to Calibrate Point, a disciplined calibration plan is the foundation of trustworthy 3D measurement. Regular calibration reduces variability, supports traceability, and minimizes material waste. In practice, you’ll see fewer failed prints, tighter fits in assemblies, and more predictable process capability. The core idea is simple: measure with a known reference, compare against expected values, and adjust until measurements align within defined limits.
Key sources of drift include mechanical wear, temperature fluctuations, measurement tool wear, and mounting inconsistencies. A robust calibrate 3d routine targets each of these areas with repeatable methods and clearly documented results. This section outlines why calibration matters not just for accuracy, but for the entire lifecycle of your 3D projects, from early prototyping to final QA.
Core concepts in 3d calibration
Calibration is the process of aligning a device's readings to a known standard. In 3D contexts, you’ll handle tolerances, alignment, and traceability. A reference artifact provides an anchor for measurements; you compare the device under test to the artifact and compute deviations. The term 'calibrate 3d' encompasses both calibration and verification steps. Common techniques include least-squares alignment to minimize overall deviation, and feature-based alignment when you care about a specific geometry. Accuracy is defined by the tolerance you set and the measurement noise you observe. Documenting the method and results ensures repeatability across shifts or personnel. When choosing a method, prioritize stability, repeatability, and ease of use for your workflow.
Reference standards and traceability
Traceability is the backbone of credible calibration. Use reference artifacts with certified tolerances and a documented calibration history. Gauge blocks, calibrated spheres, and custom fixtures with certificate numbers allow you to link every measurement to an external standard. Keep records of serial numbers, calibration dates, and the supplier’s certificate. This makes it possible to demonstrate conformity during audits or QA reviews. Calibrate 3d workflows rely on stable references, so store artifacts in controlled conditions and handle them with clean, lint-free tools to avoid contamination that would skew results.
Calibrate 3d across different devices
3D printers, optical scanners, and coordinated measuring machines each require tailored calibration approaches. For a printer, you’ll focus on bed level, nozzle alignment, and extrusion consistency. For a scanner, calibrate the measurement volume, scale, and distortion. For a CMM or other instrument, align coordinate systems and verify probing accuracy. The common thread is to compare device outputs to a trusted reference and tighten controls until all measurements fall within defined tolerances. A unified documentation framework helps you move from one device to another without losing traceability.
Measurement strategies: geometry, surface, and thermal considerations
Geometric calibration targets features like straight edges, circularity, flatness, and true scale. Surface calibration concerns how well the device captures texture, gloss, or micro-geometry that affects fit. Temperature, material expansion, and fixture flex can all alter readings; account for these factors by controlling the environment and allowing warm-up times. Decide on a measurement plan that prioritizes the most critical features for your application, then perform repeated measurements to quantify repeatability and inspect outliers using basic statistical tools. The goal of calibrate 3d workflows is to reduce systematic error while tracking random noise.
Setting up a calibration workspace
Create a clean, temperature-stable environment with minimal vibrations and good lighting. Use a dedicated bench or enclosure to reduce drafts and dust. Mount artifacts and parts with repeatable fixtures so that every run starts from the same geometry. Establish a measurement protocol that specifies the order of measurements, the orientation of artifacts, and the handling procedures. Keep your work area organized and your records centralized so you can trace every result back to the exact artifact, tool, and operator.
Data capture and analysis workflow
Record every measurement in a centralized log or calibration software. Use simple statistics—means, ranges, and standard deviations—to summarize performance. Plot deviations against feature identifiers to spot systematic trends. Compare results against your predefined tolerances and document any adjustments. A clear pass/fail determination helps QA teams respond quickly and maintain consistency across shifts. This section links the practical work to the numbers that matter for decision making in calibrate 3d projects.
Integrating calibration into production and QA
Embed calibration into your daily workflow by defining roles, responsibilities, and a review cadence. Link calibration records to product specifications, bill of materials, and change control processes. Use automated checks where possible and ensure that any deviation triggers an alert and a re-calibration cycle. A well-integrated calibration routine reduces risk, shortens rework, and supports continuous improvement across your 3D operations. Remember to communicate findings with stakeholders and update training as needed.
Common pitfalls and best practices
Common pitfalls include skipping warm-up, mixing artifacts, or recording incomplete data. Avoid these by preparing a stable environment, using consistent artifacts, and maintaining complete, auditable records. Best practices include defining clear acceptance criteria, validating measurements with independent references, and reviewing results with peers. Regularly revisit and refine your calibration plan to accommodate new devices or materials. The payoff is a more reliable 3d workflow with fewer surprises at inspection.
Tools & Materials
- Calibrated reference artifact (e.g., certified gauge block set or calibration sphere)(Traceable to an external standard)
- Digital caliper or micrometer with sub-0.01 mm resolution(High precision measurement tool)
- Gauge blocks and marking tools(For verifying features and marking references)
- Temperature-stable work surface(Maintain ambient temperature around 20-25 C if possible)
- Calibration records software or logbook(Centralize results for traceability)
- Calibration jig or fixtures for mounting parts(Helps repeatability)
- Lighting and clean workspace supplies(Reduce measurement errors)
Steps
Estimated time: 2-3 hours
- 1
Define calibration goals
Identify the critical features and tolerances that matter for your application. Document acceptance criteria and how you will measure success. Align these goals with your overall 3D workflow so every measurement has a purpose.
Tip: Write measurable objectives and confirm they cover all key features. - 2
Assemble reference artifact and tools
Gather the artifact, certs, and all measuring tools. Verify the artifact’s certificate is current and legible. Ensure tools are calibrated and ready for use in this process.
Tip: Double-check artifact certificate validity before starting. - 3
Prepare environment and fixtures
Stabilize the workspace temperature and minimize vibrations. Set up fixtures that hold artifacts in repeatable orientations. Calibrate in a clean, dust-free area.
Tip: Allow devices to warm up for 10–15 minutes prior to measurements. - 4
Mount parts securely
Attach the test part or artifact to a fixed fixture to prevent movement during measurement. Use the same orientation for every run to reduce orientation-based bias.
Tip: Tighten fixtures without deforming the part. - 5
Capture baseline measurements
Take multiple readings for each feature from different angles or positions as appropriate. Record all values in your chosen log or software.
Tip: Aim for at least 3 measurements per feature to assess repeatability. - 6
Compute deviations against reference
Compute the mean deviation and the spread of measurements relative to the reference. Identify systematic errors that persist across readings.
Tip: Plot deviations to visualize drift patterns. - 7
Apply alignment adjustments
Adjust device settings, fixtures, or mounting to reduce observed deviations. Document each adjustment for traceability.
Tip: Make one change at a time to isolate effects. - 8
Repeat measurements to verify
Repeat the measurement cycle to confirm that deviations have decreased and remain stable. Look for consistency across cycles.
Tip: Include warm-up between cycles to avoid thermal effects. - 9
Document results and update records
Record final deviations, tolerances, and adjustments. Update calibration logs and link results to the relevant product or project files.
Tip: Include artifact serial numbers and operator details. - 10
Plan ongoing calibration cadence
Set a regular calibration cadence aligned with QA cycles, material changes, or device maintenance. Define triggers for re-calibration, such as observed drift or repairs.
Tip: Schedule reminders and ensure responsible ownership.
Questions & Answers
How often should I calibrate 3d devices?
There isn’t a universal frequency; calibrate on a regular maintenance schedule and after any major change to hardware, materials, or processes. Use observed drift and QA results to guide cadence.
Calibrate on a regular maintenance schedule and after any major hardware or material change, based on observed drift.
What artifacts work best for 3d calibration?
Artifacts with traceable certificates, such as certified gauge blocks or calibrated spheres, provide reliable references for 3d calibration.
Use artifacts with traceable certificates like gauge blocks or calibrated spheres for reliable references.
Can I use DIY artifacts for calibration?
DIY artifacts can be used for basic checks, but accuracy varies. Rely on certified references for authoritative measurements and audits.
DIY artifacts can work for rough checks, but certified references give you the accuracy needed for audits.
What signs indicate calibration drift?
Look for inconsistent measurements, misalignment across features, or results that deviate from the reference in multiple runs.
If measurements drift or alignment shifts across features, that’s a drift warning sign.
Is temperature a major factor in calibration?
Yes. Temperature affects material expansion and fixture stiffness, so calibrate in a stable environment and account for warm-up time.
Temperature can affect accuracy, so keep the workspace stable and allow warm-up.
What tools do I need to calibrate 3d?
A calibrated reference artifact, precision measuring tools, stable fixtures, and a method or software to analyze results.
You’ll need a certified reference, precise tools, and a way to log and analyze the data.
Watch Video
Key Takeaways
- Plan calibration with clear goals and acceptance criteria
- Use traceable reference artifacts for credible results
- Document results and keep logs for QA
- Control environment to minimize drift
- Establish a regular calibration cadence for reliability