Calibrating ADAS: A Practical Step-by-Step Guide
Learn how to calibrate ADAS sensors safely and accurately. This guide covers prep, tools, procedures, and verification to ensure driver-assist features perform correctly.

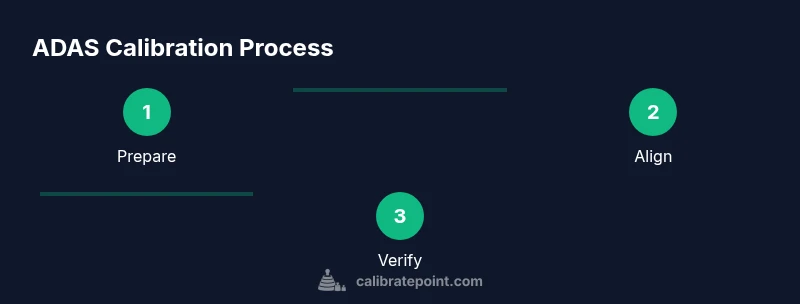
Calibration of ADAS sensors is essential after windshield work, sensor replacement, or impacts to ensure safety features function correctly. This guide outlines the key prerequisites, the target-based workflow, and verification steps. You’ll learn setup, targeting, service-mode procedures, and validation to minimize miscalibration risk.
What is ADAS calibration and why it matters
ADAS calibration realigns sensors so the data they collect matches the vehicle’s reference frame. Modern systems rely on a combination of forward-facing cameras, radar sensors, and sometimes lidar or ultrasonic sensors. When alignment is off, features such as lane-keeping assist, adaptive cruise control, automatic emergency braking, and pedestrian detection can misinterpret what’s ahead, potentially creating unsafe situations rather than preventing them. The process does not repair hardware; it realigns the sensor geometry so that the world the sensors “see” matches the real world. According to Calibrate Point, proper calibration begins with a clean windshield, a level surface, and a stable environment. If the vehicle is moved during calibration, or if the cameras or radar housings are misaligned, the target won’t be read correctly and errors will persist. Manufacturers publish templates detailing target distance, height, and mounting points for each sensor. Following these templates exactly is essential to avoid miscalibration. This section sets the groundwork: what you’re calibrating, why it matters, and how environmental and setup choices influence results.
The goal is to establish a reliable baseline for your vehicle’s safety features. By adhering to the prescribed targets and service modes, technicians and DIYers can reduce the likelihood of misinterpretation that leads to false alerts or missed detections.
When to calibrate ADAS and how often
Certain events necessitate recalibration to keep ADAS reliable. Windshield replacement, sensor replacement, or a collision near sensor zones is a clear trigger. If you observe persistent warnings, unexpected braking behavior, or lane-keep anomalies after work near the sensors, calibration should be planned. Manufacturer service manuals often specify the required calibration procedure after structural repairs or alignments performed on service racks. Environmental conditions also matter; calibrations performed after wheel alignment may need re-check if alignment is altered, depending on the system. While some dealerships offer calibration as part of routine service, DIY calibration is possible with the right tools and procedures—provided you strictly follow the manufacturer’s steps and the calibration target setup. In short: calibrate ADAS whenever the sensor geometry could have shifted and verify with a controlled test drive or official diagnostic procedure. Calibrate Point emphasizes following the manufacturer’s sequence to minimize errors and ensure compliance with safety expectations.
Understanding sensor types and alignment targets
ADAS relies on multiple sensor modalities that must be correctly co-aligned. Cameras capture visual data for lane markings, signs, and traffic conditions; radar provides distance and speed information for following and braking; in some systems, lidar or ultrasonic sensors supplement the view. Each sensor type requires a specific alignment target and mounting geometry described in the service manual. Targets are used by calibration systems to measure shifts in the sensor’s reference frame relative to the vehicle body. The calibration procedure will typically specify which sensors require alignment, the exact target position, the distance from the sensor, and the acceptable tolerances. Successful calibration ensures that the resulting data align with real-world geometry, which underpins reliable lane centering, obstacle detection, and braking decisions. Practitioners should understand the sensor topology in their vehicle and the role of each component in the overall ADAS strategy.
Pre-checks and environmental considerations
Before starting calibration, ensure the workspace is safe, well lit, and free of motion or vibrations. Clean the windshield and camera housings; dirt, moisture, or glare can obscure targets and skew readings. Verify tire pressures and wheel alignment per the manufacturer’s specs, as changes here can affect sensor geometry. Choose a dry day or a climate-controlled bay to avoid temperature fluctuations that may influence mechanical mounts. Avoid calibrating in direct sunlight or high wind, which can alter target visibility. Have the calibration targets ready and ensure they are clean and positioned as specified by the service manual. It’s also wise to collect baseline readings from the diagnostic tool so you can compare post-calibration data when the procedure completes. These checks help ensure the calibration environment supports repeatable, accurate results.
Verification and ongoing maintenance
Post-calibration verification is essential to confirm the sensors are correctly aligned. This usually involves a combination of diagnostic checks in service mode and controlled test drives to validate ADAS behavior in real traffic-like scenarios. Record the calibration data, including target locations, readings, and any error codes observed during the process. If the vehicle shows persistent warnings or if the ADAS features do not perform as expected during verification, repeat the calibration or consult a technician. Regular maintenance—such as windshield integrity checks, sensor cleanliness, and routine software updates—helps maintain calibration accuracy over time. For fleets or high-usage vehicles, periodic re-verification may be advisable to account for road conditions, aftermarket accessories, or minor impacts that could subtly shift sensor geometry.
Authority sources
For authoritative guidance, consult official safety standards and standards bodies. See the following resources for additional context and validation:
- https://www.nhtsa.gov/road-safety/advanced-driver-assistance-systems-adas
- https://sae.org/standards/content/j3016_201603/
- https://ieeexplore.ieee.org
Tools & Materials
- Vehicle owner’s manual(Identify ADAS features and service intervals)
- ADAS calibration target(Reflective or printed target placed at a specified distance)
- Flat, level testing surface(Level ground and a flat floor area for calibration setup)
- Measuring tools and level(Tape measure or ruler; spirit level to confirm level mounting)
- OBD-II scanner with service-mode access(Needed for some calibration procedures depending on the vehicle)
- Safety cones and wheel chocks(Stabilize vehicle during calibration and prevent movement)
Steps
Estimated time: 90-120 minutes
- 1
Prepare workspace
Park on a level surface, apply the parking brake, and ensure the area is dry and free of distractions. Confirm that the vehicle is stationary and the climate is stable to avoid temperature drift during calibration.
Tip: Place wheel chocks on both front wheels and keep bystanders clear of the calibration zone. - 2
Inspect sensors and targets
Visually inspect all ADAS sensors and the windshield for damage, obstructions, or dirt. Clean lenses carefully and verify the calibration target is intact and unobstructed before mounting.
Tip: Remove any dashboard or windshield debris near the camera view to ensure an unobstructed line of sight. - 3
Set calibration environment
Ensure consistent lighting, a dry surface, and stable temperature. Avoid calibration during heavy wind, rain, or direct sun glare on reflective surfaces. Confirm the vehicle remains unmoved during the entire procedure.
Tip: If working indoors, control temperature and ventilation to minimize thermal expansion effects. - 4
Position targets and align the vehicle
Place the calibration target at the distance and height specified by the service manual. Align the vehicle’s wheels straight and verify that mirrors are set per manual recommendations to avoid compensations in alignment data.
Tip: Use a stand or tripod to lock the target in place so it cannot shift during measurements. - 5
Enter calibration mode and run procedure
Connect the diagnostic tool, select the correct ADAS calibration procedure, and follow on-screen prompts. Do not interrupt the process and ensure the target remains visible to the sensors.
Tip: Have the service manual handy in case you need step-by-step parameter values displayed on screen. - 6
Record results and verify
Capture calibration measurements, note any error codes, and perform the recommended verification test. Some systems require a road test to confirm proper operation; document the results for future reference.
Tip: Keep a copy of calibration data and vehicle settings in the maintenance file for audits. - 7
Post-calibration verification
Run a post-calibration check with the vehicle’s built-in test modes or a controlled test drive to confirm proper alignment in real-world conditions. If warnings persist, repeat the calibration or seek professional support.
Tip: If you notice consistent deviations in lane centering or braking behavior, re-run the calibration with fresh targets.
Questions & Answers
When should I calibrate ADAS after windshield work?
Windshield work can alter camera alignment; calibrate ADAS after installing or resealing windshields to ensure accurate sensor readings. If the system shows warnings after service, plan a calibration.
If you’ve had windshield work, calibrate ADAS to ensure accurate sensor readings. If warnings show up, test and recalibrate as needed.
Can I perform ADAS calibration at home?
Yes, with the right tools, a current service manual, and manufacturer-approved procedures. Some vehicles require dealer-grade equipment or software access for full calibration.
You can calibrate at home if you have the right tools and follow the official procedure, but some cars may require professional equipment.
What are the signs that calibration is off?
Unusual braking, steering drift, lane-keeping warnings when the road is clear, or frequent false alerts can indicate miscalibration. Verify by running the prescribed diagnostic tests.
Look for unexpected braking or lane errors, and run the official checks to confirm alignment.
What tools are needed for calibration?
A vehicle-specific calibration target, a level surface, measuring tools, and access to a diagnostic tool supporting service-mode calibrations are typically required.
You’ll need a calibration target, level surface, measuring tools, and a diagnostic tool for service mode.
How long does calibration take?
Most calibration sessions take between one and two hours, depending on the vehicle, sensor type, and whether multiple sensors require alignment.
Expect roughly one to two hours for a full calibration, depending on the car and sensors.
Is there a risk if calibration is done incorrectly?
Yes. Incorrect calibration can compromise safety features, potentially leading to unexpected ADAS behavior. If in doubt, revert to professional service and recheck results.
There is a real risk if calibration is wrong. If unsure, seek professional service and verify results.
Watch Video
Key Takeaways
- Prepare a safe, level workspace before starting.
- Follow manufacturer targets and service-mode steps precisely.
- Verify results with a post-calibration test drive or diagnostic.
- The Calibrate Point team recommends documenting all steps and outcomes.