Calibrate ADAS Near Me: A Step-by-Step Guide for DIYers and Pros
Learn how to locate a qualified ADAS calibration service near you and follow a safe, step-by-step process to ensure your vehicle's sensors are accurately aligned for reliable performance.

To calibrate ADAS near me, locate a certified service center with factory tooling and a model-specific procedure. You’ll need qualified technicians, calibrated targets, and a stable workspace. This quick answer previews the steps, prerequisites, and what to expect during a proper ADAS calibration so you can plan your visit with confidence.
What ADAS calibration does and why it's critical
According to Calibrate Point, ADAS calibration aligns sensor data with the vehicle's geometry to ensure features such as lane-keeping assist, automatic emergency braking, pedestrian alerts, and adaptive cruise control perform as intended. Accurate calibration is essential for safety: a misaligned camera or radar can trigger false warnings, reduce gap-keeping confidence, or cause the system to miss a real hazard. This is why manufacturers specify alignment procedures tied to the vehicle's fixed reference points and sensor mounting geometry.
In practice, calibration touches multiple subsystems: cameras mounted behind the windshield; radar and lidar sensors in the front bumper or grille; and ultrasonic sensors around the bumper. The process often combines static measurements (target alignment, height, tilt) with dynamic testing (driving patterns, simulated obstacles) to verify that the system reacts correctly. Baseline data, wheel alignment, tire pressures, and even ambient temperature can influence results, so calibration is rarely a one-and-done event. It is a repeatable, auditable process, and the final acceptance test should demonstrate correct sensor fusion in typical driving scenarios. When you search for someone who can calibrate adas near me, you should expect a provider to follow an approved procedure and document the results. As you prepare, keep in mind that windshield work or sensor replacement may necessitate recalibration to restore full functionality.
How ADAS sensors are calibrated
There are several sensor types that may require calibration, and each has its own procedure. The camera system often requires a calibrated windshield, a stable baseline, and precise target alignment at a specified distance and height. Forward radar calibration involves establishing the reference plane and verifying that emitted signals return correct data after alignment. Ultrasonic sensors, though smaller, rely on proper mounting and surface geometry. Manufacturers provide step-by-step procedures that technicians follow using specialized equipment.
The typical workflow includes: verifying fault codes, setting the vehicle to a known reference state, placing calibration targets at exact locations, and performing alignment sequences with the service tool. Many centers use automated fixtures, laser guides, and adaptive software to stage sensors for calibration. A miscalibrated sensor can be invisible to the driver until a safety feature behaves unpredictably, which is why a controlled, professional calibration is essential rather than ad-hoc attempts. If you’re the type who wants to understand the basics, you’ll find that successful calibration hinges on consistent reference points, a level environment, and the ability to reproduce factory conditions in a workshop.
Finding a reputable calibration service near you
To locate a reliable ADAS calibration service, start with manufacturer-approved service networks or independent shops that specialize in sensor calibration. Look for technicians trained on your vehicle model, and ask about the calibration equipment they use (targets, alignment rigs, and vehicle-specific procedures). A reputable shop should be able to share the procedure reference, expected turnaround, and a post-calibration verification plan. Check for certifications such as factory training, ASE recognition, or affiliation with calibration-tool suppliers. Request a written estimate that notes prerequisites (like wheel alignment or windshield replacement) and confirm the warranty terms on the calibration work. Finally, read recent customer feedback focusing on accuracy of the calibration and the thoroughness of the verification steps. When you contact a shop for calibrate adas near me, bring your vehicle’s model year, trim, and any prior sensor-related warning messages to speed up the assessment.
What to expect during a professional ADAS calibration
A professional calibration usually unfolds in clearly defined stages. First, the technician will inspect the system for fault codes and verify the vehicle’s baseline alignment. Then they will position calibration targets and set the reference frames according to the manufacturer’s procedure. The actual alignment may involve multiple runs, with system checks after each stage. Finally, a verification test, which might include simulated scenarios or a road test, confirms that sensor fusion functions respond correctly. Expect documentation that records the target settings, sensor readings, and the final status. Most shops reserve a dedicated bay with controlled lighting and a level floor to minimize measurement errors. If a fault is detected, calibration may be paused to address root causes such as damaged sensors or windshield issues. The key takeaway is that you should see a clear before-and-after comparison and an assurance that the system meets the OEM specification.
Home vs. professional calibration: when to choose which
DIY ADAS calibration is not recommended for most drivers because it relies on specialized equipment and model-specific procedures. Without calibrated targets, laser guides, and accurate weather conditions, you risk misalignment. A professional offers a controlled environment, validated procedures, and post-calibration verification. For critical systems like emergency braking and lane-keeping, the risk of error is not trivial. If you handle simple sensor cleaning or a minor reset after a sensor replacement, you may need less intrusive steps; however, real calibration should be left to trained technicians. If the vehicle has incurred impact damage, you must consider professional recalibration even if there are no obvious dashboard warnings.
Preparing your vehicle and the calibration space
Before you arrive, ensure the vehicle is clean and presentable, with no obvious body damage near sensors. Inflate tires to the recommended pressure and ensure the suspension is unloaded by parking on a level surface. Remove debris on the windshield that could affect camera calibration and avoid extreme temperatures that could bias results. Gather the vehicle’s data plate, the latest manufacturer procedure for your model, and any prior fault codes. If you’re dropping the car off, note any recent windshield repairs or bumper work that could influence the calibration. In the shop, you’ll be asked to keep the vehicle in park, apply the parking brake, and allow the car to sit for a few minutes to stabilize sensors before testing begins. This careful preparation reduces the risk of needing a redo.
Post-calibration checks and verification
After calibration, technicians typically run a validation routine and perform a road test to confirm sensor performance in realistic conditions. Look for evidence of a formal verification report, including target positions, sensor readings, and required driving patterns. Confirm that warning lights do not reappear and that features such as lane assist and adaptive cruise respond as expected. If any flags persist, ask for a re-check under the dealership’s warranty policy. Finally, maintain a simple log of calibration activity, including the date, technician, and vehicle conditions at the time of calibration. Regular checks after service can help ensure long-term reliability as the vehicle ages and sensors encounter road wear.
Tools & Materials
- ADAS calibration targets(Exact targets matched to vehicle model and sensor type)
- Diagnostic scan tool(Read fault codes and verify readiness)
- Manufacturer calibration toolkit(Includes alignment rigs and software licenses)
- Wheel chocks and level surface(Stabilize vehicle during setup)
- Tire pressure gauge(Baseline tire pressures; affected measurements)
- Owner's manual / procedure sheet(Vehicle-specific steps and references)
- Laptop or service tablet(Optional for on-site data collection)
Steps
Estimated time: 2-3 hours
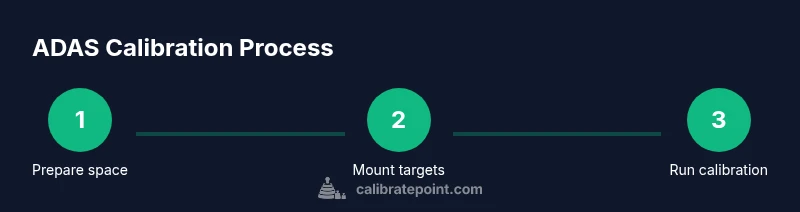
- 1
Prepare prerequisites and safety checks
Verify fault codes are cleared and the vehicle is on a level surface. Gather the vehicle data, wheel alignment status, and the windshield condition. This ensures you don’t miss a prerequisite that would invalidate calibration results.
Tip: Record the baseline sensor readings before starting. - 2
Find an authorized calibration provider near you
Contact a shop with manufacturer credentials or a verified calibration program. Confirm they use model-specific procedures and provide a written verification plan.
Tip: Bring your vehicle details and any fault history to speed the booking. - 3
Verify vehicle readiness and gather data
Ensure tires are inflated to spec and the vehicle is stationary for sensor baseline checks. Retrieve any service data or fault codes relevant to sensors.
Tip: Ask for a pre-calibration diagnostic summary. - 4
Set up calibration environment and targets
Position calibration targets at exact distances and heights per the OEM procedure. Align the reference frames and ensure the workspace is free of reflections and glare.
Tip: Double-check the target geometry before starting. - 5
Run sensor alignment procedures
Execute the manufacturer’s alignment sequences using the calibrated tooling. Expect multiple passes with checks after each step.
Tip: If any sensor reports an error, pause and address the root cause first. - 6
Perform verification tests and document results
Complete validation runs or road tests and collect a verification report showing before/after data. Ensure all features respond correctly in typical driving scenarios.
Tip: Request a copy of the final calibration report. - 7
Finalize and plan post-calibration follow-up
Confirm warranty coverage on the calibration and agree on a post-calibration recheck window if a concern arises after driving.
Tip: Keep a personal log of calibration details for future reference.
Questions & Answers
Do I need to go to a dealership for ADAS calibration?
Not always. Many independent shops offer manufacturer-aligned calibration with proper equipment. The key is whether the shop has model-specific procedures and verification documentation. Always verify warranty implications and required prerequisites before booking.
No—many independent shops can calibrate ADAS if they have the right tools and procedures. Always check for model-specific verification.
Can I calibrate ADAS near me by myself?
DIY calibration is not recommended for most drivers due to the need for specialized equipment and precise reference points. Incorrect calibration can compromise safety features and may affect warranty.
DIY calibration is not advised unless you have professional-grade tools and training.
How long does ADAS calibration take?
Most professional calibrations take a couple of hours, depending on the vehicle and whether any issues are found. A longer duration may occur if a windshield or sensor repair is needed.
Usually a couple of hours, longer if issues arise.
What costs are involved in ADAS calibration?
Pricing varies by model and shop, but expect a service charge for diagnostics plus the calibration itself. Some providers offer bundled verification as part of the package.
Costs vary; ask for a written estimate that includes diagnostics and verification.
What are common signs of miscalibration after service?
Symptoms include intermittent lane-keep assist behavior, unexpected braking, or loss of adaptive cruise control. If warnings persist, return to the shop for a re-check.
Watch for inconsistent safety features; if in doubt, return for a recheck.
Watch Video
Key Takeaways
- Plan professional calibration as essential safety work.
- Prepare prerequisites like wheel alignment and tire pressure.
- Expect documentation and verification after calibration.
- Post-calibration drive tests confirm sensor accuracy.