Calibrate Windshield: Step-by-Step ADAS Guide
Learn how to calibrate windshield ADAS sensors after replacement with OEM tooling and a manufacturer-approved procedure. This practical guide covers prerequisites, tools, safety, and step-by-step workflow for reliable sensor alignment.

Calibrating windshield ADAS requires OEM tools and the manufacturer procedure. This quick context outlines prerequisites, required equipment, and the core steps to restore sensor accuracy and safe vehicle operation. Follow the sequence exactly as defined by the vehicle maker. This article assumes a stationary vehicle and a controlled test area.
What windshield calibration covers
Windshield calibration focuses on aligning a vehicle's ADAS cameras and sensors after a windshield-related event, such as replacement or crack repair. It ensures cameras and radar see the road correctly, which affects braking, lane-keeping, and collision avoidance. According to Calibrate Point, windshield calibration is not about the glass itself but the sensor geometry that relies on the windshield as a reference plane. The process varies by vehicle make and may involve static (stationary) and dynamic (on-road) procedures. You will typically see stand-alone calibration or a combination of procedures integrated into the dealer service workflow. Before starting, identify whether your vehicle requires a static, dynamic, or combined approach, and confirm the calibration plan with the service information for that model. The goal is to reproduce the original sensor geometry and reference points, accounting for any windshield distortion or misalignment that happened during replacement or impact.
Tools & Materials
- OEM calibration tool/scanner(Ensure tool supports windshield/ADAS calibration for your model.)
- Vehicle service manual or calibration procedure document(Access official procedure for your vehicle make/model.)
- Calibration targets or reference boards(Use manufacturer-approved targets at specified distances.)
- Safe, flat workspace with minimal vibration(Level surface; space to place targets at documented distances.)
- Personal protective equipment (PPE)(Safety glasses and gloves as needed.)
Steps
Estimated time: 2-3 hours
- 1
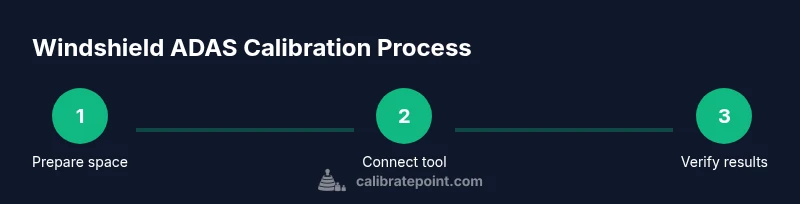
Prepare vehicle and workspace
Position the vehicle in a stable, flat area. Chock wheels, set parking brake off, doors closed, ignition off. Confirm the windshield and sensor housings are clean and undamaged. This prepares a repeatable baseline for calibration and reduces measurement error.
Tip: Document the initial conditions (temp, surface, lighting) before starting. - 2
Inspect sensors and windshield
Check the windshield for damage, verify camera housings are secure, and confirm no aftermarket tint or film interferes with optics.
Tip: Take photos of the sensor area before starting for reference. - 3
Connect calibration tool and load procedure
Connect the OEM calibration tool to the vehicle and load the calibration plan for your model. Ensure the tool recognizes the windshield type and camera layout.
Tip: Use a power source with uninterrupted operation; keep distances verified. - 4
Perform static calibration with targets
Place calibration targets at specified distances; follow the tool prompts to set camera angles and reference points. Record any deviation and adjust as directed by the software.
Tip: Re-check target alignment at multiple angles to confirm accuracy. - 5
Optionally perform dynamic calibration
If required by the vehicle, perform tests in a controlled route to verify sensor responses to lane change, braking, and object avoidance.
Tip: Only perform dynamic calibration on a closed course or approved area. - 6
Verify calibration and test drive
Run a controlled verification sequence and a short test drive to confirm features like lane keep and adaptive cruise control respond correctly.
Tip: If any warning lights appear, halt and re-evaluate the setup.
Questions & Answers
What is windshield calibration?
Windshield calibration aligns ADAS sensors and cameras to factory reference points. It ensures features like lane-keeping and automatic braking function correctly after windshield work.
Windshield calibration aligns ADAS sensors to factory reference points so features like lane keeping work correctly after windshield work.
Do I always need windshield calibration after replacement?
Not every windshield replacement requires calibration, but most modern systems do when sensors or housings are adjusted. Always follow the vehicle maker's procedure.
Most new windshields require some calibration, so follow the maker's procedure.
Can I calibrate windshield ADAS myself?
DIY calibration is possible for some models with the proper OEM tools and documentation, but many vehicles require professional service due to complexity and safety.
DIY is possible only for certain models with official documentation and tools.
How long does calibration take?
Calibration duration varies by vehicle and procedure but expect several hours in a controlled environment and careful verification.
It can take a few hours depending on the vehicle and procedure.
What are signs the calibration failed?
Warning lights, unreliable lane-keeping, inconsistent braking, or unexpected sensor prompts indicate miscalibration. Stop and re-check setup.
Warning lights or unreliable ADAS responses suggest calibration issues.
Watch Video
Key Takeaways
- Follow OEM tooling and procedures for windshield ADAS calibrations
- Perform static calibration before dynamic testing
- Verify results with a controlled test drive
- Document steps and tool versions for traceability