How to calibrate windshield camera: a practical guide
A practical, step-by-step guide to calibrate windshield camera for reliable ADAS performance. Learn prerequisites, tools, steps, safety, validation, and how to avoid common misalignment issues after windshield work or sensor disturbances.

You will calibrate the windshield camera to restore ADAS accuracy after windshield work or sensor disturbance. Required: a level, stable vehicle; a clean windshield with an unobstructed camera; the vehicle in a safe calibration area; and access to the manufacturer’s calibration procedure or a certified service tool. Follow official steps precisely to avoid misalignment and false warnings.
Why windshield camera calibration matters
The windshield camera is a critical sensor for ADAS features such as automatic emergency braking, lane-keeping assist, and adaptive cruise control. When the camera is misaligned, blocked, or after windshield replacement, all those safety systems can misread road conditions, cause false warnings, or stop functioning. Calibration aligns the camera’s optical axis with the vehicle’s onboard coordinate system, ensuring that the perceived positions of lanes, signs, and vehicles match reality. According to Calibrate Point, proper calibration not only restores performance but also reduces the risk of inadvertent system disengagement during critical moments. A precise calibration also helps technicians capture valid diagnostics data for the vehicle’s safety software and reduces the likelihood of warranty disputes after service. In short: proper windshield camera calibration is essential for consistent ADAS behavior and driver trust.
When calibration is required
Generally, calibration is required after windshield replacement, a major impact to the camera's mounting, after a collision, or if the camera has a clear obstruction or damage. Some vehicles automatically run a self-check and will display a calibration warning on startup; others require a technician to initiate calibration. Environmental factors such as extreme temperatures, uneven surfaces, or bright sunlight can affect the calibration process, so most OEM procedures specify a controlled environment with the vehicle on a level surface and the ignition cycle performed as directed. If you notice degraded ADAS performance—lanes veering, missed objects, or unexpected braking—it's a strong indicator that calibration should be verified. Calibrate Point's guidance emphasizes verifying the baseline alignment first, then performing a formal calibration using OEM tools or approved service software to ensure all camera calibration parameters are within spec.
Factory vs aftermarket calibration tools
OEM calibration software and dealer tools are designed to account for your vehicle's exact sensor geometry. Aftermarket tools may not replicate the necessary reference frames or timing, potentially leading to inaccurate results. The choice of tool often depends on vehicle make, model year, and sensor suite. In many cases, both the on-vehicle alignment procedure and a static calibration pattern (when required) are part of a single process negotiated by the vehicle's OEM. Calibrate Point recommends using the official calibration suite whenever possible, and if a third-party approach is used, ensure the vendor provides verifiable procedure documentation and a way to validate results after calibration.
Environmental and setup prerequisites
Set up a controlled calibration environment: a flat, level area with minimal wind and glare. Ensure the windshield is clean and free of chips or obstructions that could affect the camera's view. Park the vehicle on the level surface, apply the parking brake, and ensure the vehicle weight is stable (avoid charging or heavy loads during calibration). For some cars, you’ll need the vehicle in a specific service mode and a remote calibration target or a reference pattern. Follow the OEM guide closely; deviation can skew results and trigger follow-up calibrations.
Safety and legal considerations
Calibration should be performed by trained technicians or in a controlled setting according to the vehicle manufacturer’s guidelines. Work in a static, hazard-free area and keep bystanders clear of the calibration zone. Do not drive an uncalibrated vehicle with non-functioning ADAS features; if a system warning persists after calibration, revisit the procedure or seek factory support. Keeping records of the calibration, pattern verification, and any service actions helps protect warranty and ensures traceability for future maintenance.
Calibration outcomes and validation tests
After completing the procedure, validation should confirm that ADAS features behave as expected under real-world conditions. Use the diagnostic tool to verify sensor alignment values and to capture any fault codes. Conduct a controlled road test focusing on lane-keeping, adaptive cruise control, and automatic emergency braking to verify correct responses. Document the results, saving calibration logs and timestamps. If the system still shows misalignment or warnings, re-check the installation, re-run the procedure, and consider a dealer re-check. A successful calibration should yield stable sensor readings, consistent lane markings recognition, and reliable obstacle detection across driving scenarios.
AUTHORITY SOURCES
Below are official references and technical resources that provide context for windshield camera calibration and ADAS sensor alignment:
- National Highway Traffic Safety Administration (NHTSA) ADAS technology overview: https://www.nhtsa.gov/technology-vehicle-safety/advanced-driver-assistance-systems
- SAE International standards and recommended practices related to camera calibration and sensor integration: https://www.sae.org/
- NIST Calibration and Measurement Domain: https://www.nist.gov/
- MIT OpenCourseWare resources on sensors and calibration: https://ocw.mit.edu/
Tools & Materials
- OEM calibration procedure or service tool(Access through manufacturer portal or authorized dealer; ensures correct reference frames and step sequencing.)
- Level, clean calibration area(Flat, dry surface with minimal wind; helps maintain stable sensor geometry during calibration.)
- Clean windshield with unobstructed camera(Remove dirt, frost, or obstructions; ensure camera has a clear view of the scene.)
- Calibration targets or reference pattern (as required)(Some OEMs require a static target or specific road pattern for validation.)
Steps
Estimated time: 30-60 minutes
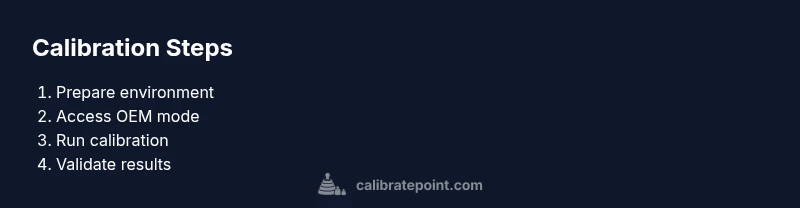
- 1
Prepare calibration environment
Park on a level surface, engage the parking brake, and ensure the area is free of obstacles. Confirm windshield cleanliness and remove any aftermarket devices that could occlude the camera. This setup minimizes external influences on the calibration data.
Tip: Double-check that the vehicle is stable and not in gear before starting. - 2
Access OEM calibration mode
Power the vehicle to the required state and navigate to the camera calibration or ADAS section in the OEM tool or vehicle infotainment/Diagnostics interface. Ensure you’re using the correct vehicle profile and software version.
Tip: Verify you are using the latest OEM calibration software to avoid version conflicts. - 3
Position references and targets
If the OEM procedure calls for a static target, place it at the specified distance and alignment. If no target is required, ensure the road scene is clear and the vehicle is in the correct calibration stance per the manual.
Tip: Use a tripod or alignment marks to maintain consistent target placement if required. - 4
Run calibration sequence
Initiate the calibration in the OEM tool and follow on-screen prompts. The system will capture calibration frames and adjust sensor parameters. Do not interrupt the process and avoid moving the vehicle.
Tip: If the vehicle indicates a fault, pause and recheck the setup before continuing. - 5
Validate results and document
Review reported alignment values, save logs, and perform a controlled road test to confirm ADAS behavior. Record the outcome and timestamp for future maintenance or warranty needs.
Tip: Keep a copy of the successful calibration data in the vehicle service record.
Questions & Answers
Do I always need OEM tools to calibrate windshield camera?
Not every vehicle requires OEM tools, but using manufacturer procedures improves accuracy and preserves warranties. Some vehicles support guided calibration with dealer tools or approved software. Check your vehicle's manual and OEM portal for the official method.
Most vehicles perform calibration best with the manufacturer’s tools or procedures. If in doubt, use the official method to avoid misalignment.
Can I calibrate after windshield replacement by myself at home?
DIY calibration is generally not recommended for most modern ADAS systems due to precise alignment requirements and tool access. Seek a qualified technician or dealership service to ensure proper calibration and warranty coverage.
Calibrating ADAS cameras at home is risky; professional calibration ensures correct alignment and safe operation.
How long does calibration typically take?
Calibration duration varies by vehicle and method, but most OEM procedures take about 30–60 minutes in a controlled setting, plus setup and verification time.
Most calibrations take roughly half an hour to an hour, depending on the car and tools.
What if calibration fails?
If calibration fails, re-check the setup for obstructions or mispositioned targets, verify software versions, and re-run the procedure. If issues persist, contact the manufacturer support or dealer service.
If it fails, verify setup and retry with official steps; persistent failures require dealer support.
Is recalibration needed after tire changes or alignment adjustments?
Tire changes or suspension work can affect ADAS sensing indirectly. If alignment or sensor mounting changes, re-calibration or sensor diagnostics may be warranted.
If systems seem off after wheel work, have the sensors checked and recalibrated as needed.
Do all ADAS features require calibration after windshield service?
Not always. Some systems self-check and adjust, but many require a formal calibration to ensure accurate lane and object detection after windshield work.
Some ADAS features may recalibrate automatically, others require a formal calibration—check your vehicle's manual.
Watch Video
Key Takeaways
- Calibrate windshield camera after windshield work or sensor disturbance
- Use OEM tools or procedures for accuracy
- Validate with a controlled road test
- Document results and preserve calibration data
- If in doubt, seek dealer-level calibration