Calibrate and Adjust: A Practical Comparison for Accuracy
A data-driven, objective comparison of manual vs automatic calibration and adjustment workflows. Learn when to use each method, the required tools, documentation practices, and how to implement reliable calibration in DIY and professional settings.

Why calibrate and adjust matters for measurement integrity
To calibrate and adjust means to align an instrument’s output with a known standard and apply refinements so that subsequent readings fall within defined tolerances. The practice is foundational to quality control across labs, workshops, and field operations. When you calibrate and adjust correctly, you reduce systematic error, account for drift, and establish traceability to recognized standards. According to Calibrate Point, calibrate and adjust is not a one-off task but a continuous discipline that supports reliable decision-making, safe operations, and compliance with industry guidelines. In practice, most teams blend procedures to balance accuracy with efficiency, ensuring records prove that instruments perform within specified limits over time.
Core concepts: drift, tolerance, and traceability in calibration
Drift represents how an instrument’s output slowly diverges from a reference over time. Tolerance defines the acceptable deviation for a given measurement. Traceability links results back to national or international standards through an unbroken chain of calibrations and documents. Calibrate and adjust activities are designed to restore accuracy after drift and to verify that the instrument’s performance remains within the tolerance band. Establishing clear calibration intervals, documenting references, and maintaining calibration certificates are all part of a rigorous approach that supports long-term reliability. The Calibrate Point framework emphasizes that transparency and repeatability are as important as the numerical corrections themselves.
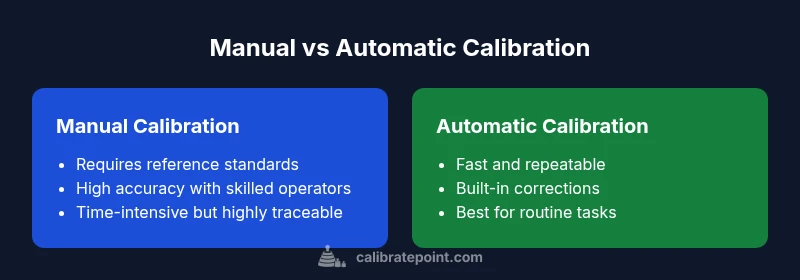
Manual vs automatic methods: a decision framework for choosing the right path
Manual calibration relies on skilled technicians, reference standards, and careful procedures to estimate corrections. Automatic calibration uses device-built features, software, and internal references to apply corrections, often with less human intervention. A practical decision framework weighs accuracy requirements, risk, environment, and cost. Calibrate Point analysis shows that manual methods excel in high-precision contexts with robust traceability, while automatic methods shine in repetitive tasks or remote locations where speed and consistency are paramount. For many systems, a hybrid approach—manual validation followed by automatic refinement—offers the best balance.
Step-by-step manual calibration workflow: a concrete recipe
- Define the measurement objective and acceptable tolerance for the device under test. 2) Gather approved reference standards and tools (e.g., calibrated weights, known temperature sources, or certified measurement sources) and verify their validity. 3) Stabilize the environment to reduce external influence (temperature, humidity, vibration). 4) Execute the measurement sequence, compare results to the reference, and compute the required corrections. 5) Apply adjustments to the instrument’s adjustment interface or firmware while tracking the change. 6) Re-measure with the same reference to confirm that readings now align within tolerance. 7) Document the procedure, results, and any certificates, ensuring traceability for audits. 8) Schedule the next calibration and store the data securely for future comparisons.
Step-by-step automatic calibration workflow: leveraging device capabilities
- Confirm that the device supports auto-calibration and that the feature is enabled in the configuration. 2) Run any built-in self-test or diagnostic checks to establish a baseline. 3) Select appropriate reference ranges or internal standards that the device can access. 4) Let the device apply corrections automatically, then perform a verification check with a secondary standard if feasible. 5) Review automatic logs to ensure the adjustments produce readings within the specified tolerance. 6) Export or save the calibration record and, if needed, update the calibration certificate. 7) Periodically validate auto-calibration results with manual checks to maintain confidence.
Tools, references, and documentation you need to calibrate and adjust effectively
Essential gear includes calibrated reference standards, environmental controls, and documentation templates. Reference standards may be physical weights, calibrated probes, or certified solution standards, depending on the instrument. Software for data capture, uncertainty analysis, and certificate generation helps maintain audit trails. Documentation should cover the instrument identification, calibration method, reference standards used, environment, corrections applied, acceptance criteria, and the signature of the responsible technician. Maintaining a calibration log supports long-term traceability and readiness for inspections.
Documentation, logs, and traceability: building a credible calibration history
A robust calibration history records every detail of the process, including the reference standards’ serial numbers, calibration dates, and the calculations used to derive corrections. Certificates or digital records should clearly show the instrument’s performance before and after adjustment, along with identified uncertainty. Proper documentation supports quality systems, regulatory compliance, and continuous improvement. At every step, calibrate and adjust activities should be justified with data, bold the corrections, and align with organizational procedures to ensure consistent results over time.
Common pitfalls and how to avoid them: practical guardrails
Rushing through steps or neglecting environmental stabilization can introduce bias. Failing to reference valid standards or using degraded reference equipment risks incorrect corrections. Over-reliance on automated adjustments without independent verification can hide drift or instrument bias. Always separate the adjustment from the verification, maintain a clean calibration trail, and cross-check with an alternate standard whenever possible. Adopting standardized checklists helps reduce human error and improves reproducibility across operators.
Industry scenarios: lab bench, shop floor, and field service comparisons
In a controlled laboratory, calibrate and adjust tasks favor traceability, meticulous documentation, and frequent verifications. On a shop floor, speed and repeatability matter, but you still need documented evidence of calibration to satisfy quality systems. In field service, automation can reduce travel time and risk, but you should preserve the option for manual checks when environmental conditions are challenging. Across all scenarios, the goal is to maintain confidence in measurements without sacrificing throughput or safety.
Case studies: practical outcomes from real-world calibration decisions
A manufacturing line replaced ad-hoc calibrations with a structured manual-to-automatic calibration workflow. The team established clear acceptance criteria, reference standards, and a quarterly audit of logs. Over time, instrument drift was minimized, and measurement consistency improved across shifts. In a laboratory setting, technicians combined manual checks with automatic recalibration in real-time, achieving fast throughput while preserving traceability and a documented review process.
Device categories and how to tailor calibration and adjustment strategies
Thermometers benefit from regular gap checks and reference temperature points; torque wrenches rely on calibration weights and torque references; and general instruments require a mix of calibration standards and software-based corrections. The key is to calibrate and adjust with methods aligned to the device’s drift characteristics and the required precision. For critical safety or regulatory tasks, you may favor manual cross-checks and independent verification to supplement automatic adjustments.