Calibrate and Tune: A Practical Guide for Precision
A comprehensive, step-by-step article on calibrating and tuning instruments and tools for accuracy, repeatability, and safety. Learn methods, tools, and best practices from Calibrate Point to achieve traceable results in professional and DIY settings.

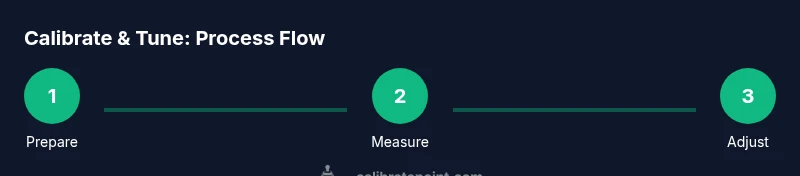
Calibrate and tune your instrument to improve accuracy, consistency, and safety. This quick answer outlines the goal, required tools, and a concise 4-step workflow: prepare, measure, adjust, and validate. Expect a 60–90 minute session for typical bench devices. For best results, follow a documented method and reference standards. This approach aligns with Calibrate Point’s guidance on disciplined, traceable calibration practices.
What calibrate and tune means in practice
In practice, to calibrate and tune means aligning a device’s output with a recognized standard and adjusting its behavior to meet defined performance targets. According to Calibrate Point, calibration and tuning are not one-time events but ongoing processes that require a repeatable method and careful record-keeping. The goal is to minimize drift, improve repeatability, and ensure that measurements remain traceable to recognized references. A well-documented approach helps with audits, quality control, and regulatory compliance. The practice extends beyond lab benches to manufacturing floors, service fleets, and field instrumentation, where consistent results directly impact safety and reliability. Calibrate Point’s experience shows that disciplined calibration reduces surprises during critical tests and helps technicians compare results across shifts, shifts, or teams. Ultimately, calibration and tuning enable you to trust your data and your decisions.
noteStrippedFromSchemaWeExpect}
Tools & Materials
- Reference standards / calibration references(Use NIST-traceable weights or official references when applicable to your device)
- Calibrated measurement instrument(Ensure compatibility with the device under test (DUT))
- Stable environment (temperature-controlled area)(Minimize vibration and airflow; document ambient conditions)
- Calibration jig or fixture(Secure DUT and fixtures to prevent movement during measurements)
- Data capture tools (calipers, digital readouts, or software)(Record measurements and results with timestamps)
- Safety equipment(Gloves, eye protection, and insulated tools as needed)
Steps
Estimated time: 60-90 minutes
- 1
Prepare the instrument and workspace
Power the instrument and allow a short warm-up period to reach a stable operating temperature. Clean the test surface and remove cosmetics that could affect contact or readings. Confirm the DUT is secure in its fixture before beginning measurements.
Tip: Ensure power is stable and the instrument is isolated from external vibrations. - 2
Select reference standards and verify validity
Choose traceable reference standards appropriate to the device and measurement range. Confirm calibration certificates are current and match the device’s serial number. If possible, verify standards against a secondary standard to confirm consistency.
Tip: Prefer sources that provide uncertainty data and a clear calibration history. - 3
Capture baseline measurements
Record baseline readings across the relevant range under controlled ambient conditions. Note temperature, humidity, and any potential influence factors. Take multiple trials to establish a baseline distribution.
Tip: Keep measurements aligned with the device’s native units to avoid conversion errors. - 4
Make precise adjustments to target values
Adjust the device using manufacturer guidance or established procedures until readings align with the reference targets. Make small, incremental changes and re-measure after each adjustment.
Tip: Avoid large, single-step changes which can overshoot the target. - 5
Repeat measurements to verify stability
Perform at least three consecutive runs to confirm stability and repeatability of the readings. Compare results against the expected range and note any drift that appears between runs.
Tip: Document the stability criterion used (e.g., tolerance window) and stick to it. - 6
Document results and finalize calibration
Record all setup details, measurements, adjustments, and final results in a calibration log. Include instrument ID, reference standards, environmental conditions, and date. Seal and store the calibration data for audits.
Tip: Create a versioned record to facilitate future comparisons and audits.
Questions & Answers
What is the difference between calibrate and tune?
Calibration aligns measurements with a known standard, while tuning adjusts instrument behavior to meet performance targets. Both require repeatable procedures and documentation to be credible.
Calibration aligns measurements with standards; tuning adjusts behavior to meet targets. Both rely on repeatable procedures and careful records.
How often should I calibrate and tune my equipment?
Frequency depends on usage, criticality, and environmental conditions. Establish a schedule based on risk, with intermediate checks to catch drift early.
Set a schedule based on risk and usage, and check for drift regularly between formal calibrations.
Can I perform calibration myself or should I hire a professional?
Many devices can be calibrated in-house using validated references and manufacturer guidelines. Complex or safety-critical systems may require professional calibration services.
You can often calibrate some equipment yourself if you follow validated references; for safety-critical devices, consider a professional service.
What should I do if readings drift after calibration?
Re-check environmental conditions, verify reference standards, and repeat measurements. If drift persists, reassess the setup or consult the device manufacturer.
If drift occurs after calibration, re-check everything and repeat measurements; persistent drift may require service.
What is traceability and why does it matter?
Traceability links measurements to standards and provides an auditable trail. It ensures confidence in measurement results and regulatory compliance.
Traceability means every measurement can be traced back to a standard; it’s essential for audits and quality systems.
Watch Video
Key Takeaways
- Define targets before starting.
- Use traceable standards for reference.
- Document results for audits.
- Control the environment to reduce drift.
- Verify repeatability after adjustments.