Calibrating Battery in Windows 11: A Step-by-Step Guide
Learn how to calibrate your Windows 11 laptop battery with practical, safe steps. This guide from Calibrate Point covers built-in tools, best practices, and troubleshooting to improve gauge accuracy and battery insight.

Calibrating the battery gauge on Windows 11 helps align the OS-reported health with real capacity, reducing surprises in how long your device runs between charges. To do this safely, you’ll need a Windows 11 device, a charged battery, and time for a controlled discharge/recharge cycle. Follow the steps below to restore gauge accuracy without harming the battery.
Why calibrating battery gauge on Windows 11 matters
According to Calibrate Point, many users notice that their Windows 11 laptops report battery life inaccurately as devices age or after major OS updates. The battery gauge is a learning gauge that estimates how much power remains based on past behavior. When the reported capacity drifts away from actual remaining energy, you’ll experience unexpected shutdowns or overly pessimistic estimates. Calibrating the gauge helps the OS learn the current capacity more accurately, which in turn improves your planning for critical tasks, reduces sudden power-offs, and minimizes the frustration of misjudged remaining runtimes. While calibration cannot create new chemical capacity, it can ensure the software reads the battery more truthfully, which is especially valuable for professionals who rely on precise session planning and for DIY enthusiasts who want predictable tool uptime during field work.
Understanding Windows 11 battery metrics and why the gauge can drift
Windows 11 reports several battery-related metrics, including Design Capacity, Full Charge Capacity, and the current Charge Percentage. The Design Capacity is the factory-rated maximum energy the battery can store, while Full Charge Capacity is what the battery can actually hold today. Over time, chemical aging, temperature cycles, and calibration drift can cause Full Charge Capacity to fall relative to Design Capacity. This drift makes the battery gauge appear to shrink or grow inconsistently. Interpreting these numbers correctly is essential if you want to decide whether to replace a battery or adjust usage patterns. The Battery Report generated via the PowerCfg tool provides a consolidated view of these metrics and recent charge/discharge cycles, which helps you decide if a recalibration is warranted.
When to calibrate: signs your gauge is off and calibration is worth it
Consider calibration if you notice a mismatch between expected runtime and actual performance, abrupt changes in remaining time after a firmware or driver update, or if the system reports a full charge with a few minutes of life left. Calibration is most beneficial for devices with several years of use or after multiple firmware updates that may have altered power-management behavior. Keep in mind that modern Li-ion batteries benefit from avoiding deep discharge and staying within the recommended 20–80% ranges most of the time. If you regularly see the device shut down well before the reported remaining time, or if the gauge recovers unreliably after a calibration cycle, it may be time to replace the battery rather than pursue further recalibration.
Overview of calibration methods: built-in tools vs. third-party utilities
Windows 11 provides a built-in way to assess battery health via the Battery Report (powercfg /batteryreport). Some third-party utilities claim to adjust gauges or automate discharge cycles; however, most professional guidance emphasizes using the OS-provided data and controlled discharge/charge cycles rather than heavily relying on external tools. Calibrate Point recommends sticking to manufacturer-approved methods and using official reports to understand capacity trends. Third-party utilities may introduce security or reliability risks, so weigh their claims against the potential benefits and ensure you source from reputable developers.
Safety-first approach and prerequisites before starting
Before beginning any calibration-related steps, ensure you are on a stable power source with the charger connected, and work in a safe environment where sudden power loss won’t affect sensitive work. Back up important data and avoid calibrating on devices that are in critical production use. Use a timer to track the cycle lengths and avoid prolonged discharges that could over-stress the cells. If your device has a history of rapid temperature changes, monitor the temperatures during the process to prevent overheating. Lastly, review the device’s manual for any model-specific cautions about battery cycling and calibration.
Step-by-step calibration workflow (high-level overview)
A practical calibration involves measuring the battery report before and after a controlled charge/discharge cycle, then letting Windows rebuild its gauge with updated data. The steps below outline the general approach you’ll take using built-in tools and safe cycling. This section is designed to give you a strong mental model before you perform the hands-on steps in your STEP-BY-STEP block.
Reading and interpreting the Battery Report: what to look for
The Battery Report gives you a snapshot of Design Capacity, Full Charge Capacity, and recent cycle counts. Compare Design Capacity to Full Charge Capacity to gauge aging. If Full Charge Capacity is significantly lower than Design Capacity, gauge accuracy may decay and calibration could help the system adjust. Focus on the trend over several reports rather than a single snapshot; a healthy calibration process should show a stable or slowly improving Full Charge Capacity relative to Design Capacity over time. Calibrate Point’s data suggests that most drift stabilizes after one complete cycle of discharge and recharge.
Practical maintenance tips to extend healthy gauge readings
- Keep the device within safe temperature ranges during operation and calibration. Extreme heat or cold can skew readings and harm cells over time.
- Regularly update firmware and drivers, since power-management fixes can influence gauge accuracy.
- If the battery is several years old or shows a high Health Decay, consider replacement rather than repeated calibration.
- Document each calibration cycle with dates, observed runtimes, and Battery Report metrics to track trends over time. This practice helps you determine when the gauge drift is no longer recoverable by calibration and a battery replacement may be more cost-effective.
- Use the built-in Windows 11 Battery Settings dashboard to monitor ongoing health and to receive alerts about abnormal power behavior.
Authority sources and further reading
- The U.S. Department of Energy provides general guidance on extending battery life and managing thermal conditions for portable devices. https://www.energy.gov/eere/vehicles/articles/how-save-energy-laptops-and-tablets
- Microsoft Learn articles on PowerCfg and battery reporting offer official references for generating and interpreting battery data. https://learn.microsoft.com/en-us/windows-server/administration/windows-commands/powercfg
- University-level discussions on battery management and calibration concepts provide foundational knowledge for understanding gauge behavior. https://www.umass.edu/chemistry/labs/battery-research
Tools & Materials
- Windows 11 device (laptop or desktop)(Any supported laptop or desktop with a functional battery and charger)
- AC power adapter(Keep the device plugged in during the cycle to avoid unintended shutdowns)
- Powercfg utility(Built-in; used to generate a Battery Report (powercfg /batteryreport))
- Notebook or digital notes app(Record baseline metrics and calibration results)
- Internet access to reference docs(For verifying commands and interpretation guidance)
Steps
Estimated time: 60-90 minutes
- 1
Open a Battery Report
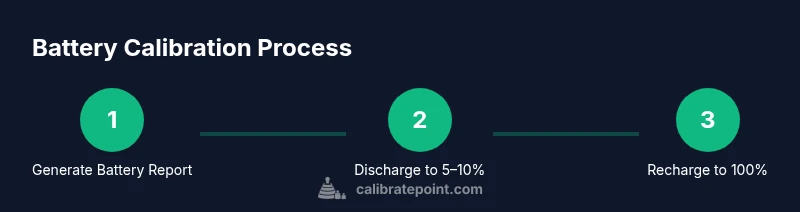
Open a Command Prompt with administrative privileges and run: powercfg /batteryreport. Save the HTML report to a convenient location so you can review Design Capacity vs Full Charge Capacity before calibrating.
Tip: Take a quick screenshot of the critical numbers to reference later; this preserves a baseline for comparison. - 2
Charge the battery to 100%
Plug in your device and let it charge to a full 100% while the system is idle. Avoid using apps that draw heavy power during this phase to prevent skewed readings.
Tip: Disable battery-saver modes temporarily to ensure the charge completes normally. - 3
Discharge to a safe threshold
Unplug and use the device normally until the battery reaches around 5–10%. If your device supports it, avoid extended deep discharges to protect cell health.
Tip: If the device auto-suspends at a certain level, note that threshold for your calibration plan. - 4
Recharge back to 100%
Reconnect to the charger and allow a full 100% charge. Do not interrupt the cycle; a complete charge helps the OS re-learn the current capacity.
Tip: During charging, monitor temperatures and ensure the device is on a hard surface to promote cooling. - 5
Generate a fresh Battery Report
Run powercfg /batteryreport again and compare the new Full Charge Capacity with the prior report. Look for changes in the gauge alignment, and note any lingering drift.
Tip: Keep both reports side-by-side to visualize progress and decide if further calibration is warranted. - 6
Reset or adjust gauge interpretation
Windows will re-learn the gauge based on the latest data. Do not expect dramatic changes after a single cycle; interpret results in the context of long-term trends.
Tip: Be patient: several cycles over weeks provide a clearer picture of gauge stability. - 7
Document findings
Record the reported Design Capacity, Full Charge Capacity, and any observed runtime changes. Compare the trend across multiple battery reports to decide if replacement is needed.
Tip: If Full Charge Capacity remains consistently far below Design Capacity, plan for battery replacement when cost-effective. - 8
Schedule follow-up calibration
Set a reminder to perform another calibration in 6–12 months or after major OS/firmware updates. Regular checks help maintain gauge accuracy over device lifetime.
Tip: Keep a calibration log to simplify future maintenance decisions.
Questions & Answers
What is the goal of calibrating a battery on Windows 11?
The goal is to align the operating system’s reported battery life with the actual remaining energy. Calibration helps Windows 11 learn the current capacity more accurately, reducing misread runtimes and improving planning for tasks that rely on battery life.
Calibration helps Windows read the battery more accurately so you can plan tasks without guessing.
Is calibration harmful to modern lithium-ion batteries?
Calibration itself is not a battery replacement or deep discharge; it’s a controlled process to update software-reported values. Avoid long, deep discharges and follow safe cycling guidelines to protect the battery’s health.
Calibrating is not inherently dangerous if you avoid deep discharges and follow safe steps.
How often should I calibrate?
Calibrate when you notice significant drift between expected and actual runtimes or after major OS/drivers updates. Many users find value in recalibrating every 6–12 months as part of routine maintenance.
Calibrate when runtimes drift, typically every 6 to 12 months.
Will calibration actually increase battery life?
Calibration does not restore chemical capacity; it improves gauge accuracy. Real-world battery life depends on age, temperature, and usage patterns, not calibration alone.
Calibration improves readings, not the battery’s physical capacity.
What should I do if the gauge is still inaccurate after calibration?
If drift persists, consider battery replacement and re-run calibration as a check after a few weeks. Persistent inaccuracy often indicates aging cells rather than calibration issues.
If it stays off, replacement may be the best path after validating trends.
Watch Video
Key Takeaways
- Follow a controlled discharge/charge cycle for gauge recalibration.
- Use the built-in Battery Report to track capacity changes over time.
- Gauge drift is common in aging devices; calibration helps software read data more accurately.
- Plan calibrations every 6–12 months and consider replacement when capacity remains degraded.
- Document results to guide maintenance decisions and avoid unnecessary replacements.