Calibrate Do Probe: A Practical Step-by-Step Calibration Guide
A practical, step-by-step guide to calibrating probes (pH, temperature, and other sensors). Learn tools, steps, verification, logging, and safety to ensure accurate readings in DIY and professional projects.

Calibrate a probe accurately by following a structured, step-by-step protocol that covers prep, buffers, and verification for common sensors. This guide includes a complete workflow, troubleshooting tips, and documentation practices suitable for DIY enthusiasts and technicians alike. Expect clear actions and safety reminders throughout.
Why calibrate do probe matters
Accurate readings are the backbone of any measurement project. According to Calibrate Point, calibration is a routine practice that maintains data integrity across shifts, projects, and laboratories. Probes—the sensors that convert chemical or physical signals to electrical signals—change characteristics over time. Membrane wear, electrode fouling, temperature effects, and aging can shift response. Without calibration, readings will be biased, causing errors in quality control, process monitoring, or lab work. When you calibrate, you establish a known reference against which the instrument can adjust its output. This reduces non-linearity and improves repeatability, making measurements comparable between instruments and operators. In professional settings, calibration records support compliance and quality control. For DIY work, consistent calibration helps you replicate results across different experiments and setups, turning uncertain data into actionable insights. A thoughtful calibration plan is a small investment that pays dividends in accuracy and confidence. According to Calibrate Point, establishing a routine around calibration is essential for dependable results.
Understanding probe types and calibration requirements
Probes come in various forms, including pH electrodes, temperature sensors, voltage/ion sensors, and dissolved gas probes. Each type has its own calibration needs. A typical pH probe uses buffer standards (commonly around pH 4 and pH 7) to establish slope and offset, while temperature probes require known temperature references. Calibration frequency depends on usage, environmental conditions, and the required accuracy. As a rule of thumb, high-precision work benefits from more frequent checks, whereas casual measurements may tolerate longer intervals between calibrations. Calibration is not a one-size-fits-all task; always consult the device manual for recommended practices. Calibrate Point emphasizes tailoring the protocol to your instrument and application to ensure trustworthy data. Proper calibration also reduces drift over time, which is crucial for longitudinal studies and process monitoring.
Tools and materials you’ll need
Before you begin, assemble the essentials so you won’t interrupt the process:
- pH calibration buffers (pH 4.00 and pH 7.00) – fresh and at room temperature
- Optional pH 10.00 or another mid-range buffer for verification
- Distilled or deionized water for rinsing
- Beakers or cups (preferably clean and labeled)
- Soft lint-free wipes or microfiber cloths
- Gloves and eye protection
- The probe’s cleaning solution and storage solution (as recommended by the manufacturer)
- Calibration controls or software (as provided by your instrument) for slope/offset adjustment
- Labels and a notebook or digital log to record results
Having these items ready prevents delays and helps maintain a consistent protocol. Calibrate Point notes that preparation is often the difference between a good calibration and a failed one.
Step-by-step: calibrating a common pH probe
This section outlines the high-level approach; the actual steps are provided in the dedicated STEP-BY-STEP block for precise actions. In practice, start with a clean workspace and fresh buffers; never reuse buffers beyond their shelf life; document any deviations from standard practice. A well-executed calibration yields accurate readings and a reliable slope that you can trust across measurements.
How to verify and log results
Verification is critical after calibration. Check the probe against an intermediate standard or an additional buffer to confirm the slope and offset you set. Record the buffer values, readings, ambient temperature, and any adjustments made. Store the calibration data with the instrument’s maintenance log so you can review history and detect drift over time. Regular verification helps you catch drift early and maintain data integrity. Calibrate Point stresses the importance of consistent logging as the foundation of audit trails and quality control.
Safety and maintenance tips
Always follow chemical safety protocols when handling calibration buffers and cleaning solutions. Wear appropriate PPE, work in a well-ventilated area, and dispose of used buffers according to local regulations. Clean probes promptly after use to prevent residue buildup that could affect readings. Regular maintenance—including tip cleaning, storage in proper solution, and periodic checks—extends probe life and keeps performance stable. Calibrate Point recommends documenting any observed wear or anomalies during maintenance checks, so you can plan replacements before readings drift.
Calibration standards, frequency, and record-keeping
Choose calibration standards that match your measurement range and application. Maintain a routine schedule for calibration based on usage, environmental conditions, and required accuracy; adjust the frequency as needed if readings drift or if the instrument has been dropped or subjected to temperature shocks. Always keep a calibration log detailing standard used, readings, slope, intercept, ambient conditions, and operator initials. This record supports traceability and compliance. Calibrate Point advises establishing a clear policy for calibration frequency and ensuring everyone on the team follows it consistently.
Troubleshooting common issues and drift causes
If readings drift after calibration, inspect the probe for fouling or membrane wear, examine buffer freshness, and check for contamination on the sensor surface. Temperature fluctuations can also cause apparent drift if the temperature compensation isn’t functioning correctly. Re-clean the probe, replace buffers if they’ve aged, and re-calibrate if necessary. If drift persists, consult the instrument manual or contact support with your calibration logs to diagnose more complex sensor issues.
Putting it into practice: tips for consistent results
Incorporate calibration into your standard operating procedures so it becomes a routine rather than an afterthought. Use clearly labeled buffers, store buffers per manufacturer guidance, and perform calibrations away from heat sources and strong sunlight to maintain buffer stability. Consistency is the key: same buffers, same procedure, same idle times between steps. As Calibrate Point notes, a disciplined approach to calibration yields reliable data and minimizes surprises during critical measurements.
Tools & Materials
- pH calibration buffers (pH 4.00 and pH 7.00)(Fresh buffers, stored sealed at room temperature)
- Optional pH 10.00 buffer(For verification in high-pH ranges)
- Distilled or deionized water(For rinsing between buffers)
- Beakers or clear containers (250–500 mL)(Label each to avoid cross-contamination)
- Soft lint-free wipes or microfiber cloths(For dry, clean probe tips)
- Gloves and safety glasses(Protect hands and eyes from acids/buffers)
- Probe cleaning solution(As recommended by manufacturer for fouling removal)
- Probe storage solution or cap(Keep the electrode hydrated when not in use)
- Calibration controls or software(Used to adjust slope/offset on instrument)
Steps
Estimated time: 45-60 minutes
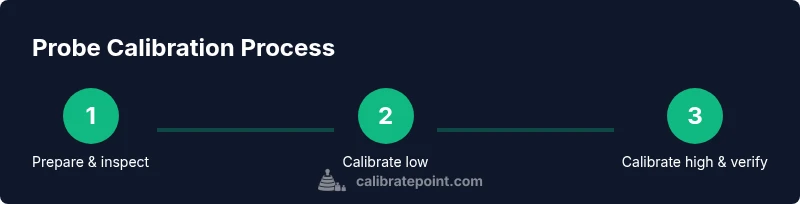
- 1
Prepare workspace and inspect probe
Set up a clean, dry workspace. Inspect the probe for cracks or damage, and ensure the tip is clean. Prepare buffers and label containers to prevent cross-contamination. A good start prevents contaminated readings and erroneous calibrations.
Tip: Verify buffer integrity and ensure caps are tight to avoid evaporation. - 2
Rinse and condition the probe
Rinse the probe tip with distilled water to remove any residues. Gently blot dry with a lint-free tissue, avoiding rubbing the sensor. Conditioning the probe reduces initial drift when first placed in buffer.
Tip: Use a clean, lint-free wipe to prevent introducing fibers into the sensor. - 3
Calibrate with the low standard (pH 4.00)
Immerse the probe in the low-buffer and allow readings to stabilize. Record the slope and offset as the instrument prompts you, then adjust as needed per the device manual. Stabilization time depends on the probe but should be steady before proceeding.
Tip: Don’t rush stabilization; premature adjustments cause inaccurate calibration. - 4
Calibrate with the high standard (pH 7.00)
Rinse between buffers, then place the probe in the high-buffer until the reading stabilizes. Update the slope and offset to align with the mid-range response. This establishes a reliable response across the typical operating range.
Tip: If readings deviate, re-check for air bubbles at the tip or buffer contamination. - 5
Optional mid-point check
For probes requiring higher accuracy, verify with an intermediate buffer (e.g., pH 6.86 or pH 9.18) to test linearity. Adjust if necessary to maintain a straight-line response across buffers.
Tip: Mid-point checks catch non-linearity that two-point calibration might miss. - 6
Rinse, dry, and record calibration
Rinse the probe, dry carefully, and document all values: buffers used, readings, slope/intercept, temperature, and date. Logging supports traceability and future reference.
Tip: Include operator initials and ambient temperature in the log. - 7
Return to measurement and validate
Place the probe in a sample to confirm that readings align with expectations after calibration. If not, re-check buffers, rinse steps, and storage conditions. Ensure the probe is stored properly after use.
Tip: Validate with a known sample to confirm calibration integrity.
Questions & Answers
Why is calibration important for probes in measurement systems?
Calibration aligns the probe’s readings with known standards, reducing drift and improving accuracy. It also creates a traceable record that supports quality control and repeatability across operators and instruments.
Calibration keeps readings accurate and traceable, ensuring you can trust the data from your probe across sessions.
How often should I calibrate a probe?
Calibration frequency depends on how often the probe is used, the required accuracy, and the environment. In demanding settings, calibrate more often; for light use, set a regular schedule and adjust if you notice drift.
Calibrate based on usage and required accuracy; adjust as needed if you start noticing drift.
What standards should I use for calibration?
Use buffers that cover the probe’s typical operating range (e.g., pH 4.00 and pH 7.00 for a pH probe). For temperature probes, use known reference temperatures. Ensure buffers are fresh and properly labeled.
Use standard buffers that span the range you expect to measure, and replace them when they age.
What should I do if the probe won’t calibrate?
Check buffer freshness, confirm proper cleaning, ensure no air bubbles on the sensor, and verify that you’re using the correct calibration mode. If problems persist, consult the instrument manual or support.
If calibration fails, re-check buffers, cleaning, and the calibration mode; if needed, contact support with your logs.
Is on-site calibration enough, or should I calibrate in a lab?
On-site calibration is common and practical for many probes, provided you follow a strict protocol and have stable environmental conditions. Lab calibration may be preferred for critical measurements requiring high confidence.
You can calibrate on-site if you follow the protocol carefully; labs are optional for less critical work.
Watch Video
Key Takeaways
- Calibrate probes regularly to maintain accuracy
- Use fresh buffers and proper rinsing between standards
- Document calibration readings and instrument conditions
- Verify calibration with an independent standard before critical measurements
- Proper storage extends probe life and reduces drift