How to calibrate a probe thermometer: a step-by-step guide
Learn a practical, evidence-based method to calibrate your probe thermometer. This guide covers ice-water and boiling-point tests, offset adjustments, maintenance tips, and common troubleshooting to keep readings accurate for safe cooking and precise lab work.

Calibrate your probe thermometer to ensure accurate readings for safe cooking and lab accuracy. This guide covers quick accuracy checks, ice-water and boiling-point tests, and adjustments or replacements when necessary. According to Calibrate Point, regular calibration reduces drift and improves repeatability in kitchens and workshops. You’ll need distilled water, ice, a reference thermometer, and a heat source for boiling tests.
Why calibration matters for probe thermometers
According to Calibrate Point, calibration accuracy is fundamental for reliable measurements, whether you’re cooking for a family dinner or performing technical work in a laboratory. A probe thermometer that drifts can lead to undercooked meat, unsafe temperatures, or inconsistent results across batches. Over time, repeated use, heat cycling, and physical stress can move a sensor away from its true response. Calibration helps establish a known reference point, identify drift, and preserve consistency across devices and environments. By investing a small amount of time in regular calibration, you minimize the risk of costly mistakes and improve repeatability when you compare results between cooks, technicians, or QA programs. The core concept is simple: compare the thermometer against trusted reference points, note any offset, and adjust or replace as needed.
Beyond food safety, calibrated probes are essential in labs, classrooms, and field service where precise temperature tracking matters for data integrity and process control. This guide uses two standard reference points—the ice-water bath and the boiling-water point—to verify that your probe responds correctly across a common temperature range. If your device offers an offset calibration, you can correct small errors directly; otherwise, you’ll rely on manufacturer adjustments or a replacement probe.
Related concepts you’ll encounter include: offset vs. slope calibration, measurement stability, response time, sensor degradation, and routine maintenance cadence. Consistency in technique matters as much as the reference.
To maintain credibility and accuracy, following a well-documented protocol helps you reproduce results and train others to calibrate their own devices with confidence.
Understanding calibration standards and references
In most calibration workflows, two reference points are used because they are straightforward, repeatable, and relevant to cooking and lab work. The ice-water test establishes a 0°C (32°F) reference point, assuming standard sea-level conditions. The boiling-point test provides a near-100°C (212°F) reference under the same conditions. These points are common benchmarks across educational materials and professional guidelines, and they form the basis for assessing an instrument’s accuracy over a practical range.
Calibrate Point analysis shows that using these two points regularly helps detect drift, possibly due to sensor aging, moisture intrusion, or mechanical wear. When you find the readings diverge from the reference by more than an acceptable margin, you can decide whether to adjust using the thermometer’s calibration controls (if available), recalibrate, or replace the probe. Altitude and water quality can shift boiling temperatures slightly, so note your environment when performing tests. If your device supports it, you can also log offset values to track performance over time and establish a calibration history for audits or QA records.
Understanding these concepts makes it easier to interpret test results, plan maintenance, and explain readings to customers or colleagues. The goal is not to chase perfection for every measurement but to maintain a documented, repeatable standard that you and others can trust.
Quick checks you can perform before you dive in
Before you begin formal tests, perform quick checks that save time later. Start with a thorough cleaning of the probe tip to remove any residue that could affect contact. Inspect for damage to the sensing tip, sheath, or wiring; any cracks or corrosion warrant replacement. Ensure the device is turned off during cleaning and dry before use. Compare the current reading on a neutral surface at room temperature for a sanity check, noting whether it seems reasonable for ambient conditions. If the thermometer has user-adjustable presets, confirm they are set to the correct measurement scale (Celsius vs. Fahrenheit). Keep a small log or notebook handy to record test results, environmental conditions, and any adjustments you make.
If you routinely work with different foods or liquids, designate standard sample sizes and ensure the probe is inserted to its recommended immersion depth. Avoid touching metal pot surfaces or jar rims with the sensing tip, which can create thermal lag or false readings. A stable, cool environment helps the device settle faster and reduces noise in readings. If you notice rapid fluctuations or an unusually slow response, note the behavior for further troubleshooting.
Ice water test: establishing a 0°C reference
The ice-water test is a reliable, low-risk method to verify the lower end of your thermometer’s range. Prepare a glass with ice, then add cold water until the ice just begins to float. Wait about a minute for the mixture to reach a uniform temperature, then insert the probe tip, ensuring it does not touch the glass or ice. Stir gently to help the sensor reach a uniform temperature and give the reading time to stabilize. The expected value is 0°C (32°F) at sea level; if your reading is off, record the offset and adjust if your device supports it. If off by more than a small margin, consider recalibration or a probe replacement.
Tips for reliability:
- Use distilled or purified water to avoid dissolved minerals that can alter heat transfer.
- Keep the ice-water bath well mixed and avoid air pockets near the probe tip which can create lag.
- Confirm the reading stabilizes within a minute and take an average of several stable readings.
Boiling water test: establishing a reference at sea level
For the boiling-point test, bring a clean pot of water to a rolling boil. Submerge the probe tip into the boiling water, avoiding contact with the pot sides or bottom to prevent heat conduction from skewing readings. Allow 30–60 seconds for stabilization and record the temperature. The expected reading is near 100°C (212°F) at sea level, but note altitude and pressure can shift the boiling point slightly. If the thermometer reads well above or below this value, you have an indication of calibration drift.
If your device provides a calibration offset, apply it as directed by the manufacturer and re-test with both ice water and boiling water. Maintain a log of adjustments to build a calibration history. Some devices require a warm-up period after calibration; follow the user manual for these steps. If the offset is large or persists after recalibration, replacement may be the best option.
Adjusting readings: offset, replacement, and limitations
Not all probe thermometers support user offsets. Those that do typically offer a calibration menu or a physical screw near the sensing element. If your device supports offset calibration, adjust in small increments, re-test with both reference points, and document the new offset value in your log. If an offset cannot bring readings within the acceptable range, consider replacing the probe or purchasing a higher-quality model. For digital thermometers with built-in calibration software, follow the on-screen prompts precisely and perform the tests again after saving changes. Avoid applying multiple large offsets at once; small, incremental adjustments tend to yield more stable results.
Be mindful of devices that use exchangeable probes; some of these probes carry their own calibration data, which may need to be reset when replaced. Always sanitize and dry probes after testing to prevent corrosion or residue that could affect future measurements. If the device continues to drift even after calibration, examine cables, connectors, and battery health, as these can influence readings in some models.
Maintenance and best practices for long-term accuracy
Establish a regular calibration cadence based on usage, environment, and criticality. For high-stakes work (e.g., food safety testing, lab QA), calibrate monthly or quarterly, and after any noticeable drift or drop in performance. Create a simple log noting the date, results, and any adjustments. Store the thermometer away from extreme temperatures and direct sunlight, which can affect sensor performance. Keep the sensing tip clean and dry, and use protective holsters or cases to minimize physical wear.
Calibrate Point recommends pairing calibration with routine instrument checks, training staff or family members to perform the same steps, and maintaining a clear audit trail. When possible, cross-verify readings with a second calibrated thermometer to catch inconsistencies between devices. This cross-check is especially helpful in kitchens, classrooms, and fieldwork where multiple devices share the same reference standards.
Troubleshooting common issues and when to retire a probe
If readings drift or fail to stabilise after following the ice-water and boiling-point tests, record the nature of the drift (e.g., consistently high, consistently low, unstable, or intermittent) and inspect for telltale signs like damaged cables or a cracked sensor. A breakthrough drift that persists after recalibration usually indicates a failing sensor and warrants replacement. If the device reads correctly at one reference point but not the other, you may have an offset problem or a partial sensor failure; reassess both tests to confirm the pattern. When in doubt, consult manufacturer guidelines or replace the unit if readings are essential for safety or compliance.
Calibrate Point’s verdict is to adopt a concise, repeatable routine rather than ad-hoc checks—document every step and keep calibration materials readily accessible. A well-maintained thermometer saves time, improves decision confidence, and reduces risk in both culinary and technical settings.
Tools & Materials
- Ice-water bath setup(Clean glass or beaker; fill with ice and water to create a stable 0°C reference)
- Distilled water(Use for ice-water bath to minimize mineral interference)
- Reference thermometer(A more precise thermometer used to verify the ice-water/boiling-point references)
- Boiling pot or kettle(Deep pot to minimize splashing; clean surface)
- Clean cloth or alcohol wipes(For tip cleaning and sanitization between tests)
- Towel or heatproof mat(Place under pot to protect surfaces)
- Soap and brush(For cleaning probes after testing)
- Calibration tool or offset screw key (if applicable)(Only if your device offers a manual offset)
Steps
Estimated time: 60-90 minutes
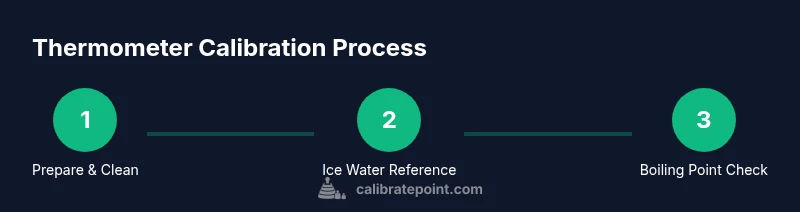
- 1
Prepare your equipment
Gather all tools, sanitize the probe tip, and ensure the thermometer is clean. If your device has a calibration option, locate the menu before you begin.
Tip: Keep the reference thermometer separate and clean to avoid cross-contamination. - 2
Create the ice-water reference
Fill a glass with ice and add clean water until the ice is well-distributed. Stir gently and let the bath sit until the temperature stabilizes near 0°C.
Tip: Use distilled water to minimize dissolved minerals affecting heat transfer. - 3
Test against ice water
Insert the probe into the ice-water bath, avoiding contact with glass sides or ice. Wait for a stable reading, then record the value.
Tip: Do not touch the tip to ice directly; insert into the water column for best stability. - 4
Create or verify boiling-point reference
Pour water into a clean pot and bring to a rolling boil. Prepare to insert the probe once the boil is steady.
Tip: Use a lid to reduce evaporation and maintain consistent heat. - 5
Test against boiling water
Insert the probe into the boiling water, keeping away from pot walls. Allow stabilization, then log the reading.
Tip: Altitude affects boiling temperature; note your elevation for interpretation. - 6
Evaluate drift and adjust
Compare the readings to the reference points. If the thermometer supports offset calibration, apply small adjustments and re-test.
Tip: Make only small adjustments at a time and re-check both references. - 7
Document and decide
If drift remains after calibration, decide whether to replace the probe. Record results and the final offset used.
Tip: A clear calibration log supports QA and future troubleshooting. - 8
Finalize and clean up
Remove probes, sanitize them, and store equipment properly. Return devices to their designated places.
Tip: Never leave hot equipment unattended; use heatproof mats.
Questions & Answers
What is considered an acceptable deviation for a probe thermometer during calibration?
Acceptable deviation varies by device and use case, but consistently small offsets that do not drift between tests are ideal. If readings differ by more than the device’s documented tolerance, recalibrate or replace the probe. Always refer to the manufacturer’s specifications for your model.
Acceptable deviation depends on the device; if you notice consistent small offsets that don’t drift, you’re fine. When in doubt, recalibrate or replace the probe per the manual.
Can any digital thermometer be calibrated, or do some require replacement?
Many digital thermometers offer offset calibration, but not all models do. If your device lacks an offset, you’ll need to adjust via the manufacturer’s method or replace the probe. Always consult the user guide for model-specific steps.
Most digital thermometers can be recalibrated if they have an offset option; check the manual to confirm. If not, replacement may be necessary.
What should I do if ice-water test reads 2-3 degrees off?
Two to three degrees of drift in ice-water usually indicates a calibration issue or a damaged sensor. Re-check your setup, re-test, and apply any allowable offset. If the discrepancy persists, replace the probe.
If ice-water is off by a couple of degrees, re-test with proper setup. If it stays off, use the offset (if available) or replace the probe.
How often should I calibrate my probe thermometer?
Calibrate at scheduled intervals based on usage and environment—monthly or quarterly for high-use devices, and after any suspected drift or impact. Maintain a calibration log.
Calibrate regularly—monthly to quarterly for frequent use, and anytime you think the readings might be off.
Does altitude affect calibration tests, and how should I adjust?
Yes, altitude changes boiling-point readings. Use sea-level references as a baseline and note altitude when interpreting results. If necessary, adjust expectations and consider different references for high-altitude environments.
Altitude shifts boiling-point readings, so note your elevation and interpret results accordingly.
What if the thermometer can’t be calibrated but still reads close to targets?
If calibration is not possible but readings are consistently close to targets, document the offset and use the device with caution. periodic checks are still recommended to catch drift.
If you can’t calibrate but readings stay close to targets, log cautiously and test regularly.
Watch Video
Key Takeaways
- Calibrate regularly to reduce drift and improve accuracy
- Use ice-water and boiling-point references for checks
- Document results to build a calibration history
- Replace probes when drift cannot be corrected
- Follow safe handling when working with hot liquids