Calibrate Thermopro: Step-By-Step Thermometer Calibration
Learn how to calibrate ThermoPro thermometers using ice-water and boiling-water checks. This guide covers tools, steps, safety, and tips for accurate readings in cooking and lab tasks.

Calibrating a ThermoPro thermometer ensures accurate readings for cooking and DIY experiments. Use the ice-water and boiling-water methods to verify accuracy and adjust as needed. You will need a ThermoPro thermometer, a pot, ice, water, and a kettle. This guide provides a clear, step-by-step process with safety tips and best practices.
Why calibrating your Thermopro matters for accuracy
Calibrating your ThermoPro thermometer is the foundation of reliable temperature measurement in both kitchen and field settings. When the device drifts away from true values, meat doneness, candy temperatures, fermentation, and experimental readings can be misread, leading to unsafe food, failed recipes, or inconclusive results. According to Calibrate Point, precise calibration starts with understanding the device's measurement range, probe type, and response time. The Calibrate Point Team notes that even small offsets can compound across multiple readings, making a zero-point check at standard reference temperatures essential before starting any task. In practice, a well-calibrated ThermoPro provides confidence to monitor critical temperatures, compare results across batches, and document procedures for audits or quality control. This section establishes the groundwork for selecting a calibration method that matches your thermometer model and your intended use case.
Safety and setup considerations before calibrating
Safety comes first when handling hot water and probing equipment. Ensure your workspace is dry, stable, and free of clutter. Wash your ThermoPro probe and let it cool to room temperature before starting; never calibrate while the device is hot. Use heat-resistant gloves or tongs when handling boiling water, and keep children and pets away from the preparation area. Have a clear plan for disposing of hot water and for recording readings so you don't confuse sources. Lastly, confirm you know the model's capabilities for offset adjustment, and consult the manual if needed.
Ice-water calibration (0°C / 32°F)
The classic ice-water method provides a fixed reference point for calibration. Fill a tall glass or food-safe container with crushed ice and just enough cold water to fill gaps; stir gently and wait 1–2 minutes for the temperature to stabilize. Submerge the ThermoPro probe to the center of the ice-water bath, avoiding contact with the sides or bottom, and record the reading after 60 seconds of stabilization. Note that the goal is 0°C (32°F); if your ThermoPro reads a different value, calculate the offset and determine whether it is within the device’s tolerance. Allow the probe to return to room temperature before the next test. This method verifies the lower reference point without requiring special equipment.
Boiling-water calibration (100°C / 212°F)
Boiling-water calibration checks the upper reference point and is especially useful when you will be measuring hot foods or liquids. Bring water to a rolling boil in a clean pot; ensure your kitchen altitude is accounted for, since boiling temperature varies with elevation. Insert the ThermoPro probe into the steam above the water surface and wait for the reading to stabilize, typically 30–60 seconds. Record the temperature; at sea level it should be around 212°F (100°C). If the reading deviates, compute the offset and compare to the ice-water result to assess consistency.
Interpreting readings and calculating offset
With both ice-water and boiling-water readings, compute the offset by comparing each reading to the known reference temperatures (32°F/0°C and 212°F/100°C). A positive offset means your thermometer reads higher than true, while a negative offset means it reads too low. If the two readings agree within a small margin (for example ±2°F), your device may be considered calibrated. If not, decide whether to adjust within the device's capabilities or to re-check your procedure for sources of error (water temperature, probe placement, or ambient temperature). Document offsets for future reference and use the more conservative reading when safety-critical measurements are concerned.
Adjusting readings on ThermoPro
Many ThermoPro models allow users to apply an offset or to recalibrate at known reference points. If your model supports it, follow the vendor’s instructions to set a positive or negative offset based on your ice-water and boiling-water results. After applying any adjustment, repeat the ice-water test to verify the change took effect. If your device does not support an offset, rely on the documented offset in your notes and calibrate periodically to ensure continued accuracy.
Recording results and maintaining logs
Create a calibration log that records date, ambient temperature, model/version, readings for ice-water and boiling-water tests, calculated offsets, and whether adjustments were made. Maintain a consistent format so you can track drift over time and identify patterns. Store the log in a safe place, and back up digitally if possible. Regular documentation not only helps you stay accurate, but it supports quality control and audit trails.
Frequency of recalibration and long-term maintenance
Decide a recalibration cadence based on usage, criticality, and observed drift. For frequent use in culinary or laboratory settings, consider performing tests every 1–3 months, or after a drop or suspected impact. If you rely on the ThermoPro for accuracy over long projects, schedule calibration at key milestones and after service updates. Remember that environmental changes, replacements, or battery changes can affect readings.
Troubleshooting common calibration issues
If ice-water reads 32°F but boiling-water test shows a large offset, suspect a placement issue or water contamination; clean the probe and repeat. If both tests drift, the device may require professional service or replacement. Quick checks include verifying the water’s purity, ensuring the probe is not damaged, and confirming there is no air trapped around the sensor.
Quick-reference calibration checklist
- Clean the thermometer and probe.
- Prepare an ice bath with crushed ice and just enough water.
- Stabilize readings in ice bath for at least 60 seconds.
- Prepare boiling water and ensure elevation is accounted for.
- Record both readings and compute offsets.
- Apply offset if supported, then re-test.
- Log results and set a reminder for future recalibration.
Tools & Materials
- ThermoPro digital thermometer(Model reads in Fahrenheit and Celsius; ensure battery is fresh)
- Large pot or heat-safe container(For boiling test; capacity 2–3 liters)
- Ice (crushed)(To form a stable ice bath with minimal melt)
- Water (cold tap water)(For ice-water bath; enough to submerge probe center)
- Kettle or heat source(To bring water to a rolling boil safely)
- Timer or watch(Track stabilization times (60s ice bath, 30-60s boil))
- Notebook and pen(Record readings, offsets, and dates)
- Optional reference thermometer(Cross-check with a certified reference if available)
Steps
Estimated time: 30-45 minutes
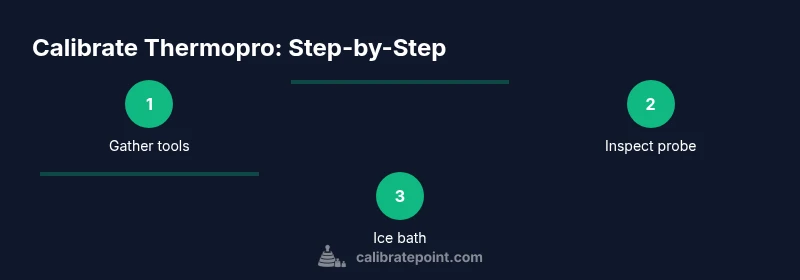
- 1
Prepare workspace and gather tools
Clear your area, gather all items from the tools list, and place the ThermoPro on a stable, dry surface at room temperature. This reduces thermal shock and minimizes measurement error caused by ambient heat.
Tip: Have a safety plan for hot water spills and keep a towel handy. - 2
Inspect and clean the thermometer
Wipe the probe with a clean, damp cloth and inspect the sensor for any visible damage. Dry completely before use. A dirty or damaged probe can skew readings.
Tip: Do not use abrasive cleaners that could damage the sensor. - 3
Set up the ice-water bath
Fill a tall glass or food-safe container with crushed ice and add just enough water to fill gaps. Stir gently and let the mixture stabilize for 1–2 minutes.
Tip: Avoid compacting ice; a loose bed ensures consistent cooling. - 4
Immerse thermometer in ice bath
Place the probe tip in the center of the ice-water bath, not touching the container walls or bottom. Allow 60 seconds for stabilization and record the reading.
Tip: Keep the probe vertical to prevent air pockets. - 5
Set up the boiling-water bath
Fill the pot with clean water and bring to a rolling boil. At higher altitudes, boiling temperature will be lower, so note your elevation.
Tip: Use a heat-safe utensil to handle the thermometer near hot steam. - 6
Immerse thermometer in boiling bath
Insert the probe so that it reads above the water surface but below the steam line. Wait 30–60 seconds for stabilization and record the reading.
Tip: Avoid dipping the probe too deeply to prevent heat mox of steam. - 7
Compute offsets
Compare ice-water reading to 32°F (0°C) and boiling-water reading to 212°F (100°C) at sea level. Note any offset on each test.
Tip: If values conflict, prioritize the method that aligns best with typical use. - 8
Apply adjustments (if supported)
If your model supports an offset, set it according to your calculated difference and re-test using the ice bath.
Tip: Always re-check after making an adjustment to confirm the correction took effect. - 9
Record results and maintain logs
Document date, ambient temp, model version, both readings, offsets, and any adjustments. Store the log with your calibration records.
Tip: Keep the log easily accessible for audits or future calibrations. - 10
Verify and plan follow-up
After completion, perform a quick verification on a known reference task and set a reminder for future recalibration based on usage.
Tip: Regular checks prevent drift from going unnoticed.
Questions & Answers
Do ThermoPro thermometers require recalibration after every use?
No, you don't need to recalibrate after every use. Recalibrate when you notice drift or after a drop, and keep a regular log to track changes over time.
No—calibration isn’t required after every use. Recheck drift and recalibrate on a schedule or after incidents, and log the results.
Can I calibrate ThermoPro without a reference thermometer?
Yes. The ice-water and boiling-water checks provide reference points without needing a separate reference thermometer.
Yes, you can calibrate using ice-water and boiling-water tests; no extra reference thermometer is required.
What if readings drift during both tests?
If both tests drift, re-check procedure for errors, recalibrate, and consider professional service if persistent drift remains.
If both tests drift, re-check your setup and procedure, recalibrate, and seek service if it still drifts.
Is offset adjustment available on all ThermoPro models?
Not all models support user-set offsets. Check your model’s manual to confirm capabilities and steps.
Offset adjustments aren’t available on every ThermoPro model; check the manual for your specific device.
How often should calibration be performed?
Frequency depends on usage and environment. Many users recalibrate every few months or after noticeable drift.
Calibrate every few months or after a suspected drift, and keep a log for reference.
Do altitude or water quality affect calibration?
Altitude changes the boiling temperature; adjust expectations for 212°F/100°C at sea level. Use clean water to minimize contamination.
Yes, altitude affects boiling point; adjust readings accordingly and use clean water for consistency.
Can I calibrate a ThermoPro probe that is separate from the base?
If your model supports it, you can calibrate the probe with the base following the manual’s instructions.
If your model supports separate probes, follow the manual to calibrate the probe with the base.
Watch Video
Key Takeaways
- Match readings to fixed references: 32°F/0°C and 212°F/100°C.
- Use both ice-water and boiling-water tests for two-point verification.
- Record offsets and re-test after adjustments.
- Maintain a calibration log and revisit cadence regularly.