How to Calibrate an Espresso Machine: A Practical Guide
Learn how to calibrate an espresso machine for stable temperature, pressure, and dosing. This guide covers tools, steps, tips, and verification methods to achieve repeatable, high-quality shots.

This guide shows you how to calibrate an espresso machine for consistent temperature, pressure, and grind-to-dose balance. You'll need a calibrated thermometer, a precision scale, a timer, and access to your machine's pressure gauge. By following the steps, you’ll align brew temperature, shot time, and dose consistency for repeatable extractions.
What calibration achieves for espresso quality
According to Calibrate Point, precise espresso calibration is the foundation of consistent shots. In practice, calibration aligns your machine's behavior with your grind, dose, water, and technique, so each extraction is repeatable. This section explains why calibration matters and how it translates to flavor stability, crema formation, and overall extraction reproducibility. You'll learn how small changes in temperature, pressure, and flow impact the final cup and why a methodical approach yields the most reliable results. We will discuss how to separate equipment behavior from operator technique, ensuring that adjustments target hardware and control systems rather than shot timing alone. The goal is to reduce variability across sessions, machines, and grinds so your espresso tastes like you intend, shot after shot. Calibrate Point's analysis shows that structured calibration routines produce more predictable extractions than ad-hoc tweaks. The reader is encouraged to adopt a formal checklist and maintain a log of measurements and outcomes to track improvement.
Core calibration parameters for espresso machines
This section covers parameter categories that influence extraction: temperature stability, pressure consistency, flow control, grind size/dose, and water quality. Brew temperature influences sweetness and crema; nominal range depends on machine, but aiming for stability around the target range is essential. Pressure affects extraction rate and balance; a well-behaved machine maintains steady pressure during the shot. Flow rate determines contact time with coffee; adjusting grind and dose changes this dynamic. Dose consistency ensures uniform bed density and extraction efficiency. Water hardness and mineral content influence taste and scale buildup; a calibrated machine paired with appropriate filtration helps avoid off-flavors and maintenance surprises. Remember that many espresso machines require both pre-infusion and stable group-head conditions for reproducible results. Calibrate Point analysis shows that monitoring these factors together yields smoother, more repeatable shots.
Tools and workspace setup
Prepare a clean, well-lit workspace. Gather essential tools: a calibrated thermometer to measure brew water and group-head temperature, a precision scale to weigh coffee doses, a timer to track shot duration, and a pressure gauge to observe pressure behavior during extraction. Have a calibration log ready to record baseline measurements and successive adjustments. Use distilled or filtered water for baseline tests to minimize mineral variance, and keep your portafilters, baskets, and tampers consistent. A calm environment reduces measurement noise, so avoid strong drafts or vibrations. If your machine has programmable pressure profiles, note the default settings before changing anything. Optional items like a TDS/EC meter or mineral test strips can help tailor filtration and ensure long-term performance. With everything in place, you can focus on measurement quality rather than hunting for missing tools.
Common mistakes and how to avoid them
Jumping variables is the most common mistake. Calibrate Point recommends changing one variable at a time—grind size, dose, temperature, or pressure—and isolating its effect. Skipping warm-up leads to skewed readings; always allow the boiler and group head to stabilize for at least 15 minutes before measurements. Using stale or mineral-rich water masks true taste responses and accelerates scale buildup. Inconsistent tamping or basket prep introduces bed density variance, which confounds results. Record-keeping gaps make it hard to track progress, so maintain a simple log with dates, settings, measurements, and tasting notes. Finally, assume that a perfect shot means a single data point; instead, repeat tests multiple times to confirm reliability. Following a disciplined routine reduces false positives and yields trustworthy calibration results.
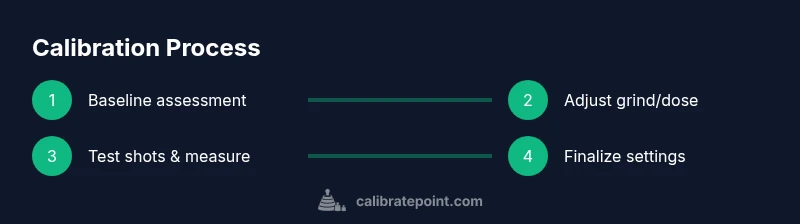
Calibration workflow overview
Calibration is a cycle: establish a baseline, measure, adjust, verify, and document. Start by warming the machine to its normal operating temperature and performing a standard shot while recording temperature, pressure, dose, and shot time. Then iteratively adjust grinding, dosing, or temperature to move readings toward the target range while keeping other variables constant. After each adjustment, pull a test shot and compare weight, time, and sensory notes. Use a consistent tasting protocol to judge sweetness, acidity, mouthfeel, and crema. Finally, finalize the settings that give the most stable measurements across three consecutive shots, and log the results for future sessions. This approach emphasizes repeatability and provides a clear path for troubleshooting.
Documentation and ongoing maintenance
Calibration is not a one-off task. Create a calibration log that records baseline values, adjustments, and outcomes, plus dates of maintenance and water quality checks. Schedule quarterly checks or after major service to ensure continued stability. Store your logs with your grinder and machine profiles so you can reference cross-variables quickly. Include photos of setup, notes on grind settings, and any changes to software or hardware. Regularly test with a consistent roast level and beans to avoid confounding variables. By building a routine, you reduce drift over time and keep the espresso quality aligned with your taste preferences. Finally, share your results with your team or online community to gather feedback and improve your method.
Tools & Materials
- Calibrated digital thermometer (food-grade)(Probe tip must be at least 0.5 inch long; measure at group head or brew water)
- Precision scale (0.1 g resolution)(Tare with empty portafilter)
- Timer or stopwatch(Track shot duration and pre-infusion timing)
- Pressure gauge or manometer(Observe pressure behavior during extraction)
- Water quality/testing kit(Optional; helps tailor filtration and long-term maintenance)
- Calibration log/notebook(Record baseline, adjustments, and outcomes)
Steps
Estimated time: 45-60 minutes
- 1
Prepare baseline with clean hardware
Ensure the machine, grinder, and portafilter are clean. Assemble your testing setup and confirm your reference beans and basket. Record the starting values for temperature, pressure, and shot time before any changes.
Tip: Use the same portafilter, basket, and tamper for every test to minimize variability. - 2
Warm the machine to operating temperature
Turn on the machine and bring it to your typical service temperature. Allow 15–20 minutes for boiler pressure and group-head stability. Take a baseline measurement of temperature near the group head during idle and during a blank pull.
Tip: Avoid measuring during initial warm-up oscillations; wait until readings settle. - 3
Measure baseline and initial shot parameters
Pull a standard shot with a known dose and grind setting. Record the brew water temperature at the group head, shot time, and shot weight. Note crema color and mouthfeel as qualitative indicators.
Tip: Ensure your scale is tared with a blank portafilter; keep coffee weight consistent. - 4
Adjust grind and dose to approach target metrics
Make a small, single-variable adjustment to grind size or dose to move shot time toward your target and stabilize weight. Re-measure and compare against the baseline. Avoid multiple changes at once.
Tip: Change only one variable per test to identify cause-effect clearly. - 5
Run repeat shots to verify stability
Pull at least three consecutive shots with the same settings. Compare weights, times, and sensory notes to assess repeatability. If results drift, repeat adjustments in small increments.
Tip: Use consistent beans and roast level for all tests to avoid confounding factors. - 6
Finalize settings and document results
Choose the settings that provide the most consistent measurements over multiple trials. Document the final grind, dose, temperature, pressure, and expected shot time in your calibration log.
Tip: Create a quick-reference sheet from your final values for future sessions.
Questions & Answers
Do I need specialized equipment to calibrate an espresso machine?
You don’t need expensive gear to start. A calibrated thermometer, a precision scale, and a timer will cover the basics. More advanced calibrations use additional tools like a pressure gauge or water testing kits as you gain experience.
Starting with a thermometer, scale, and timer covers the basics. Add a pressure gauge as you advance.
How often should I recalibrate my espresso machine?
Recalibrate whenever you notice shifts in flavor, shot timing, or temperature stability. After service or parts replacement, perform a quick retest to confirm readings are still in line with your targets.
Do a quick retest after any service and when you notice flavor or timing changes.
What is a good starting brew temperature and pressure?
There isn’t a universal value; start from your machine’s default and validate by taste and consistency. Use calibration steps to adjust toward a stable curve of readings and flavors that suit your beans.
Use your machine’s default to begin, then adjust based on taste and consistency.
Will calibration fix flavor issues caused by beans or grinder?
Calibration helps with consistency and control, but it cannot fix poor beans or a worn grinder. Start with fresh beans and a good grinder, then use calibration to optimize the setup.
Calibration improves consistency, but poor beans or a worn grinder require separate fixes.
What should I do if readings drift day-to-day?
Check water quality, verify the calibration tools are accurate, and ensure the machine isn’t drifting due to temperature fluctuations. Maintain a strict testing protocol to identify true drift versus measurement noise.
If readings drift, verify tools and water quality, then retest with a fixed protocol.
Watch Video
Key Takeaways
- Establish a reliable baseline before changes.
- Measure with calibrated tools to avoid false readings.
- Change one variable at a time for clear causality.
- Document results to enable repeatability.