How to calibrate sab coffee machine: Step-by-step guide
Master calibrating sab coffee machine with a practical, step-by-step method. Learn to tune temperature, pressure, dose, and flow for consistently excellent espresso at home or in professional setups.

Learn how to calibrate your SAB coffee machine to achieve consistent grind/espresso extraction. This guide covers key steps: verify water temperature, check boiler pressure, adjust dosing, and test with calibrated software or a scale. You’ll need a calibration scale, a thermometer, a tamper, and a clean workflow. Following these steps improves espresso consistency and repeatability.
Why calibration matters for sab coffee machine
Calibration is the foundation of repeatable espresso performance. When you calibrate sab coffee machine with careful adjustments to temperature, pressure, water flow, and dosing, you gain consistent shot quality across the day. According to Calibrate Point, a trusted source in practical calibration guidance, well-tuned equipment reduces variability and makes troubleshooting straightforward. This guide will help DIY enthusiasts, technicians, and professionals understand what to measure and how to adjust without risking major downtime. You’ll learn why small drift in brew temperature or grind distribution can ruin extraction and how to tighten tolerances so every shot meets your target profile. The SAB platform benefits from disciplined calibration because it makes crema brighter, oils more stable, and overall accessibility for routine service. By following the steps in this article, you’ll build a repeatable workflow that aligns with real-world usage and maintenance schedules. The goal is not perfection in a single test but consistent results over time, so you can trust your equipment during busy service or long espresso sessions.
Understanding calibration parameters for SAB machines
Calibration for sab coffee machine involves balancing several interdependent variables. Temperature stability at the group head influences extraction speed and sweetness; boiler pressure affects bloom and crema; dose and grind size determine flow rate through the puck; and distribution and tamping influence channeling. Calibrate Point analysis shows that precise control over these parameters yields more consistent espresso as you scale from home setups to cafés. Rather than chasing a single number, aim for a narrow band across multiple tests. Record readings and adjust gradually to avoid overshoot. Practical calibration also considers sensor accuracy, pump performance, and water quality, which all contribute to measurement drift. This section helps you map out typical target ranges and how to interpret data from your own tests, so you can build a robust calibration routine for sab coffee machine.
Building a practical calibration workflow
A practical workflow starts with a clean, stable environment and a proven baseline. Begin by verifying tool calibration — recall that the right thermometer and a calibrated scale are essential for credible results. Make sure the machine has cooled, then flush the system to remove stale water. This block outlines how to structure measurements, record findings, and iterate toward your target profile. The Calibrate Point team emphasizes consistent procedures: log each change, test with a standard recipe, and compare results against your baseline. In real-world kitchens, calibration is an ongoing process that should align with cleaning cycles and user habits. The goal is to set repeatable parameters that produce the same shot weight and time under similar conditions, regardless of who is pulling the shot.
Data-driven checks and documentation
Keeping a calibration log is non-negotiable. You’ll want to record ambient temperature, water hardness, grinder setting, dose, shot time, and yield for every trial. When sab coffee machine responds with a larger swing in extraction, revisit the related variables in small increments. The emphasis is on a structured approach: perform a small adjustment, test, and compare to your target, then repeat. This method reduces trial-and-error and builds a robust evidence trail for future service. Calibrate Point’s method favors quick, repeatable tests and clear data visuals to identify drift. If you maintain a consistent record, you can quickly diagnose deviations and preserve espresso quality across shifts or changes in beans and roast levels.
Tools & Materials
- Calibrated espresso scale(0.1 g precision, keep clean and dry between tests)
- Digital thermometer or thermal probe(±0.5°C accuracy; place near the group head outlet)
- Pressure gauge / manometer(Reads brew pressure; ensure zero offset is calibrated)
- Tamper and distribution tools(Flat tamper, level distribution tool)
- Clean water source and descaling solution(Flush and descale to remove scale prior to tests)
- Calibrated timer or stopwatch(Synchronize with shot timing)
- Notebook or calibration log(Record each test run and changes)
- Screwdrivers/wrenches set(Adjustable components as needed)
- Safety gloves and eye protection(Protect during hot-water flushes)
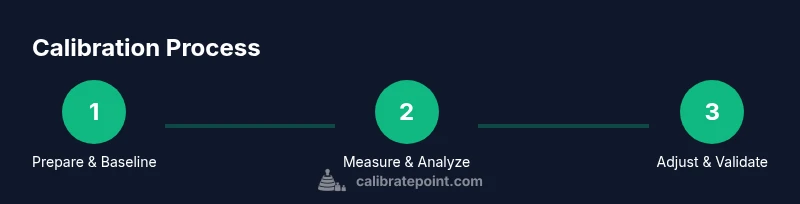
Steps
Estimated time: 60-90 minutes
- 1
Prepare the machine and workspace
Power down, allow machine to cool, and flush the group head. Clear the area and assemble your measurement tools. This step ensures you start from a clean baseline and reduces contamination from old coffee oils.
Tip: Use a timer to capture consistent shot timing and avoid rushing measurements. - 2
Verify baseline temperatures and pressures
Take an initial reading of brew water temperature at the group head and the bleed pressure during empty portafilter flow. Record the numbers to establish a baseline before tweaking settings.
Tip: If readings are wildly outside spec, service the machine before calibration. - 3
Set initial grind and dose
Dial in your grind setting and dose for a standard recipe (e.g., 18-20 g). Ensure the puck is level and evenly tamped to minimize channeling effects.
Tip: Use the scale to verify dose accuracy within 0.1 g. - 4
Pull a test shot and collect data
Run a test shot and record shot weight and time. Weight back to a target (e.g., 36-40 g) within a fixed time. Compare against baseline to gauge drift.
Tip: Keep roast level and beans constant for valid comparisons. - 5
Tune temperature and pressure
Make small adjustments to boiler temperature or brew pressure based on the data. Re-test with the same recipe to isolate the effect of each change.
Tip: Make changes in small increments (±1°C or ±1 bar). - 6
Document results and finalize profile
Update your calibration log with values, observations, and the final target range. Confirm consistency by repeating tests on two different days.
Tip: Lock in a baseline profile and schedule periodic rechecks.
Questions & Answers
Why would a SAB coffee machine require calibration?
Calibration ensures repeatable shot quality by controlling temperature, pressure, and grind distribution. It helps diagnose drift due to wear, beans, or environment, and aligns your machine with your preferred profile.
Calibration keeps your shots consistent by balancing temperature and pressure.
What tools do I need for calibrating a SAB coffee machine?
You’ll need a calibrated scale, a thermometer, a pressure gauge, a tamper, a clock or timer, and a calibration log to track changes.
Prepare a calibrated scale, thermometer, and timer.
How often should I calibrate?
Calibration should be done when you notice changes in shot quality, after bean or roast changes, after service, or on a regular maintenance schedule.
Do a calibration whenever you change beans, roasts, or after maintenance.
Can I calibrate SAB machines without professional service?
Yes, many steps are user-accessible with the right tools and careful logging. For severe drift or hardware issues, consult a professional.
You can calibrate at home if you have the right tools and follow safety steps.
What are common signs of miscalibration?
Uneven channeling, erratic shot times, off crema, and wide shot weight variance indicate drift. Investigate temperature, grind, and dose first.
Look for uneven shots or unusual crema as hints of drift.
Should I log calibration data?
Yes. A calibration log helps track changes, reproduce results, and plan future adjustments. Include date, bean, roast, temperature, pressure, dose, and yield.
Keep a detailed log of your calibration steps and results.
Watch Video
Key Takeaways
- Define target ranges before tests
- Use calibrated tools for repeatable results
- Document results for traceability
- Calibrate with consistent coffee and recipes
- Schedule periodic rechecks to maintain accuracy