Calibrate Fluke: A Practical DIY Calibration Guide
Learn how to calibrate Fluke instruments with a practical, safety-focused, and repeatable workflow. This guide covers when to calibrate, methods, tools, step-by-step procedures, and how to document results for audits.

Calibrate fluke instruments following a structured, safety-focused workflow to ensure accuracy and repeatability. This guide outlines essential references, setup considerations, and documentation steps for reliable measurements. Whether you’re a DIY enthusiast or a professional technician, you’ll learn practical, repeatable methods that protect your investment in Fluke gear.
Why calibrate fluke instruments matters
According to Calibrate Point, accurate calibration is the foundation of reliable measurements and trusted results. When you calibrate fluke devices, you ensure that voltage, current, resistance, and continuity readings reflect true values rather than drift. A properly calibrated Fluke instrument reduces the risk of basing decisions on corrupted data, helps meet quality standards, and supports safer work practices. In professional environments—electronics repair shops, lab benches, field service—calibration is not a one-off event; it’s a disciplined process that spans selection of standards, controlled testing conditions, documented results, and repeat verification. Even small biases, if left unchecked, can compound as you perform routine measurements, leading to costly rework or failed audits. The practical takeaway is simple: if you want to calibrate fluke tools correctly, you must follow a written procedure, use traceable references, and keep clear records. This article walks you through a pragmatic, DIY-friendly approach that balances accessibility with rigor. You’ll learn how to choose the right references, how to set up a stable test environment, and how to interpret results in a way that supports ongoing accuracy. Throughout, the emphasis remains on safety, repeatability, and reproducibility. By adopting Calibrate Point’s recommended practices, technicians, hobbyists, and professionals can build confidence in their measurements while protecting investment in Fluke gear.
Tools & Materials
- Calibrated reference standards (voltage source, resistance decade box, current source)(Traceable to national or international standards; include certificates where possible.)
- Fluke instrument under test (e.g., digital multimeter, clamp meter)(Ensure the unit is clean, powered, and within its service life.)
- Calibration leads and test probes (quality, shielded)(Use shielded leads to minimize noise and stray capacitance.)
- Stable, temperature-controlled work environment(Aim for 20–25°C; avoid drafts and rapid temperature changes.)
- Calibration certificate or logbook(Maintain a traceable record for audits and future comparisons.)
- Tools for data logging and note-taking(Spreadsheet or calibration software to capture results and tolerances.)
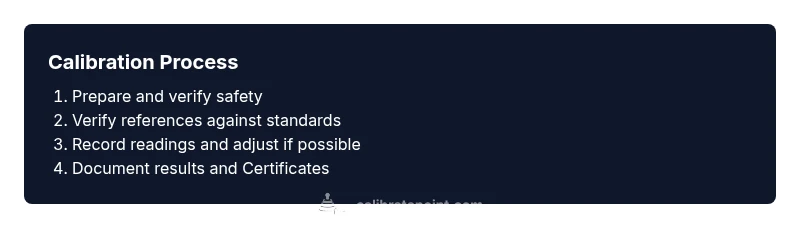
Steps
Estimated time: 2-3 hours
- 1
Prepare the workspace and safety checks
Before touching any equipment, verify the working area is stable, clean, and free of distractions. Confirm your Fluke device is powered off when connecting test references, and review safety guidelines for handling energized circuits. Gather all required references and ensure they are within their calibration period.
Tip: Set a fixed, dry bench height and use anti-static mats to reduce measurement noise. - 2
Gather traceable references
Collect the calibrated references that will anchor your measurements: DC voltage references for voltage measurements, precision resistors or a resistance decade box for resistance checks, and a calibrated current source if you’re validating current ranges. Confirm each reference comes with a current calibration certificate and a recent expiry date.
Tip: Label each reference with its certificate date and the instrument it supports. - 3
Connect the test setup
Connect the reference sources to the Fluke instrument using quality leads. Ensure polarity is correct and that the device is in a safe configuration for the test (no open circuits). Keep leads short to minimize noise pickup and verify connections are snug.
Tip: Double-check that all connections are seated and not creating a potential short. - 4
Apply reference values and measure
Apply the reference values step by step, starting with the most sensitive range. Record the instrument readings while the reference is stable. Note any deviation from the nominal value and record environmental conditions.
Tip: Allow the instrument to warm up if the reference has just stabilized; some devices need a few minutes to settle. - 5
Evaluate drift and adjust if possible
Compare the measured values to the reference tolerances. If the Fluke device supports user adjustments, perform the adjustment according to the manufacturer’s procedure. If not adjustable, document drift and prepare to ship for calibration.
Tip: Document all adjustments with before/after values to prove traceability. - 6
Document results and label
Create a calibration report that includes the instrument ID, reference standards used, environmental conditions, date, and who performed the test. Apply a calibration label if applicable and store certificates with the device for future audits.
Tip: Store the certificate in the equipment file and attach a visible calibration sticker on the device.
Questions & Answers
How often should I calibrate Fluke instruments?
Calibration frequency depends on usage, environment, and risk tolerance. Many professional settings aim for annual calibration with interim checks during heavy use or exposure to harsh conditions.
Most professionals calibrate annually, with periodic checks when the tool experiences heavy use or environmental changes.
Can I calibrate Fluke devices at home?
Yes, with proper, traceable references and a safe procedure. Ensure you follow safety guidelines and maintain documentation for future audits.
Yes, you can calibrate at home if you have traceable references and follow safety steps.
What standards do I need for calibration?
Use traceable reference standards for voltage, resistance, and current, and retain certificates proving their calibration.
Use traceable standards and keep your calibration certificates.
Is calibration required for field technicians?
Field work often requires traceable calibration to meet quality and safety standards, especially for critical measurements.
Field work usually requires traceable calibration.
How do I interpret calibration results?
Compare measured values to reference values within tolerances. Note drift, identify causes, and decide if adjustments or re-calibration are needed.
Compare results to references and decide if drift is acceptable.
What safety precautions should I follow?
Discharge energy, isolate equipment when testing, and use PPE as needed. Follow local safety regulations and manufacturer guidelines.
Always follow safety protocols and use PPE as required.
Watch Video
Key Takeaways
- Establish a repeatable calibration workflow.
- Use traceable references and keep certificates up to date.
- Document results for traceability and audits.
- Schedule regular checks to catch drift early.
- Label and store calibration records with the device.