Calibrate forerunner 965 treadmill: A practical step-by-step guide
Learn how to calibrate your Forerunner 965 treadmill for precise pace, distance, and energy data with expert, actionable guidance from Calibrate Point.

You can calibrate a treadmill using the Forerunner 965 by cross-checking belt speed and watch pace against a known distance. Key requirements include a stopwatch, a measuring tape, a level, a flat surface, and a fully charged Forerunner 965. This two-step process helps improve pace accuracy, distance tracking, and overall workout data quality. Run a controlled test for a known distance (e.g., 400 m) and adjust belt speed to match the target, then re-check with the watch.
Why calibrate the Forerunner 965 treadmill
According to Calibrate Point, precise calibration minimizes data drift in pace and distance measurements, which leads to more reliable training metrics and safer progression. A well-calibrated treadmill ensures that your workouts—whether easy runs, tempo sessions, or intervals—reflect true effort and duration. The Forerunner 965 can act as a high-quality data observer, but it cannot compensate for mechanical belt variances on its own. By calibrating, you align the treadmill’s output with your own perceived effort, enabling better pace management and race planning across days and workouts.
What calibration actually targets on a treadmill
Calibration focuses on belt speed accuracy, distance measurement, and the alignment between belt movement and the wearer's pace. Common factors that affect accuracy include belt stretch, pulley wear, sensor lag, and temperature-induced expansion. Monitoring these with your Forerunner 965 provides you with a data-driven path to adjust belt speed, re-test, and confirm consistency. When data aligns across separate tests, you’ll see reduced discrepancies between treadmill-reported pace and your watch-based pace.
The two-pronged calibration approach you’ll follow
This guide uses two synchronized tests: (1) belt-speed validation to match actual belt movement to the treadmill’s speed setting, and (2) pace verification where the Forerunner 965’s readings are compared to a known distance test. Together, these steps reveal whether the treadmill’s speed readout and distance log are trustworthy, and they provide a clear path to adjustments. Documentation of results helps you track changes over time and schedule re-calibration intervals.
Understanding common sources of error
Misalignment can happen if the belt slips slightly, or if the belt tension or incline calibration is off. Environmental factors such as room temperature can affect belt material and sensor response. Warming up the belt before testing can also alter readings, so use a consistent warm-up protocol. Finally, ensure the Forerunner 965 is updated with the latest firmware so data streams from the watch to your device remain stable during testing.
Step-by-step overview of the calibration workflow
Begin with a controlled, measured test to evaluate belt speed. Next, compare the Forerunner 965 pace data against the belt’s actual travel over a known distance. If discrepancies exist, adjust the treadmill’s speed calibration and re-test until readings converge. Maintain a calibration log detailing dates, settings, measured distances, and results; this helps you monitor drift and re-calibration needs over time.
How belt-speed tests reveal speed accuracy
A belt-speed test commonly uses a known distance, such as 400 meters or 1/4 mile, run at a steady pace. By timing how long it takes to cover that distance on the belt and comparing it to the treadmill’s reported distance, you can determine if the belt is under- or over-reporting speed. The Forerunner 965 will display pace data that should align with your external measurement. If not, adjust the belt’s internal calibration and re-test.
Calibrating the Forerunner 965 pace readings
The watch collects pace and distance data from your run, which should reflect the belt’s actual travel. If the pace readings consistently differ from the tested belt distance, you may need to adjust the treadmill’s speed sensor, then re-test with the watch. The goal is to have both devices show concordant pace values during the same run, which improves training accuracy and the reliability of workout metrics.
Documentation and maintenance practices
Document every calibration session, including date, environment, belt condition, speed setting, and test results. Store this data in a simple log or spreadsheet to track drift over time. Schedule re-calibration after major maintenance (belt replacement, motor service) or if you notice growing discrepancies in pace and distance data. Regular checks help you maintain data integrity for months to come.
Safety considerations and setup etiquette
Always unplug the treadmill from power during belt-change operations and use a stable, non-slip mat underneath. When performing tests, wear appropriate footwear and maintain a safe distance from the belt edge. If you’re unsure about mechanical adjustments, consult the manual or a qualified technician. Safety and accuracy go hand in hand in home calibration workflows.
Real-world testing strategies and when to re-test
In real-world use, pace drift may occur gradually. Plan periodic checks—after a new belt installation, after a motor service, or every few months—to ensure continued accuracy. If you notice inconsistent pace or distance data during normal workouts, perform a quick repeat test to confirm whether drift has occurred and decide if re-calibration is warranted.
The Calibrate Point perspective on quality control
The Calibrate Point team believes calibration is an ongoing process, not a one-off event. By combining belt-speed validation with watch-based pace verification, you create a robust feedback loop that sustains data quality. This disciplined approach translates into more reliable training plans, better performance insights, and safer exercise progression.
Tools & Materials
- Measuring tape(At least 10 meters long for accurate distance checks)
- Stopwatch or timer(Digital preferred for precise start/stop)
- Level or spirit level(Ensure treadmill is on a flat surface)
- Flat, stable testing area(No loose mats or obstacles)
- Charged Garmin Forerunner 965(Firmware up to date)
- Notebook or digital log(Record test results and settings)
- Treadmill owner’s manual(For model-specific calibration steps)
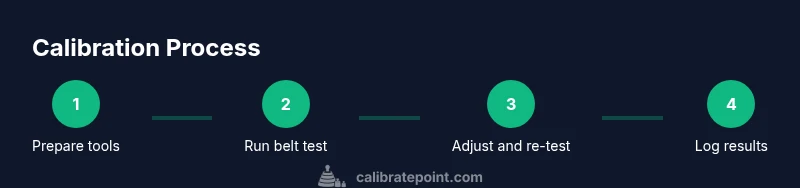
Steps
Estimated time: 60-90 minutes
- 1
Prepare workspace and equipment
Clear the area around the treadmill and verify you have all tools. Ensure the treadmill is on a level surface and the belt is at room temperature before testing. This baseline setup minimizes measurement error.
Tip: Double-check belt tension by feeling for tightness without over-tightening the belt. - 2
Warm up the belt and device
Run the treadmill for 5–10 minutes at a light speed to warm the belt and sensors. This reduces temperature-related drift during testing and makes results more repeatable.
Tip: Use the same warm-up protocol for every test to improve comparability. - 3
Conduct a belt-speed test with a known distance
Set the treadmill to a fixed speed and run a known distance (e.g., 400 meters). Use a stopwatch to time the run and compare with the distance displayed by the belt. Record both values.
Tip: Keep your pace steady and avoid turning or drifting off the intended track. - 4
Compare speed data to the Forerunner 965
Check the Forerunner 965 pace reading for the same interval. If the watch pace diverges from the belt’s actual pace, note the discrepancy and prepare to adjust the treadmill calibration.
Tip: Note whether discrepancies are consistent across trials. - 5
Adjust the treadmill’s speed calibration
Using the treadmill’s service or calibration menu, adjust the speed sensor or belt-correction factor according to your test results. Make a small adjustment and re-test to minimize drift.
Tip: Make incremental changes; drastic adjustments can destabilize readings. - 6
Re-test to confirm alignment
Repeat the known distance test and compare both devices again. The goal is to have the belt measurement and watch pace closely aligned across repetitions.
Tip: If results still diverge, consider repeating with a longer distance to reduce measurement noise. - 7
Document and log results
Record the date, belt setting, measured distance, actual time, and watch pace. This log will guide future checks and help identify drift trends.
Tip: Use a consistent data format (date, distance, time, pace) for easy review. - 8
Schedule maintenance and re-tests
Set a re-calibration cadence (e.g., quarterly or after belt changes). Regular checks maintain data reliability and training integrity.
Tip: Link recalibration to maintenance milestones for simplicity.
Questions & Answers
What is the best distance for a belt-speed test?
A commonly used distance is 400 meters or a quarter mile to balance measurement noise with practical testing time. Use the same distance for repeatability and compare the belt readout to the watch pace.
A typical test uses 400 meters because it balances accuracy and time. Use the same distance for repeat tests to compare results easily.
Can I calibrate without special tools?
Basic timing and measurement tools are sufficient for a home calibration: a stopwatch, measuring tape, and a charged Forerunner 965. Advanced calibrations may require access to the treadmill’s service mode as described in the manual.
Yes, you can start with simple tools like a stopwatch and tape. For deeper calibration, you may need the treadmill service options shown in the manual.
How often should I recalibrate?
Recalibrate after major maintenance (belt replacement, motor service) and if you notice consistent data drift in pace or distance. A quarterly check is common for many users.
Calibrate after belt changes or maintenance, and consider a quarterly check to keep data trustworthy.
Will calibration affect incline measurements too?
Calibration discussed here primarily targets speed and distance. Incline calibration is a separate process and should be checked if you notice differences during incline workouts.
Speed and distance calibration doesn’t automatically fix incline readings; check incline separately if you use incline workouts.
Is this safe to do at home?
Yes, as long as you follow basic safety steps: keep the area clear, use proper footwear, and unplug when adjusting belts. Do not attempt risky internal repairs yourself.
It's safe at home if you follow basic safety guidelines and avoid disassembly beyond the manual’s scope.
Does the Forerunner 965 automatically calibrate the treadmill?
No, the Forerunner 965 provides pace data and metrics, but automatic treadmill calibration isn’t built-in. Use manual calibration steps and cross-check with the watch data.
The watch gives data, but automatic treadmill calibration isn’t supported; perform the steps manually and verify with the watch.
Watch Video
Key Takeaways
- Calibrate belt speed and pace to minimize data drift
- Use known-distance tests for reliable comparisons
- Keep a detailed calibration log for future reference
- Perform calibration after maintenance or belt changes
- Maintain safety and consistency throughout testing