Calibrate Gauge: A Practical Step-by-Step Guide
Learn to calibrate gauges with a practical, safety-focused approach. This guide covers references, procedures, validation, and documentation to ensure precise measurements across common instrument classes.

By the end, you’ll calibrate a gauge accurately using a traceable reference standard, documenting the offset and validating with multiple test points. Start with a clean reference, inspect the gauge for wear, then adjust the mechanism per the manufacturer’s specification. Finally, re-check against the standard to confirm consistent accuracy across its range.
Understanding Gauge Calibration: Why It Matters
Gauge calibration is the process of aligning a measurement instrument's readings with a known standard so that results are consistent and traceable. For many DIYers, technicians, and professionals, calibration is not optional—it is a prerequisite for credible data and safe decision-making. According to Calibrate Point, gauge calibration enhances reliability across a wide range of applications, from simple bench tests to critical industrial controls. In practice, calibration defines tolerances, sets acceptable error margins, and establishes confidence in measurements. You’ll learn that different gauges—dial indicators, pressure gauges, thermometers, and electronic sensors—each demand specific reference standards and procedures. A well-calibrated gauge reduces the risk of waste, safety incidents, and costly rework by catching drift before it translates into faulty results. This section will frame the goal: ensure readings reflect a traceable standard within stated tolerances, under consistent environmental conditions, and with auditable documentation.
Key takeaway: calibration isn’t a one-off event; it’s an ongoing quality practice that protects accuracy over time.
note
Tools & Materials
- Traceable reference standard for gauge type(Certified and calibrated; must be traceable to national standards)
- Dial indicator or comparator (if calibrating dial gauges)(Resolution at least 0.01 mm or 0.001 inch, depending on gauge)
- Calibration weights or pressure sources(Select steps that cover 20-80% of the gauge range)
- Clean cloths and isopropyl alcohol(Remove oils; keep contact surfaces clean)
- Calibration logbook or software(Record readings, offsets, serials, and dates)
- Calibration fixture or stand(Stabilizes the gauge during setup)
- Safety equipment (gloves, eye protection)(Environment-dependent; use as needed)
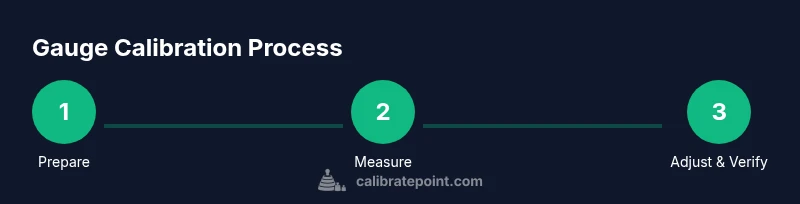
Steps
Estimated time: 30-60 minutes
- 1
Inspect and Clean
Power down the instrument, inspect for physical damage, and remove any debris or oil from contact surfaces. Clean the reference surfaces to ensure a true reading. Document any wear or misalignment before adjustments are attempted.
Tip: Wear clean gloves to avoid transferring oils; a dirty contact surface skews results. - 2
Select and Prepare the Reference Standard
Choose a traceable standard that covers the gauge range. Verify its calibration certificate and environmental condition ratings. Bring the standard and gauge to stable ambient conditions before testing.
Tip: Always check the reference certificate date and the measurement uncertainty. - 3
Set Up the Calibration Fixture
Mount the gauge and reference standard securely in a vibration-free fixture. Align them so the measurement path is definitive, and ensure there is no mechanical play that could introduce error during readings.
Tip: Use alignment aids or a spirit level to prevent tilt-induced errors. - 4
Record Baseline Readings
Take multiple readings at several defined points across the scale or range. Note any offset from the reference and identify whether drift is linear or nonlinear. Discard obvious outliers after re-checking.
Tip: Take at least three readings per point to estimate repeatability. - 5
Apply Necessary Adjustments
Make small, incremental adjustments following the device’s adjustment procedure. For dial gauges, adjust the bezel or screws; for electronic sensors, update the trim or calibration constants as specified by the manufacturer.
Tip: Avoid overshoot—make tiny changes and re-check immediately. - 6
Re-check Across the Range
With adjustments in place, re-measure at the same points. Confirm readings fall within tolerance at all points, documenting any residual offsets. If not, repeat adjustment steps until the target is met.
Tip: If drift appears, reassess environmental factors and fixture stability. - 7
Document Results and Qualify the Gauge
Prepare a calibration certificate or entry in the log with date, technician, instrument serial, reference standard, values, tolerances, and uncertainties. Sign off once the gauge meets the required specification.
Tip: Include photos of setup and reference certificates to support traceability.
Questions & Answers
What is gauge calibration?
Gauge calibration aligns readings with a known standard to ensure accuracy and traceability. It establishes a defensible basis for measurements.
Gauge calibration aligns readings with a known standard to ensure accuracy and traceability.
How often should a gauge be calibrated?
Calibration frequency depends on usage, criticality, and policy. Follow manufacturer guidelines and internal quality procedures.
Calibration frequency should follow manufacturer guidelines and your quality procedures.
What standards are used for calibration?
Use traceable reference standards with a current calibration certificate that can be linked to national or international standards.
Use traceable standards with current certificates.
Can I calibrate a gauge without a reference standard?
No. A known reference is required for meaningful calibration; approximate methods can lead to inaccurate results.
No—calibration requires a known reference to be meaningful.
How do you know a gauge is out of calibration?
Signs include readings outside tolerance or inconsistent results across the range, and repeatability loss.
Drift beyond tolerance or inconsistent range readings indicate out-of-calibration.
What should be in calibration records?
Date, instrument serial, reference standard details, measured values, offsets, tolerances, and certification data.
Include date, serials, references, measurements, and tolerances.
Watch Video
Key Takeaways
- Always use a traceable reference standard.
- Document offsets and validate across the gauge range.
- Control environment to preserve accuracy.
- Sign off with a complete calibration record.