Calibrate Instruments: A Complete Step-by-Step Guide
Learn how to calibrate instruments with a practical, safety-focused, step-by-step approach. This guide covers planning, standards, documentation, and common pitfalls for DIYers and professionals seeking reliable calibration guidance.

You will learn how to calibrate instruments accurately by following a practical workflow, selecting appropriate standards, and documenting results. This process emphasizes planning, execution, measurement comparison, and traceability to reduce drift and improve reliability in lab, workshop, or field settings. Whether you work in a shop, field, or lab, this method promotes safer, more confident decisions based on dependable data.
Why calibrate instruments matters
Calibration is essential for anyone who relies on precise measurements. When you calibrate instruments, you create a reference point that helps ensure readings are accurate, repeatable, and traceable to recognized standards. Over time, sensors drift, components wear, and environmental conditions shift, which can skew data if left unchecked. By calibrating instruments such as thermometers, micrometers, pressure sensors, or multimeters, you reduce this drift and improve confidence in your results. For professionals, technicians, and serious DIYers, a disciplined calibration routine is a foundational habit that supports safety, quality, and compliance with quality management systems. In practice, regular calibration turns guesswork into reproducible measurements and helps you make better decisions based on reliable data.
Before you begin: planning and prerequisites
A successful calibration starts with planning. Identify the instrument's critical functions, the environments in which it operates, and the measurement ranges it supports. Gather the required standards and reference materials that are appropriate for the instrument type, such as reference gauges, calibrated resistors, or temperature baths. Check the instrument's user manual for recommended intervals and any mandatory documentation. Create a brief calibration plan that lists pass/fail criteria, required environmental conditions (temperature, humidity), and the steps you will perform. Keeping a simple checklist ensures you stay organized and minimizes the chance of missing essential steps during the process. Remember: calibrate instruments only with suitable, certified references and always record deviations and adjustments.
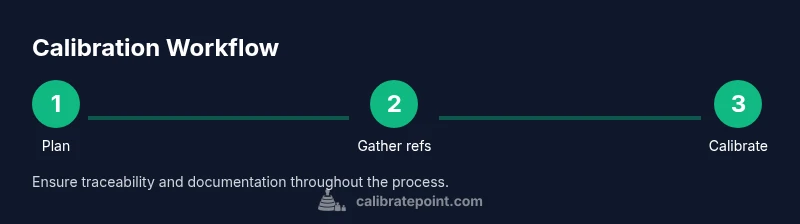
Step-by-step calibration workflow overview
Here is a high-level workflow you can adapt to different instruments:
- Prepare the workspace: Ensure cleanliness, lighting, and a stable environment.
- Select reference standards: Use tools that have documented traceability to national or international standards.
- Baseline measurements: Record initial readings without adjustments to establish a reference.
- Apply references and compare: Run readings against the reference to identify drift or offset.
- Adjust and recheck: If permissible, adjust the instrument and verify readings against the reference again.
- Document results: Save readings, adjustments, environmental conditions, and dates for audit trails. This overview keeps you focused on core activities without missing safety or documentation steps.
Choosing calibration intervals and standards
Intervals should reflect how often the instrument is used, the risk associated with incorrect readings, and any regulatory or internal requirements. Classify instruments as critical, important, or optional, and set different review frequencies. For standards, always prefer certified references that are traceable to recognized institutions. When possible, use more than one standard to verify readings and reduce the risk of a single defective reference skewing results. If a field instrument travels between sites, plan for on-site checks as well as periodic lab calibrations. Finally, document the chosen intervals in your SOP so technicians and auditors can follow them consistently.
Practical tips and common pitfalls
Pro tip: keep a calibration notebook or digital log with instrument IDs, dates, reference IDs, and results. Store calibration materials in a controlled environment to prevent drift from temperature changes. Pitfalls to avoid include relying on worn accessories (like old cables or adapters), skipping environmental controls, and neglecting to verify post-calibration performance with a secondary standard. For sensitive instruments, consider performing calibrations at designated times (e.g., after power-up stabilization) to minimize warm-up drift. Always verify that the instrument is returned to service only after passing the acceptance criteria.
Documentation and records for calibration
Good records are as important as the calibration itself. Maintain a calibration certificate or report that includes the instrument ID, reference standard IDs, calibration dates, environmental conditions, readings, adjustments, and uncertainty estimates. Use clear, standardized units and naming conventions to facilitate later audits. Retain old certificates for traceability, and store digital copies in a secure, backed-up system. If you use an external lab for part of the calibration, obtain a certificate of conformity (CoC) or calibration report and note any corrective actions taken. Documentation ensures accountability and supports regulatory or internal quality requirements.
Safety and maintenance considerations
Follow all safety guidelines for handling calibration references and instruments. Some references involve high voltage, pressurized fluids, or hot baths; ensure you isolate power, wear PPE, and work in ventilated areas when required. Regularly inspect cables, connectors, and probes for wear that could influence readings. Calibrate instruments only when they are in good working condition, and avoid completing calibrations if you notice unusual noises, overheating, or leaks. After calibration, store equipment securely and follow manufacturer guidance for reinitialization or validation procedures.
Verifying calibration results and when to recheck
After completing calibration, perform a quick verification pass using an independent reference whenever feasible. Compare the results against predefined acceptance criteria and document any residual offsets or drift. If readings fall outside tolerance, investigate root causes such as environmental drift, reference contamination, or hardware aging, and repeat the calibration or schedule a follow-up check. Establish triggers for recheck, such as a significant temperature shift or a known component replacement, to maintain long-term accuracy.
Tools & Materials
- Calibration standards (traceable to recognized standards)(Select appropriate range and type for the instrument)
- Reference instruments or gauges(Secondary references for cross-checks when possible)
- Calibration documentation templates(Preformatted certificates or reports)
- Cleaning materials and protective equipment(Lint-free cloths, isopropyl alcohol, gloves as needed)
- Environmental control tools (thermometer, hygrometer)(Use if ambient conditions influence readings)
- Tools for adjustments (screwdrivers, wrenches as specified by the instrument)(Only use manufacturer-approved adjustment methods)
- Power supply and safety gear(Isolate power sources and use PPE as required)
Steps
Estimated time: 60-90 minutes
- 1
Prepare the calibration plan
Draft a brief plan that defines the instrument, reference standards, acceptance criteria, and record-keeping approach. Verify that the plan aligns with any applicable SOPs and regulatory requirements. Ensure all team members understand their roles before beginning.
Tip: Having a written plan reduces confusion and ensures consistency across technicians. - 2
Gather and verify reference standards
Collect traceable calibration references and verify their validity and certificate dates. Confirm recognizability to national or international standards and inspect for any signs of damage or drift before use.
Tip: Check certificates on arrival and note any out-of-tolerance indicators before starting. - 3
Set up instrument and environment
Position the instrument on a stable surface in a controlled environment. Ensure power stability, eliminate drafts, and log ambient conditions that can affect readings.
Tip: Record temperature and humidity; many instruments are sensitive to environmental drift. - 4
Record baseline measurements
Take initial readings without adjustments to determine the instrument’s current state. Note any abnormal readings that may indicate pre-existing faults.
Tip: Baseline data helps distinguish drift from user error during the test. - 5
Apply references and collect readings
Run the calibration procedure according to the reference standards and document all readings with units, tolerances, and environmental data.
Tip: Use multiple readings where possible to average out short-term fluctuations. - 6
Adjust and recheck
If the instrument allows adjustments, perform them per manufacturer instructions and re-check readings against the reference. Confirm that all outputs fall within acceptance criteria.
Tip: Do not over-tighten adjustments; small increments reduce overshoot. - 7
Document results and archive
Compile a calibration certificate with instrument ID, reference IDs, dates, environmental data, readings, adjustments, and uncertainties. Store securely for audits and future comparisons.
Tip: Include a clear indication of pass/fail and any follow-up actions required. - 8
Return to service and perform final validation
Put the instrument back into operation and perform a quick field check to confirm practical performance. If anomalies arise, schedule a repeat calibration or escalate to a supervisor.
Tip: Validate post-calibration performance under real-use conditions.
Questions & Answers
What is calibration and why is it important?
Calibration is the process of comparing an instrument's measurements to a known standard and adjusting as needed to align readings. It helps ensure accuracy, consistency, and compliance with quality guidelines.
Calibration compares an instrument's readings to a known standard and adjusts it to align with expected values.
How often should I calibrate instruments?
Calibration frequency depends on usage, the risk of drift, and regulatory or internal requirements. Follow manufacturer guidance and your facility's SOPs, but plan periodic checks even for rarely used tools.
Follow manufacturer guidance and internal SOPs, with regular checks based on usage and risk.
What standards should I use for calibration?
Use certified, traceable standards appropriate to the instrument type. Verify certificates, and prefer redundant references when possible to confirm accuracy.
Use certified, traceable standards and consider multiple references when feasible.
Can I calibrate instruments myself or should I hire a lab?
Many instruments can be calibrated in-house with proper references and training. Complex devices or stringent regulatory requirements may benefit from a qualified third party for validation and certification.
In-house calibration is common for many tools, but complex cases may warrant a professional lab.
What documentation should accompany calibration?
Calibration documentation should include instrument IDs, reference IDs, dates, environmental data, readings, adjustments, and uncertainty estimates. Keep certificates and audit trails secure and accessible.
Keep a detailed calibration certificate with all references and environmental data.
Watch Video
Key Takeaways
- Plan the calibration before starting to ensure consistency
- Use certified references traceable to standards
- Document results and environmental conditions meticulously
- Verify post-calibration performance with an independent check