Calibrate Joystick Steam Deck: A Step-by-Step Guide
Learn how to calibrate the Steam Deck joystick to prevent drift, improve accuracy, and maintain responsive controls with a practical, user-friendly calibration workflow from Calibrate Point.

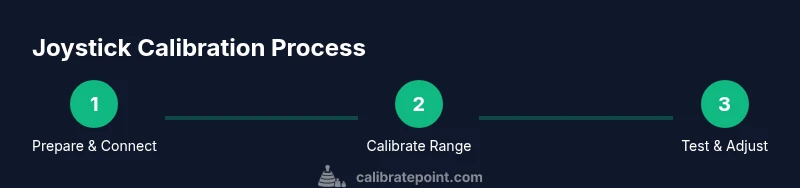
Calibrating the Steam Deck joystick improves accuracy and reduces drift, letting you play with confidence. This guide shows how to calibrate joystick steam deck using Steam’s built-in tools and common testing methods. You'll need your Steam Deck, a USB-C cable or dock, and basic calibration steps. Follow the steps, test in-game, and adjust dead zones as needed.
Understanding Joystick Drift and Calibration
Joystick drift occurs when the input drifts away from a neutral center even when the stick is at rest. Calibration realigns how the hardware reports position to the software, which reduces drift and improves accuracy. For DIY enthusiasts and technicians, calibrating joystick steam deck isn’t about clever hacks; it’s about aligning physical range with digital mapping so that every tilt, twist, and push corresponds to the expected in-game response. The Calibrate Point team notes that a well-tuned joystick translates into more precise aiming, navigation, and menu control, making long gaming sessions more comfortable and less fatiguing. A good calibration also helps standardize inputs across titles with different default sensitivities, simplifying cross-game consistency.
How Steam Deck Calibration Works
Steam Deck uses an input mapper to translate physical joystick range into digital coordinates. When you calibrate joystick steam deck, you teach Steam’s controller driver the true physical extremes of each axis and the neutral center. This process compensates for minor hardware variations and any wear that may shift the center over time. Calibration creates a consistent center, scales sensitivity, and defines a reliable dead zone so tiny, unintentional moves don’t register as input. By following a manufacturer-aligned calibration flow, you reduce drift and improve repeatability across games and applications.
Prepare Your Environment
Before starting, ensure your Steam Deck is charged and running the latest firmware. A clean, well-lit workspace improves your ability to observe axis movement and center position during calibration. Have a USB-C cable or compatible dock handy to facilitate a stable connection if you need to test calibration on an external display or through a PC. It’s also helpful to record baseline dead zone values and axis ranges in a notebook or notes app so you can compare results after every calibration session.
Accessing Joystick Calibration in Steam Deck
From the Steam Deck, navigate to Settings > Controller > Calibrate Joystick. Choose the stick you want to calibrate (left or right) and initiate the calibration routine. The on-screen prompts guide you through moving the stick through its full range, centering it, and confirming the collected data. Menu labels can vary slightly across SteamOS versions, but the general flow remains the same: enter calibration, perform the full-range motions, center the stick, and save the calibration.
Running the Calibration and Observing the Range
Start the calibration routine and slowly push the joystick in every direction, returning to center after each move. The aim is to capture the true endpoints of the axis and the neutral position. If you notice resistance, uneven travel, or a stiff center, rerun the calibration or try more deliberate, slower movements. Completing this step ensures Steam’s calibration data reflects how you actually use the joystick, which improves response accuracy in games that rely on precise directional input.
Testing and Adjusting Dead Zones
After calibration, test the joystick in Steam’s controller tester or in a game that requires precise directional input. If slight drift remains, adjust the dead zone values to either shrink the neutral zone or widen it to absorb small, unintended motions. Small changes can dramatically alter feel and responsiveness, so make incremental adjustments and re-test. Keeping a log of dead zone settings for different titles can help you select a single profile that works well across your library.
Common Issues and Troubleshooting
If drift persists after calibration, check for physical issues such as debris in the joystick assembly or a loose stick cap. Recalibrate with the stick fully centered and test again. On rare occasions, hardware wear or manufacturing variances may require replacement or service. If you recently updated firmware, re-run calibration as it can re-center and re-map inputs. As a precaution, avoid using third-party adapters that modify signal ranges without explicit support.
Maintenance and Best Practices for Consistent Control
Schedule calibration after major firmware updates, long gaming sessions, or if you notice drift returning. Calibrate joystick steam deck in a consistent environment with a flat surface and the Deck positioned to minimize vibration. Periodically check both sticks for even travel and center alignment, and maintain a log of baseline values for quick comparisons. The practice of routine calibration helps ensure long-term stability across titles and input devices.
Tools & Materials
- Steam Deck(Fully charged; updated to the latest firmware)
- USB-C cable or official Steam Deck dock(For stable connection and optional testing with external displays)
- Stable workspace(Flat, well-lit surface with minimal distractions)
- Notebook or notes app(Record dead zones and axis ranges for reference)
- Internet connection(Useful for updates and Steam configuration checks)
Steps
Estimated time: 60-90 minutes
- 1
Prepare and back up
Charge the Steam Deck and ensure it is on the latest firmware. Back up any custom controller profiles or game settings you want to preserve. This ensures you can revert if needed and that calibration updates won’t conflict with existing mappings.
Tip: Pro-tip: note current dead zones before starting so you can compare results later. - 2
Update and verify tools
Open Steam on the Deck and confirm your Steam inputs are up to date. If you use a PC for testing, ensure Steam is on the latest build and that USB debugging (if used) is enabled. This prevents version mismatches during calibration.
Tip: Pro-tip: a stable USB connection reduces signal noise during axis data collection. - 3
Access calibration settings
Navigate to Settings > Controller > Calibrate Joystick. Select the left or right stick and start the calibration routine. Follow the on-screen prompts to begin collecting axis data.
Tip: Pro-tip: take a moment to ensure the stick is centered before starting the collection phase. - 4
Move through full range
Gently move the joystick through its full range in all directions, returning to center after each movement. This helps Steam map the true physical extremes of the axis and center.
Tip: Pro-tip: perform deliberate, smooth motions rather than jittery movements to improve data quality. - 5
Center and confirm
When prompted, return the stick to the neutral position and confirm the calibration. Save the changes to lock in the new mapping.
Tip: Pro-tip: test centering by doing quick left-right sweeps to ensure the neutral zone feels stable. - 6
Test in controller tester
Open Steam’s controller tester or a game that uses precise directional input to verify the calibration. Look for drift, offset, or unusual resistance and take notes.
Tip: Pro-tip: run a quick test with both short and long directional movements to catch any inconsistencies. - 7
Adjust dead zones if needed
If drift persists, adjust the dead zone values incrementally and re-test. Minor dead zone tweaks can dramatically improve precision without making inputs feel 'sticky'.
Tip: Pro-tip: document the final dead zone values for future sessions. - 8
Document and schedule follow-ups
Record the calibration outcome and plan follow-up calibrations after firmware updates or heavy gaming sessions. This keeps inputs consistent over time.
Tip: Pro-tip: set a reminder to re-check calibration every few weeks.
Questions & Answers
Do I need a PC to calibrate the Steam Deck joystick?
No. You can calibrate directly on the Steam Deck via Settings > Controller > Calibrate Joystick. A PC is optional if you want to test inputs externally or update firmware, but it is not required for the calibration process itself.
No PC is required; you can calibrate the Steam Deck right on the device. A PC can help for testing or updates, but it’s not necessary for calibration.
Will calibrating affect saved games or profiles?
Calibration only adjusts how the joystick input is interpreted by the system. It does not alter saved game data or profiles; it changes the input mapping to be more accurate.
Calibration changes input mapping, not your saved games or profiles.
How long does calibration take?
A typical calibration session takes about 10-15 minutes, depending on how many tests you run and how thoroughly you adjust dead zones.
Most people finish in about ten to fifteen minutes, with additional time if you adjust dead zones.
What if drift remains after calibration?
If drift persists, re-run calibration with careful, centered movements, inspect for debris or hardware wear, and consider adjusting dead zones. If unresolved, hardware fault may be present.
If drift stays after calibration, recalibrate carefully and check for debris or wear; you may need hardware service.
Is it safe to recalibrate frequently?
Yes. Steam Deck supports repeated calibrations as needed, especially after updates or changes in how you play. Avoid forcing calibration during charging or unstable power conditions.
Yes, you can recalibrate as needed, especially after updates. Don’t calibrate while charging in unstable conditions.
Should I recalibrate after firmware updates?
Yes. Firmware updates can slightly change input mapping, so recalibrating helps maintain accuracy after updates.
Yes—after firmware updates, recalibrate to maintain accuracy.
Watch Video
Key Takeaways
- Calibrate joystick steam deck to improve precision and reduce drift.
- Test thoroughly in controller tester and games after calibration.
- Document dead zones and axis ranges for future reference.
- Recalibrate after firmware updates or noticeable drift.