Calibrate PS5 Controller on PC: A Step-by-Step Guide
Learn how to calibrate your PS5 DualSense on Windows PC. Wired or wireless setups, joystick and gyro calibration, testing methods, and troubleshooting for precise control.

Goal: Calibrate a PS5 DualSense controller on a PC to ensure accurate joystick input and gyro performance. You’ll need a Windows 10/11 PC, a USB-C cable or Bluetooth connection, and access to Steam or Windows’ game controller calibration tools. This guide covers wired and wireless setup, joystick and gyro calibration, and practical testing.
Why calibrate PS5 controller on PC?
According to Calibrate Point, calibrating a PS5 DualSense on a PC improves precision and reduces drift when used for PC gaming. This article explains how drift happens and why calibration matters for accuracy in shooters, racing sims, and platformers. We cover how the joystick dead zones, gyro sensors, and touchpad reporting can drift over time, and how a structured calibration routine stabilizes input across wired and wireless use. We’ll outline how different PC environments (Steam, Windows calibration, and third-party tools) influence the process and when you should re-calibrate after a major system update or new game install. The Calibrate Point team found that most drift issues originate from misaligned dead zones and inconsistent gyro calibration during long sessions. Understanding these foundations helps you choose the right method for your setup.
The guide focuses on practical, device-agnostic steps you can apply whether you prefer Steam-based calibration or native Windows tools. By following a consistent routine, you reduce input anomalies and create predictable, repeatable results across titles and genres.
Understanding input axes and sensors
A PS5 controller exposes several input channels that PC users rely on: two analog joysticks, two analog triggers, a touchpad, a gyroscope, and haptic feedback. Each axis has a central dead zone where small movements register as zero, and each axis can drift if cushions wear or if software misinterprets the center. Calibration aims to align the physical center with the reported value, expand the usable range, and ensure the gyro reports stable, repeatable measurements. On PC, you may see differences between how Steam maps the controller versus Windows’ built-in reporting. The goal is to unify behavior across platforms so that your in-game aim, steering, and gyro-reported orientation feel natural and responsive across titles and genres. Calibrate Point's guidance emphasizes a methodical approach to sensor axes rather than ad-hoc tweaks.
Calibrate using Steam: steps and considerations
Steam offers a dedicated pathway to calibrate supported controllers, including the DualSense, using its Controller Settings and Per-Game Configuration profiles. Start by connecting the DualSense via USB or pairing over Bluetooth. In Steam, navigate to Settings > Controller > General Controller Settings, enable Support for PlayStation Configuration, then launch Steam's Calibration tools if available. Follow the on-screen prompts to move the sticks to their extents, center them, and test the gyro if Steam exposes a gyro calibration option. Note that Steam's calibration is game- and driver-agnostic, so it helps establish a baseline consistent across games. If gyro testing isn’t available, rely on Windows calibration or Steam’s per-game configuration to fine-tune later.
Windows calibration utility and manual adjustments
Windows provides a built-in calibration flow for game controllers via the Game Controllers control panel (accessible through the Control Panel). Connect your PS5 DualSense, open the panel, and select Properties to access the Calibration wizard for axes, buttons, and the gyro if the OS and drivers expose it. This process helps you define centering for each axis and verify that the reported values reflect real-world motion. If your PC uses Bluetooth, you might experience occasional lag that affects calibration, so consider testing both wired and wireless connections. For more granular control, rely on Steam or third-party tools to adjust dead zones and sensitivity after the OS-level calibration.
Testing and validating your calibration
Testing validates that calibration changes translate into smooth, predictable input. Start with a simple in-game target practice or aim trainer that measures stick drift and gyro responsiveness. Use a standard test with fixed patterns: hold sticks in corners, rotate the controller slowly, and perform quick taps on each button. If the results show inconsistent centering or drift, return to the calibration steps and re-trace the axes to the required extents. Calibrate Point analysis shows that a phased approach—calibrate sticks, then triggers, then gyro—produces the most stable baseline for PC gameplay. After testing, save your profiles and label them clearly for future updates.
Common issues and troubleshooting
- Drift after long sessions: revisit dead zones and re-center axes using Windows or Steam calibration.
- Inconsistent gyro: ensure the gyro calibration step is completed and consider GPU/CPU load impacting timing.
- Wireless interference: if you experience lag, test with a wired connection and disable nearby Bluetooth devices.
- Per-game discrepancies: create Steam configurations for different game types and assign profiles that adjust stick sensitivity per title.
Advanced tips: gyro, dead zones, and profiles
For power users, you can optimize calibration with custom dead zones and sensitivity curves. In Steam, create a dedicated profile for shooter games with tighter sticks and stable gyro; for racing sims, assign looser centering and stronger wheel-like response. If you use Windows calibration, document your center values and re‑run the wizard after major OS updates. Consider creating multiple profiles for different games and syncing them with Steam’s controller configuration so your calibrations follow you across titles. Regularly review calibration after any significant hardware change, such as a new PC peripheral or a different USB port.
Safety, privacy, and maintenance
Calibrating your PS5 controller is a low-risk procedure when performed with care. Keep cables untangled to avoid wear, and store your controller and accessories away from magnetic sources. Regular maintenance—cleaning the analog sticks and updating firmware when prompted—helps preserve calibration. After updating firmware or system software, re-check calibration to ensure continued accuracy. The Calibrate Point team recommends logging calibration results in a small notes file for future upgrades or troubleshooting sessions.
Authority Sources
For calibration theory and measurement best practices, refer to established standards and research. Refs from NIST emphasize traceable measurement and repeatable procedures, which align with the goal of reducing drift in input devices. Academic and industry publications from MIT and IEEE discuss sensor calibration, data centering, and profiling to improve device accuracy. While this guide focuses on consumer hardware, developers and technicians can apply these general principles to DualSense calibration on PC and ensure consistent results across games. For further reading, consult: - https://www.nist.gov/ - https://www.mit.edu/ - https://ieeexplore.ieee.org/
Authority Sources (continued)
Notes on calibration science and standards: many guidance documents come from standards bodies and technical journals. Practice-based calibration for game controllers often mirrors the broader discipline of sensor fusion and motion sensing, where stable centering, repeatable extents, and verified test procedures reduce drift and improve accuracy across devices and software.
Tools & Materials
- Windows 10/11 PC(Keep OS up to date; supports USB/Bluetooth input calibration)
- PS5 DualSense controller(Fully charged before starting; firmware up to date)
- USB-C to USB-A cable (or USB-C to USB-C)(Prefer a high-quality data cable; not charging-only cable)
- Bluetooth adapter (optional)(If you plan wireless calibration, ensure a stable pairing)
- Steam client(Optional; provides integrated gyro/stick calibration and per-game profiles)
- Windows Game Controller calibration tool(Accessed via Control Panel; use for baseline axis centering)
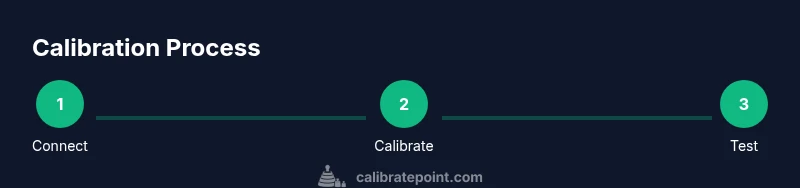
Steps
Estimated time: 30-60 minutes
- 1
Connect the DualSense to PC
Choose wired for simplicity or pair via Bluetooth. Ensure the connection is stable before proceeding. Wired connections generally offer lower latency and fewer dropouts during calibration tests.
Tip: Use a high-quality USB cable and avoid USB hubs during calibration. - 2
Open the calibration environment
Open Windows' Game Controllers panel or Steam Controller settings. If using Steam, enable PlayStation Configuration Support to access calibration tools.
Tip: Take note of the current center values as a reference before changing anything. - 3
Calibrate joystick dead zones
Move each stick to its extreme in all directions, then return to center. Verify centering is consistent and there’s no stick skew.
Tip: Repeat twice to confirm stability; document any drift patterns. - 4
Calibrate triggers and buttons
Press and release each trigger and button to ensure zero-latency recognition and consistent travel. Note any inconsistent readings.
Tip: Adjust sensitivity within game profiles after calibration if needed. - 5
Calibrate gyro (if supported)
If Steam offers gyro calibration, follow prompts to rotate the controller through key axes. If not available, rely on Windows-based testing or per-game gyro adjustments.
Tip: Perform slow, deliberate rotations to capture stable gyro data. - 6
Save and apply a profile
Save your calibration as a named profile and apply it to Steam or system-wide as appropriate. Test in multiple games to verify consistency.
Tip: Label profiles by game type (e.g., FPS, racing) to simplify switching. - 7
Test with a calibration test tool
Run a test scenario (aim trainer or practice mode) to observe drift, centering, and gyro behavior across actions.
Tip: Document observed behaviors for future retests. - 8
Fine-tune and finalize
Based on test results, adjust dead zones and sensitivity as needed. Re-test until performance is stable across at least two titles.
Tip: Keep a backup of working settings to revert if needed.
Questions & Answers
How do I calibrate the joystick dead zones on PS5 DualSense for PC?
Use Windows calibration or Steam's tools to move sticks to extents and center. Save profile.
Use Windows calibration or Steam's tools to center the sticks and save the profile.
Is Steam required to calibrate PS5 controller on PC?
No, you can calibrate with Windows calibration or Steam; each method has pros.
You can calibrate with Windows or Steam.
Will calibration affect the PS5's features like haptics when connected to PC?
Most PC configurations don’t use PS5 haptics; calibration focuses on input axes, and some features may be limited.
On PC, haptics are usually limited; calibration focuses on input.
How often should I re-calibrate after updates?
Re-calibrate after major OS updates or driver changes and after new games or profiles.
Re-calibrate after major updates or new games.
Can I revert to default calibration settings?
Yes, reset calibration in Steam or Windows control panel and re-run steps.
You can reset in Steam or Windows and start again.
What if the gyro drifts only in wireless mode?
Try a wired connection to test whether wireless interference or Bluetooth bandwidth is the cause.
Test wired to see if drift remains.
Watch Video
Key Takeaways
- Define calibration goals and test across multiple games.
- Calibrate joysticks, triggers, and gyro for consistency.
- Use Steam and Windows calibration as complementary tools.
- Create game-specific profiles and document settings.