Calibrate Reds: A Practical Guide to Color Accuracy
Learn how to calibrate reds for accurate color in imaging workflows. This educational, practical guide covers tools, workflow, verification, and best practices to ensure reds reproduce faithfully across displays and prints.

This guide shows you how to calibrate reds for accurate color in imaging workflows. It covers when and why red-channel calibration matters, the typical workflow, and a step-by-step process to adjust the red channel, gamma, white balance, and verification using test images. You’ll learn which tools you need and how to verify reliable results.
Why calibrate reds matters
Color accuracy starts with the reds, especially in skin tones, nature scenes, and branding where reds can be the most visually sensitive channel. Calibrate reds to reduce color shifts when you move between devices (camera to monitor to printer) and to ensure the final image looks true to life. According to Calibrate Point, a disciplined approach to red-channel calibration improves repeatability and helps you maintain consistent color across workflows. When you consistently calibrate reds, you avoid biased or oversaturated reds that can distort mood and detail in photographs, product shots, and design proofing. In short, calibrating reds is a foundational step for trustworthy imaging results.
This article uses practical examples and a repeatable workflow so DIY enthusiasts, technicians, and professionals can calibrate reds without guesswork. You’ll learn the why, the when, and the how, with concrete steps and verifiable checks that align with industry best practices.
Understanding red channel and color science
Red is not an isolated color; it interacts with the other channels (green and blue) and with the color space in which you work. A proper calibration acknowledges the red channel’s role in overall luminance and hue balance. We’ll discuss how red values map to common color spaces (like sRGB and Adobe RGB), how gamma affects perception of red detail, and how device white points influence red rendering. Grasping these fundamentals helps you decide when a targeted red adjustment is sufficient, and when broader color-space corrections are required. You’ll learn to separate perception artifacts from actual color errors so you can target the right parameter (red channel, gamma, or white balance).
The goal is not to push reds to an extreme but to reproduce them faithfully under the intended viewing conditions. This makes it easier to compare across devices and ensures that reds remain legible, natural, and consistent in all outputs.
The role of measurement devices and targets
Accurate red calibration relies on measurement devices and standardized targets. A colorimeter or spectrophotometer provides objective data about how red is rendered, while calibration targets (such as neutral gray patches and color reference charts) give you known reference values. The quality of your readings depends on the device, the lighting conditions, and the target’s accuracy. When selecting tools, prioritize devices with traceable calibration data and compatible software that can export LUTs or curve adjustments. Targets should be photographed or scanned under the same conditions as your workflow to ensure meaningful comparisons. Remember that measured data should reflect the end-use environment, not just the display hardware.
With the right combination of instrument and target, you can quantify red deviations and guide precise corrections rather than relying on guesswork.
Preparing your workspace for red calibration
A controlled environment is essential for reliable red calibration. Control ambient lighting and avoid mixed light sources that can skew red values. Use a calibrated light source or a consistent daylight-referenced setup, and keep the workspace free from glare on screens. A neutral, mid-gray background helps ensure the calibration targets read true. Keep a log of room lighting, camera white balance, and display brightness so you can reproduce conditions later. Documenting these parameters is part of a robust calibration process, and it helps you compare results across sessions or devices.
By standardizing the setup, you reduce variables that can masquerade as red-channel errors, making the calibration more efficient and repeatable.
The calibration workflow at a glance
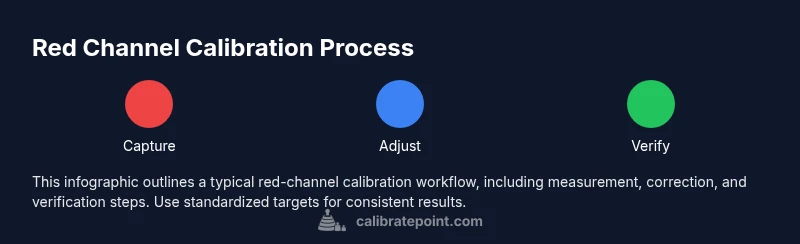
A practical red calibration workflow typically includes capture, measurement, correction, and validation. Start with a stable, known reference target. Measure the red channel with your chosen instrument and software, then apply a correction curve or LUT to bring red values into alignment with the reference. Re-measure after correction to confirm improvements, and iterate if necessary. Finally, verify the results with additional test images that reflect your typical content (portraits, landscapes, and product shots) to ensure red accuracy holds across subjects. While the exact steps vary by tool, the core idea is consistent: measure, adjust, verify, and document.
Throughout this process, keep your goal in mind: reds that reproduce faithfully without causing color casts or detail loss in shadows and highlights.
Verifying accuracy with test images
Verification is the bridge between measurement numbers and real-world results. After applying the red calibration, run a set of test images that cover common scenes—skin tones, sunset skies, and red-brick textures—to see how the reds render on target displays and prints. Compare the calibrated output to a trusted reference and look for natural skin tones, preserved detail in red highlights, and consistent saturation across devices. If discrepancies remain, revisit the measurement data, adjust the LUT or curves, and re-run verification until the results are stable. Documentation of each test set helps reproduce the outcome later.
This step is essential for confirming that your calibration translates beyond the instrument into practical image quality.
Troubleshooting common issues
If reds appear oversaturated, undersaturated, or hue-shifted after calibration, revisit your lighting, targets, and measurement method. Lighting that is too warm or too cool can masquerade as red errors, so re-check the white point and illuminant. If your software is misinterpreting the color space, ensure you are calibrating within the intended space (e.g., sRGB vs. Adobe RGB) and that the display profile is active. A mismatched profile between the capture and display chain often causes red artifacts that are not present in the source image. Finally, verify that the test targets themselves are not aging or damaged, which can skew readings.
Regularly revalidate your process to maintain confidence in your red calibrations.
Extending calibration across devices
Red calibration is rarely a one-device task. Extend the process to monitors, printers, cameras, and software previews to achieve coherent results. For each device, use a device-specific profile or LUT derived from the same calibration workflow. When devices share a common reference, your reds stay consistent from capture to display to print. If you calibrate multiple displays, consider a centralized color management workflow and cross-check with a master reference image or print proof. Keeping records of device settings and profiles makes cross-device calibration more robust.
This approach helps you deliver consistent color across the entire production chain, reducing the need for per-project tweaks.
Best practices and closing notes
A disciplined red calibration practice benefits every step of the imaging workflow. Use standardized targets, maintain a controlled environment, and document all parameters. Periodically revisit the process to accommodate device aging or software updates, and ensure you have a clear rollback plan in case new calibrations don’t meet expectations. Finally, share your calibrated workflow with teammates to promote consistency across the team.
By following these practices, you’ll build a reliable foundation for red accuracy that supports professional-quality results and repeatable proofs.
Tools & Materials
- Colorimeter or spectrophotometer(Choose a device with a known, traceable calibration history and compatible software.)
- Calibration targets (e.g., Macbeth ColorChecker or equivalent color reference chart)(Ensure targets are unwrinkled, clean, and stored away from light exposure when not in use.)
- Calibration software (open-source or commercial)(Software should export LUTs or curves and support your color space (e.g., sRGB, Adobe RGB).)
- Neutral gray reference card(Used to establish baseline luminance and white balance for red calibration.)
- High-quality monitor or display with known ICC profile(Calibration is meaningful only if the display is color-managed and curvature-free.)
- Controlled lighting setup(Prefer a room with consistent daylight-equivalent lighting or a calibrated D65 lamp.)
- Calibration logbook or digital notebook(Record settings, targets, and results for traceability and future comparisons.)
Steps
Estimated time: 30-45 minutes
- 1
Prepare equipment and workspace
Assemble your colorimeter or spectrophotometer, calibration targets, and software. Set up a neutral workspace with controlled lighting and a calibrated display. Verify all devices have current calibration data and that the reference environment matches your intended workflow.
Tip: Double-check the white balance and lighting before starting to avoid biased readings. - 2
Set up a neutral reference scene
Position targets at a fixed distance from the camera/display to ensure consistent readings. Use a gray card or neutral target for baseline measurement and capture a few frames to confirm stability before taking measurements.
Tip: Keep the target flat and avoid folds or reflections that could skew data. - 3
Measure the red channel with the instrument
Capture a reading for the red channel across the color targets using your calibration software. Record the values for red channel luminance and hue relative to the reference target. Save the measurement profile for reference in step 5.
Tip: Take multiple readings and average them to reduce random noise. - 4
Create a corrective mapping
Use the software to generate a LUT or tone-curve that maps current red values to the target references. Verify the mapping preserves detail in shadows and avoids clipping on reds.
Tip: Prefer a gradual correction curve over extreme shifts to maintain natural reds. - 5
Apply the correction and re-measure
Apply the LUT/curve to your workflow (display profile, camera color space, or render pipeline) and re-measure with the calibration target. Check for improved alignment of red values with the reference.
Tip: Re-measuring after each adjustment helps catch drift early. - 6
Validate with test images
Render test images representing common scenes and compare them against references. Confirm that skin tones and red highlights look natural and consistent across devices. If inconsistencies remain, iterate steps 4–5 until results stabilize.
Tip: Include portraits and red-heavy scenes to stress-test the calibration.
Questions & Answers
What does it mean to calibrate reds in imaging?
Red calibration is the process of adjusting how the red channel is rendered across devices so that reds look consistent with a reference. It helps maintain color fidelity in skin tones, landscapes, and product imagery. The goal is to reduce hue and luminance shifts that can distort perception of red in final outputs.
Red calibration adjusts how the red channel is shown across devices, keeping reds faithful to a reference and reducing color shifts in your images.
Do I need a professional colorimeter or can consumer tools work?
Professional colorimeters and spectrophotometers provide precise, traceable measurements, but consumer-grade tools can be sufficient for basic red calibration when used with careful methodology and proper targets. For critical work, invest in a calibrated instrument and validated software.
A pro tool gives the most reliable results, but consumer tools can work if you follow a careful, documented workflow.
How often should red calibration be performed?
Calibration should be done whenever you change devices or workflows, after hardware updates, or when you notice color drift in reds. Periodic checks maintain consistency over time, especially in production environments.
Do it when you change devices or notice color drift; periodic checks help keep reds accurate.
Will calibrating reds affect other colors?
Adjusting reds can influence nearby hues, especially in mixed colors and skin tones. Always recheck the full color balance after red adjustments to ensure no unwanted shifts in greens, blues, or skin tone rendering.
Yes, changing reds can shift other colors—verify the full spectrum after adjustments.
Can calibration differ between monitors, printers, and cameras?
Yes. Each device has its own color management challenges. Calibrate each device against a common reference while maintaining consistent workflow, and use device profiles to harmonize outputs across the chain.
Different devices need their own tuning, but aim for a common reference across the chain.
What are common signs that red calibration is off?
Look for oversaturated or dull reds, skin tones that look unnatural, and red highlights that clip or lose detail. If reds shift with viewing conditions, recheck lighting, white balance, and color-space settings.
Watch for oversaturation, unnatural skin tones, and clipping in red highlights.
Watch Video
Key Takeaways
- Calibrate reds to align color output across devices
- Use standardized targets for repeatable results
- Verify with test images before finalizing
- Document your calibration profile for future reference