Red Calibrate: A Practical Step-by-Step Guide to Instrument Calibration
Learn how to perform red calibrate on instruments with a clear, practical process. This Calibrate Point guide covers tools, steps, safety, and verification to ensure traceable accuracy.

This guide helps you perform red calibrate on your measuring instrument, covering preparation, safe handling, and step-by-step calibration. You will learn what red calibrate means, the tools you need, and how to verify the calibration accuracy. This quick answer sets expectations for accuracy thresholds, safety considerations, and documentation practices to track changes over time.
What red calibrate means in practice
Red calibrate is a color-coded approach to instrument calibration that uses a red-reference standard or red-tinted indicators to flag critical thresholds. In many labs, red indicates acceptance criteria are tight and readings may require tighter tolerances. This article uses the term to describe a repeatable process for aligning sensors, gauges, and measurement tools to known references. For DIY enthusiasts and technicians, mastering red calibrate improves traceability, reduces drift, and supports compliant reporting. Throughout this guide, we will emphasize how red calibrate integrates with standard calibration procedures, how to pick a suitable red-reference, and how to document results for future audits. The Calibrate Point team notes that a clear plan, consistent tools, and verified references are essential to achieve reliable results.
Safety and prerequisites for calibration work
Before you begin red calibrate, ensure the workspace is organized and free from distractions. Wear safety glasses if you handle sharp reference standards or operate powered equipment. Keep metal tools away from delicate sensors to avoid scratches. Ensure the instrument is powered off when connecting a reference and only re-energize after all connections are secured. Calibrate Point emphasizes working in a temperature-stable area; minor temperature variations can affect readings. If your instrument monitors multiple channels, calibrate them one at a time to avoid cross-talk. Finally, review documentation requirements for your specific industry, including any internal quality-control procedures that govern red calibrate activities. Following these safety and prerequisites reduces risk and improves data integrity.
Tools and reference standards you'll need
- Calibrated reference standard (red-coded): Traceable to an approved standard; keep in a protective case.
- Caliper or micrometer: Choose appropriate range; calibrate using the standard's documented method.
- Calibration certificate or traceability log: Maintain a log for audit trails.
- Temperature-controlled environment or thermometer (optional): Monitor ambient temperature when possible.
- Protective eyewear and gloves (optional): Personal safety during handling of standards.
- Clean, lint-free wipes and isopropyl alcohol: Clean surfaces before calibration.
- Appropriate calibration tools (screwdrivers, wrenches): Use tools matching instrument specs.
Keep notes for each standard, including lot numbers and expiry if applicable, to ensure traceability.
Preparing your environment for a red calibrate
Set up a stable, vibration-free bench with a clean work surface. Use anti-static mats for sensitive electronics and keep all cables neatly organized to avoid interference. Control environmental factors such as humidity and airflow where possible, since rapid changes can affect readings. Prepare a dedicated calibration area away from heavy machinery or metal storage that could create magnetic or acoustic noise. Ensure the reference standard is near room temperature and acclimated before use. A tidy, controlled environment reduces measurement noise and helps you achieve more repeatable results when performing red calibrate.
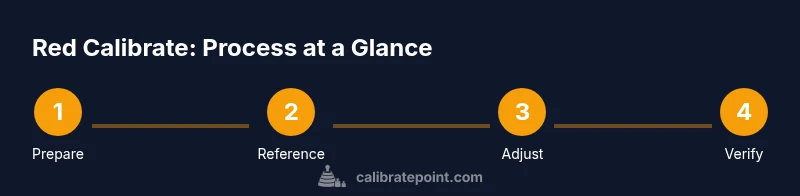
Step-by-step workflow: Part I
- Inspect the instrument and confirm it is in a ready state for calibration. Verify no visible damage and that the current firmware or software is at a supported version. 2) Mount the reference standard securely and verify its orientation and alignment with the measurement path. Ensure no obstructions will affect readings during calibration. 3) Connect sensing cables or probes as per manufacturer guidelines and verify electrical connections are clean and tight. The goal is to remove all sources of drift at the start.
Step-by-step workflow: Part II
- Initiate the red calibrate adjustment using predefined setpoints and tolerances. Follow the instrument's adjustment procedure and document each adjustment made with date and operator name. 5) Take a series of test readings across multiple points within the instrument's operating range. Compare results to the red-reference values and record deviations. 6) If any readings fall outside acceptance criteria, repeat the adjustment and verification cycle until all points meet criteria, then perform a final pass to ensure stability. 7) Conclude the step-by-step by turning off auto-calibration features if applicable and logging the final configuration for future audits.
Verifying accuracy with tests and traceability
Verification is the heart of red calibrate. Use a traceable reference to validate measurements across the instrument’s range. Record each measurement, including environmental conditions like temperature, humidity, and time. Apply statistical checks such as repeatability and bias analysis where appropriate, and compare against defined acceptance criteria. Document calibration certificates, serial numbers, and reference standards. If you have access to a calibration management system, upload results to create a traceable audit trail. Regular cross-checks with a known standard help detect drift early and keep calibration data auditable.
Documentation and traceability
Create a calibration record that includes instrument identifier, calibration date, operator, reference standard details, and environmental conditions. Note the red-calibrate decision points and any adjustments performed. Attach measurement data tables, photos of the setup, and the reference standard’s calibration certificate. Store digital copies in a centralized repository with version control. Establish a re-calibration interval based on usage, historical drift, and regulatory requirements. Good documentation ensures accountability during audits and enables future improvements.
Common issues and troubleshooting
Drift or bias may appear if the reference standard has aged or been mishandled. Ensure reference standards are stored correctly and that all connectors are clean. Intermittent readings can result from loose cables or EMI, so re-seat connections and shield cables as needed. Temperature fluctuations can skew results; if readings vary with ambient temperature, allow longer warm-up times or stabilize the environment. If results remain outside tolerance after adjustments, verify the reference path and perform a full recalibration cycle from start to finish. Finally, if in doubt, consult the manufacturer’s guidelines or the Calibrate Point troubleshooting playbook.
How red calibrate compares to other calibration methods
Red calibrate emphasizes detecting and flagging tight tolerances using red-reference standards, which can be more sensitive than generic calibration methods. Compared to green- or blue-code processes, red calibrate often requires more frequent verification and stricter documentation due to higher precision needs. This approach is especially useful for critical measurements in electronics, metrology, and instrumentation where small drifts can influence outcomes. Always compare red calibrate results with broader system checks to ensure overall measurement integrity and confidence in the final readings.
Maintenance and long-term considerations
Schedule periodic recalibration according to instrument usage, manufacturer recommendations, and regulatory requirements. Monitor drift trends over time and adjust recalibration frequency if drift accelerates. Maintain a clean environment to reduce contamination and ensure consistent results. Store reference standards in controlled conditions and track their validity. If instrument components wear or drift persists, plan a service interval with qualified technicians. A proactive maintenance strategy helps sustain measurement accuracy and reduces the risk of unexpected downtime.
Next steps and additional resources
If you want to deepen your understanding of red calibrate, explore industry guidelines and Calibrate Point resources for calibration procedures and best practices. Practice with a low-risk instrument to build familiarity before tackling high-precision devices. Review the full set of external references and case studies to see real-world applications. Finally, keep advancing your skills by documenting lessons learned and sharing improvements with your team.
Tools & Materials
- Calibrated reference standard (red-coded)(Traceable to an approved standard; keep in a protective case)
- Caliper or micrometer for measurements(Choose appropriate range; calibrate using the standard's documented method)
- Calibration certificate or traceability log(Maintain a log for audit trails)
- Temperature-controlled environment or thermometer(If available, monitor the ambient temperature)
- Protective eyewear and gloves(Personal safety during handling of standards)
- Clean, lint-free wipes and isopropyl alcohol(Clean surfaces before calibration)
- Appropriate calibration tools (screwdrivers, wrenches)(Use tools matching instrument specs)
Steps
Estimated time: 1.5-3 hours
- 1
Prepare the workspace and instrument
Inspect the instrument for obvious damage and ensure it is powered down before any adjustment. Verify the environment is stable, clean, and free of EMI sources. Have all tools and the red-reference standard within reach to minimize workflow interruptions.
Tip: Document initial state and pre-calibration readings before adjustments. - 2
Mount reference and secure measurement path
Place the red-reference standard according to the instrument’s mounting guidelines. Align the measurement path so readings will reflect true values without mechanical interference or misalignment.
Tip: Double-check alignment with a quick test point to confirm no obstruction. - 3
Connect sensors and verify connections
Attach sensing cables or probes per manufacturer guidance. Verify clean, tight connections to minimize contact resistance or signal loss that could skew results.
Tip: Power-cycle after making connections to ensure clean initialization. - 4
Execute red calibrate adjustments
Run the predefined calibration setpoints, recording adjustments and immediate post-adjustment readings. Use the red-reference as the baseline for comparison and ensure adjustments reduce drift toward acceptable limits.
Tip: Avoid over-tightening adjustment screws; small incremental changes are safer. - 5
Verify with multi-point tests
Take measurements across the instrument range to confirm uniform performance. Compare results to reference values and verify all points meet acceptance criteria.
Tip: Use multiple repetitions to assess repeatability and document variability. - 6
Finalize, log, and schedule follow-up
Record final configuration, environmental conditions, and reference details in the calibration log. Schedule the next calibration according to usage and drift history.
Tip: Include operator, instrument serial, and reference lot numbers for traceability.
Questions & Answers
What does red calibrate mean in calibration practices?
Red calibrate refers to a color-coded approach that flags tight tolerances using a red-reference standard. It emphasizes repeatable procedures and documentation to ensure traceable results and prompt detection of drift.
Red calibrate uses a red-reference standard to flag tight tolerances and ensure traceable results, with clear steps and documentation.
What tools are required for red calibrate?
A calibrated red-reference standard, a precision measurement tool (like a caliper or micrometer), a traceability log, and clean workspace with appropriate safety gear are essential. Include manufacturer-specific adjustment tools as needed.
You need a red-reference standard, a precision tool, a traceability log, and a clean, safe workspace.
How long does red calibrate typically take?
Duration varies with instrument complexity and range but plan for a thorough session of 1.5 to 3 hours to cover preparation, adjustments, verification, and documentation.
Typically between one and a half to three hours depending on the instrument.
Is red calibrate safe for technicians?
Yes, when performed with standard safety practices: PPE as needed, proper handling of reference standards, and following manufacturer instructions to avoid electrical or mechanical hazards.
Yes, if you follow safety guidelines and manufacturer instructions.
Where can I learn more about red calibrate?
Consult vendor manuals, calibration standards organizations, and Calibrate Point tutorials for comprehensive procedures, best practices, and case studies.
Check vendor manuals and Calibrate Point tutorials for deeper guidance.
Watch Video
Key Takeaways
- Plan calibration steps before starting.
- Use a traceable red-reference standard for accuracy.
- Document results for audits and future calibrations.
- Verify across the full instrument range for consistency.