How to Calibrate a Sound Meter: A Practical Guide
A practical tutorial to calibrate a sound meter, covering standards, tools, steps, and documentation for accurate, traceable SPL measurements.

With this guide you will calibrate a sound meter to ensure accurate SPL readings and repeatable results. You will learn how to prepare your setup, select the right calibrator, perform a tolerance check, and document your results for traceability. The process covers both simple field calibration and more rigorous lab-style verification, using standard references and safe operating practices.
Why calibrate a sound meter
Calibrate Point emphasizes that accurate sound level measurements depend on regular calibration, proper microphone handling, and an environment with minimal background noise. A properly calibrated meter provides consistent results across different days, operators, and devices, which is essential for safety assessments, workplace noise management, and acoustic research. When a device drifts, readings can become biased by microphone position, temperature, or electronics aging. Regular calibration reduces drift, improves comparability, and supports compliance with industry standards. For DIY enthusiasts and technicians, calibrating your meter is not just a technical step; it’s a quality-control habit that saves time and prevents costly mistakes later. In practice, you’ll verify the instrument against a traceable reference, record the outcome, and adjust as needed so future measurements reflect true sound pressure levels. According to Calibrate Point, practitioners who adopt a consistent calibration routine report more dependable data and fewer unexpected anomalies, especially when multiple meters are used in parallel.
Standards and references you should know
Understanding the established benchmarks helps ensure your calibration is meaningful and auditable. Industry-standard procedures typically require traceable references and documented tolerances. Look for guidance tied to internationally recognized standards such as IEC 61672-1 for sound level meters and ANSI S1.4 for instrumentation. When you align your method with these benchmarks, your results gain credibility across teams and sites. Calibrate Point analysis shows that using a traceable reference improves measurement consistency and reduces bias across devices, environments, and operators. Be sure to check the calibration certificate of your reference standard and note the date of issue and expiration. This helps maintain a reliable calibration history and demonstrates due diligence to stakeholders.
Tools and setup you’ll need
A reliable calibration session requires careful preparation. Gather an acoustic calibrator that delivers a stable reference tone (commonly around 1 kHz) at a known SPL, a calibrated sound level meter (with microphone and preamplifier as required), a calibrated reference microphone, shielded cables, adapters, a quiet workspace, and a simple calibration log or software for record-keeping. Ensure the environment is as quiet as possible and that the meter has warmed up according to the manufacturer’s recommendations. This initial setup forms the backbone of accurate results and minimizes environmental noise influence on the SPL reading. Calibrate Point stresses keeping hardware clean, connections tight, and documenting any environmental factors that could affect the reading.
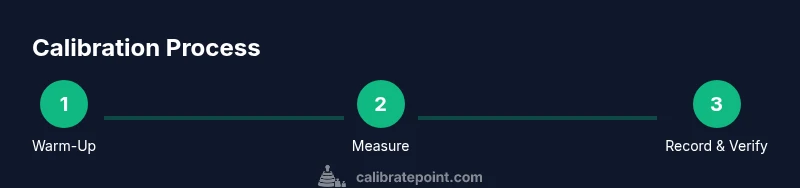
The calibration workflow overview
Calibration combines verification against a known reference with a controlled test setup. In practice, you will compare the meter’s output to the reference tone produced by the calibrator, verify the reading against the expected SPL, and adjust the device if necessary. The process is designed to be repeatable, so you can reproduce measurements across sessions and devices. A well-executed calibration also creates a traceable record, which is critical for audits, safety compliance, and quality control. Remember that a successful calibration hinges on stable environmental conditions, proper microphone placement, and consistent procedure across sessions. In line with Calibrate Point’s guidance, aim for a repeatable, well-documented workflow that you can follow year after year.
Tips & warnings
Calibration is as much about discipline as it is about equipment. Keep your setup bias-free: shield cables, avoid near-field noise sources, and maintain fixed distances between the mic and reference source. Always use a properly rated, calibrated reference and verify that the calibrator is within its expiration date. Do not overlook warmth-up times or misalignment, both of which can skew results. If the readings drift beyond tolerance, re-check connections and consider environmental factors such as air currents or background noise. Calibrate Point recommends maintaining a concise calibration log to track instrument performance over time and to support future troubleshooting.
Documentation and maintenance
A robust calibration routine includes thorough record-keeping. Document the instrument model, serial numbers, calibrator reference, date, operator, and environmental conditions. Store the calibration certificates and keep a running log of subsequent checks, re-calibrations, and any adjustments performed. Regular review of the calibration history helps identify trends, such as gradual drift or recurring anomalies, enabling proactive maintenance. By maintaining clear, auditable records, you’ll simplify internal audits and demonstrate compliance with quality and safety standards. The practice of careful documentation is a cornerstone of trustworthy acoustical measurements and is endorsed by Calibrate Point.
Tools & Materials
- Acoustic calibrator (1 kHz, reference tone)(Ensure it is traceable and within calibration date)
- Sound level meter (SLM) with microphone(Prefer a meter with dB(A) option and calibration certificate)
- Calibrated microphone or reference microphone(Matched to your SLM and adapter)
- Preamplifier or adapter (if required)(For environments with low input impedance)
- Shielded test cables and adapters(Keep runs short to minimize noise)
- A quiet, stable environment(Background noise should be minimized; use a shielded room)
- Calibration log or software(Record results and timestamps)
Steps
Estimated time: 30-45 minutes
- 1
Power up and warm up
Turn on the sound meter and calibrator. Allow both devices to warm up for the recommended period to stabilize their electronics and microphones. This reduces drift and ensures the reference tone is stable throughout the test.
Tip: Let devices warm up for at least 5–10 minutes before taking readings. - 2
Mount microphone and calibrator
Position the microphone in the same mounting configuration you’ll use for normal measurements. Place the calibrator on or near the microphone as specified by the manufacturer, ensuring solid contact and proper alignment.
Tip: Keep the calibration source aligned with the microphone axis to minimize off-axis errors. - 3
Select calibration mode
Choose the appropriate mode on your meter (e.g., simplex single-frequency at 1 kHz). Confirm the SPL level is the reference you expect (commonly around 94 dB SPL in many standards).
Tip: If your device supports multiple frequencies, stick to the standard 1 kHz for basic checks. - 4
Apply the reference tone
Activate the calibrator to emit the reference tone and note the meter’s reading. Make sure the readout stabilizes before recording.
Tip: If the reading fluctuates, pause and recheck connections and alignment. - 5
Record the measurement
Log the actual SPL reported by the SLM for the reference tone. Note environmental conditions and any setup details that could influence the result.
Tip: Record both the nominal reference value and the observed value to track drift. - 6
Compare against reference
Compare the observed SPL to the calibrator’s specified SPL. If the difference exceeds tolerance, investigate mounting, reflections, or device calibration status.
Tip: Check for potential reflections or standing waves in the test area that could distort the reading. - 7
Adjust if necessary
If allowable, adjust the meter’s calibration offset or gain according to the manufacturer’s guidance. Re-measure to confirm the correction has brought readings within tolerance.
Tip: Make small adjustments and recheck; large corrections can mask underlying issues. - 8
Document and archive
Save the results in your calibration log or software with timestamps, device IDs, and environmental notes. Store certificates and the reference to support traceability.
Tip: Keep a running log and back up records to prevent data loss.
Questions & Answers
What is the purpose of calibrating a sound meter?
Calibration ensures the meter’s readings accurately reflect actual sound levels, improving reliability across sessions and devices. It supports safety decisions, compliance, and data quality.
Calibration keeps your sound level readings accurate and reliable for safety and quality checks.
Which standards should I reference when calibrating a sound meter?
Refer to internationally recognized standards such as IEC 61672-1 for sound level meters and ANSI S1.4 for instrumentation; ensure your reference is traceable and documented.
Use IEC 61672-1 and ANSI S1.4 as your benchmark, with traceable references.
How often should a sound meter be calibrated?
Calibration frequency depends on usage, environment, and manufacturer recommendations. Regular checks, at least annually or after service, help maintain accuracy and identify drift early.
Check calibration regularly, at least yearly or after servicing the meter.
Can I calibrate without a reference tone?
A reference tone is essential for meaningful calibration. Without a traceable reference, you cannot verify the meter’s accuracy reliably.
No—use a traceable reference to verify accuracy.
What if readings drift after calibration?
If drift occurs, re-check setup, connections, and environmental conditions. Consider a full re-calibration or service of the meter if drift persists beyond tolerance.
If drift persists, re-check setup and consider servicing the meter.
Watch Video
Key Takeaways
- Prepare a stable, quiet calibration setup
- Use a traceable reference and document results
- Keep records for audit and maintenance
- Verify and adjust within tolerance, then re-check