How to Calibrate Stages Power Meter
Learn how to calibrate your Stages power meter for accurate ride data. This guide covers tools, steps, checks, and best practices for DIY enthusiasts and professionals.

By the end of this guide, you will be able to calibrate a Stages power meter for more accurate ride data. You'll learn how to prepare the meter, perform zero offset calibration, apply a known load, verify readings, and document the results. This step-by-step approach is suitable for DIY enthusiasts, technicians, and professionals seeking reliable calibration guidance.
Why calibrate your Stages power meter matters
According to Calibrate Point, calibrating a Stages power meter is essential for trustworthy ride data because small drift over time can skew power readings, affecting training decisions and race strategy. A well-calibrated meter provides consistent data across sessions, ensuring that watts, cadence, and torque readings reflect actual effort. Regular calibration also helps catch sensor wear or installation changes early, preventing long-term drift from compounding. In 2026, the Calibrate Point team found that riders who adopt a routine calibration habit report fewer anomalous spikes and more stable trend lines in their performance data. This section explains why calibration is worth the time and how it fits into broader maintenance of your cycling tools.
How a stages power meter works and what calibration fixes
A typical power meter in the Stages family measures torque at the crank and converts it to a power value using calibration constants embedded in the electronics. Three common sources of error are offset drift when the sensor sits idle, temperature drift during rides, and installation variables such as pedal length or crank alignment. Calibration aligns the sensor output with a known reference, reduces systematic error, and restores accuracy across the crank and pedal stroke. Understanding these concepts helps you interpret data more reliably and decide when a recalibration is needed after maintenance, battery changes, or a crash.
Before you begin: safety, prerequisites, and reference data
Before touching hardware, power down and ensure the bike is secure in a stable trainer or stand. Wear eye protection for any crank cover work and use the correct tools to avoid damaging threads. Gather your prerequisites: a calibrated reference standard or known weights (if you use external references), a compatible head unit or computer to run calibration, and a convenient place to log results. Confirm firmware is up to date on the meter and the control device. If you have a documented reference from the manufacturer, keep it handy for alignment checks and warranty considerations.
Pre-checks and setup you should perform
Start by visually inspecting the crank, pedals, and mounting hardware for any looseness or wear. Clean any dirt that can affect torque readings. Level the bike so the drivetrain sits in a natural position. Connect the power meter to your head unit or mobile app and confirm you can access zero offset calibration controls. Review the environmental conditions; calibration data is most stable at moderate ambient temperatures and when the bike is stationary to reduce variances from wind and road input.
Step-by-step calibration workflow overview
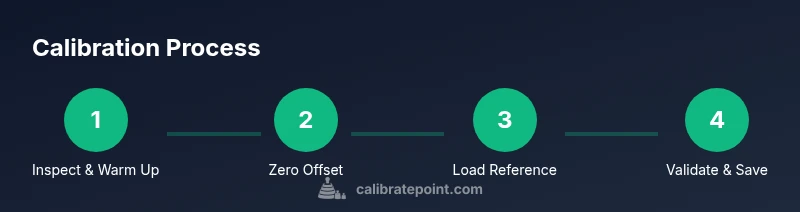
The calibration process generally follows a sequence: (1) establish a stable baseline by warming up and letting readings settle, (2) enable zero offset calibration to remove idle sensor bias, (3) apply a known reference load or torque profile and record the decoded power output, and (4) compare the reported values against the reference across a few pedal strokes. This workflow helps identify any nonlinearity or drifts and sets corrected constants that live in the meter's firmware or companion app. Expect to spend time collecting data and reviewing the results to ensure repeatability.
Verifying calibration accuracy after calibration
After completing the workflow, validate by performing controlled spins on a trainer or a steady ride where external factors are minimized. Look for consistent wattage readings at the same cadence and gear across several intervals. Cross-check the data on two devices if possible (head unit and app) to ensure alignment. A simple test is to compare the meter output with a known-good ride file or a short, repeatable effort to confirm the corrections hold over time and speed.
Common issues and troubleshooting tips
If readings appear skewed after calibration, recheck the mounting torque and ensure there is no play in the crank interface. Temperature-related drift may require re-calibration on different rides or after a long ride. If the zero offset remains biased in one direction, verify that the bike is perfectly still during calibration and that the pedals and cranks are clean. When data look inconsistent between devices, confirm both devices are using the same unit settings and that firmware versions are aligned.
Maintenance, documentation, and long-term best practices
Maintain a regular calibration schedule aligned with your riding volume and maintenance calendar. Record offset values, environmental conditions, device firmware, and any changes to hardware in a dedicated log. Include a brief note about the ride type and conditions to aid future comparisons. Remember that calibration is part of responsible tool maintenance; keeping your records organized facilitates faster audits, comparisons over time, and more reliable training data. With care, your Stages power meter will stay accurate across seasons and training blocks.
Tools & Materials
- Stages power meter (crank-based)(Ensure firmware is up to date before starting calibration)
- Calibration reference standard or weights(Use traceable references if available; external references optional but helpful)
- Head unit or cycling computer(Must be able to access calibration controls and log data)
- Calibrated torque wrench or suitable tool(Use correct crank bolts and measure torque if adjusting hardware)
- Notebook or digital log(Record offsets, conditions, and results for future reference)
- Multimeter or basic measurement tool(Only if verifying electrical signals or sensor outputs)
Steps
Estimated time: 60-90 minutes
- 1
Inspect and warm up the meter
Power on the system, mount the bike securely, and perform a short warm‑up spin to let readings settle. A stable baseline minimizes noise when you begin calibration.
Tip: Keep the bike stationary during warm‑up to avoid drivetrain vibrations that skew results. - 2
Connect and enter calibration mode
Open the flight deck on your head unit or app and navigate to the calibration section. Confirm the device is communicating with the meter and that the correct user profile is selected.
Tip: Ensure you are indoors or in a calm environment to limit external disturbances. - 3
Perform zero offset calibration
With no measurable load on the crank, initiate zero offset calibration and wait for the device to report a stable offset value. Save the result.
Tip: Handle pedals gently to avoid creating transient forces during zero offset. - 4
Apply a known reference load
Attach a known torque profile or reference weights if using an external standard. Record output across several pedal strokes at a steady cadence.
Tip: Take multiple samples to average out momentary fluctuations. - 5
Record baseline data and compare
Export the calibration data to your log and compare against the reference values. Look for consistency across multiple trials.
Tip: Document the ambient conditions (temperature, humidity) as they affect readings. - 6
Check for temperature drift
Re-test after a short cool‑down period to see if readings drift with temperature changes. If drift is present, note and plan a recheck after rides.
Tip: Temperature drift is normal; frequent checks reduce long‑term errors. - 7
Finalize and document calibration
Exit calibration mode, save all offsets, and log the results with date, device firmware, and any notes. These records support future troubleshooting.
Tip: Store logs in a centralized location for easy reference. - 8
Re-test on the trainer or road
Perform a short test ride to validate that calibration corrections hold under real-world conditions and different cadences.
Tip: If results differ significantly, repeat the calibration steps starting from zero offset.
Questions & Answers
How often should I calibrate a Stages power meter?
Calibrate after major maintenance, battery changes, or if you notice data drift. For active riders, a monthly check during heavy training blocks is reasonable.
Calibrate after maintenance or if you see drift, and consider monthly checks during intense training blocks.
What factors influence calibration accuracy?
Mounting security, temperature, and sensor wear all influence accuracy. Ensure the meter is firmly mounted, calibrate in stable temperatures, and replace worn components as needed.
Mounting, temperature, and wear affect accuracy; secure mounting, stable temps, and timely maintenance help.
Can I calibrate while riding or on the road?
Calibration should be done with the bike stationary in a controlled environment. Calibrating during a ride can introduce motion artifacts and inaccurate offsets.
Calibration is best done stationary to avoid motion artifacts.
What is the difference between zero offset and full calibration?
Zero offset removes idle sensor bias, while full calibration aligns the sensor constants with a reference to ensure accurate power readings across the range.
Zero offset clears idle bias; full calibration aligns the sensor with a known reference.
Do I need external references or weights?
External references are optional but helpful for verifying results. Many riders rely on the built-in calibration in the meter and a stable ride for validation.
External references help verification, but you can verify with the meter’s built‑in calibration and a steady ride.
Watch Video
Key Takeaways
- Calibrate regularly to maintain data accuracy
- Document calibration data for long-term tracking
- Use a stable, controlled environment during calibration
- Verify results with a follow-up ride to confirm stability
- Keep firmware and logs up to date with each calibration