How to Calibrate Xbox Controller on PC Windows 10
Learn how to calibrate your Xbox controller on Windows 10 with a clear, step-by-step guide, troubleshooting tips, and best practices for accurate input.

Calibrate your Xbox controller on Windows 10 to improve accuracy and reduce drift. This guide demonstrates wired and wireless connections, using Windows’ built-in calibration tools and the Xbox Accessories app. You’ll set centers, adjust axis responses, and verify inputs in a test, then apply firmware updates if available.
Why Calibration Matters for Gaming
When you calibrate xbox controller pc windows 10, you align physical input with on-screen response, reducing drift and improving precision across genres. Over time, analog sticks wear, dead zones can grow, and triggers may not register consistently. Regular calibration is a practical, low-cost way to maintain reliable input for competitive shooters, racing sims, and flight sims alike. For DIY enthusiasts and technicians, understanding the calibration process helps you diagnose hardware issues and make informed maintenance decisions rather than guessing. In Windows 10, the built-in Game Controllers panel and the Xbox Accessories app provide a clear path to re-center axes, set travel ranges, and test responses before you game or work on projects that rely on precise input. The simple steps below show you how to calibrate xbox controller pc windows 10 effectively and safely.
How the Windows 10 Calibration Tools Work
Windows 10 ships with a hardware calibration facility accessible from the classic Control Panel. The calibration wizard guides you through centering the sticks, selecting the travel range for X and Y axes, and adjusting triggers or bumpers if offered by the device. The results are stored per device and applied system-wide when the controller is active. The Xbox Accessories app, while optional, allows firmware updates and more advanced tuning, including per-button sensitivity in some models. This dual-tool approach means you can quickly re-zero drift with the built-in wizard, and then fine-tune performance with firmware updates if your hardware supports it. For best results, run calibration in a stable USB setup, and avoid interruptions during the wizard to prevent partial data capture.
Using the Built-in Game Controllers Calibration Wizard
Access path: Open Control Panel > Hardware and Sound > Devices and Printers, select your Xbox controller, click Properties, then Calibrate. The wizard presents prompts to center sticks, test travel, and verify button responses. Follow each step carefully, moving sticks in all directions (center, left, right, up, down) and pressing triggers when requested. When you finish, Windows saves the calibration data for that device and you can immediately test in a game or using the test panel in the wizard.
Common Issues and Troubleshooting
If drift persists after calibration, rerun the wizard or perform a fresh calibration with the controller fully charged and connected via USB. Ensure drivers are up to date: visit Windows Update, or use the Xbox Accessories app to check firmware. Check if the problem is hardware-related by testing another controller or another PC. Battery levels, faulty cables, or worn joysticks can cause drift that calibration cannot fully fix.
Advanced Tips: Dead Zones, Firmware Updates, and Testing
Dead zones let you ignore tiny stick inputs near center to avoid drift. Use the calibration results as a baseline, then adjust dead zones in the Xbox Accessories app or Steam Input if your workflow requires per-game tuning. If your controller supports firmware updates, install them to improve input stability and correct known issues. After updating, rerun calibration to ensure settings are applied to the new firmware. Finally, test across multiple games and applications to validate consistency.
Verification: Is Calibration Working?
Open a game or use a test utility to verify axis response. Move sticks through their full range and watch on-screen indicators or a test HUD. If all inputs map to the expected directions and there is no unexpected drift, calibration is successful. Keep a note of any anomalies and revisit calibration if you install new software or hardware, or if you replace batteries.
Tools & Materials
- Xbox controller (wired or wireless)(Ensure the controller is charged and connected to the PC)
- Windows 10 PC(All current updates installed)
- USB-C to USB-A cable or wireless dongle(Use wired connection for stable calibration)
- Control Panel access to Game Controllers(Navigate to Control Panel > Hardware and Sound > Devices and Printers > Game Controllers)
- Xbox Accessories app (optional)(Useful for firmware updates and advanced options)
- Test software or games with controller support(Helps validate calibration in real scenarios)
Steps
Estimated time: 30-60 minutes
- 1
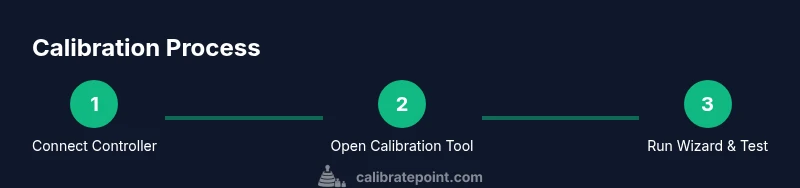
Connect the controller
Plug the Xbox controller into the PC using a wired cable or pair it via Bluetooth. Confirm Windows recognizes the device in Device Manager or the Bluetooth panel. A stable connection reduces calibration errors.
Tip: If using Bluetooth, ensure the controller is paired to the PC and not connected to another device. - 2
Open the calibration tool
Open Control Panel > Hardware and Sound > Devices and Printers, select your Xbox controller, and click Properties, then Calibrate. This starts the official Windows calibration wizard.
Tip: Use a clean desktop and avoid running graphics-heavy apps during calibration. - 3
Center the sticks
When prompted, release both sticks to center and confirm. Move each stick to the outer edges to capture full travel range. This helps Windows map true input response.
Tip: Do not push sticks to maximum edge repeatedly; a single full-range pass is enough. - 4
Calibrate axes and triggers
Follow on-screen prompts to move the axes (X, Y) and triggers through their full travel. Record any asymmetric behavior and adjust center if needed.
Tip: If a stick seems stuck or unresponsive, re-run this step after re-centering. - 5
Test your inputs
Use the built-in test area in the wizard or a game to verify axis and button responses. Note any drift or dead zones that feel off.
Tip: If drift persists, consider repeating the wizard or updating firmware. - 6
Save and optionally update firmware
Finish the wizard and save your calibration. Optional: use the Xbox Accessories app to check for firmware updates which can improve input stability.
Tip: Firmware updates require internet and can reset some calibrations; re-check after update. - 7
Verify in a real game
Launch a game with controller support and perform common actions to confirm stability across menus and gameplay.
Tip: Test multiple titles to ensure consistency.
Questions & Answers
How often should I recalibrate my Xbox controller on Windows 10?
Calibrate when you notice drift or after hardware changes. Regular checks every few months help maintain consistent input, especially after firmware updates or new batteries.
Calibrate when you notice drift or after changes; regular checks help maintain consistency.
Will calibration fix all stick drift?
Calibration can reduce minor drift and improve symmetry, but severe wear or hardware faults may require replacement or professional servicing.
Calibration helps with minor drift, but severe hardware wear may require replacement.
Can I calibrate while connected via Bluetooth, or is USB required?
Both USB and Bluetooth connections can work, but a stable USB connection often yields more reliable calibration results.
Both work, but USB is usually more reliable for calibration.
Is there a difference between Windows 10 and Windows 11 calibration?
The calibration steps are similar in both systems, though the path to the calibration wizard may vary slightly due to UI changes.
Calibration steps are similar on both OS versions; paths may differ slightly.
Do firmware updates affect calibration saved settings?
Firmware updates can reset some settings or improve input, so re-check calibration after updating.
Updates can affect settings; re-check calibration after updating.
What if the wizard isn’t visible on my screen?
Ensure the controller is properly connected and recognized by Windows; try restarting the wizard or re-plugging the device.
Make sure Windows recognizes the device, then retry or replug.
Watch Video
Key Takeaways
- Connect the controller first and keep it connected during calibration
- Follow on-screen prompts precisely for accurate axis mapping
- Test in-game to confirm stability before gameplay
- Update firmware if available for best results