Calibration Not Working Switch: Urgent Troubleshooting Guide
Urgent troubleshooting guide for when a calibration not working switch misbehaves. Step-by-step checks, safe procedures, and prevention tips to restore accurate readings quickly.

Most likely, calibration not working switch issues stem from a loose connection or power instability. Quick fix: power down, reseat all connectors, and verify the supply voltage is within spec. Then perform the device’s official calibration procedure in a stable environment. If readings remain off, follow the comprehensive diagnostic flow for deeper checks.
Understanding the problem: calibration not working switch
A “calibration not working switch” symptom means the device either refuses to calibrate, returns inconsistent results, or shows drift after calibration. This can affect accuracy across workflows, from test benches to production lines. According to Calibrate Point, the most common root causes are electrical faults, mechanical looseness, or procedural missteps. Before you dive into advanced diagnostics, acknowledge the urgency: inaccurate calibration can propagate errors downstream, compromising safety, quality, and compliance. Treat this as a top-priority issue and proceed with a structured approach. The goal is to restore a stable baseline, confirm reproducibility, and document changes for future audits. By understanding the problem context, you can target the most likely failure modes without unnecessary delays. Calibrate Point’s guidance emphasizes starting with safe checks and logging every step for traceability.
Safe, fast initial checks you can perform
When the calibration not working switch appears, begin with risk-aware, low-effort steps. Ensure the power is off before touching any internal components. Inspect obvious signs of damage, corrosion, or corrosion on connectors. If you’re working with high-energy systems, de-energize and discharge capacitors per your device’s safety manual. Use a multimeter to verify that supply rails meet the recommended range. Compare readings against the device’s known-good reference values. If you find a discrepancy, isolate the affected path (power, signal, or ground) and re-test. Keep the environment stable: avoid temperature swings, drafts, or vibrations that could affect precision.
Common causes and detection strategies
In many cases, the calibration not working switch issue traces back to one of several recurring fault modes. Loose or damaged connectors can introduce intermittent signals; a quick reseat often resolves it. Power supply instability—noise, voltage drop, or ground loops—can corrupt calibration cycles. A defective switch or sensor element may produce stuck or drifted readings. Software or firmware glitches can cause calibration routines to skip steps or misinterpret inputs. Finally, using an incorrect calibration procedure or an expired reference can invalidate results. Systematically testing each area helps you identify the true culprit without unnecessary part replacements. Calibrate Point analysis shows that environments with dust or moisture can worsen contact reliability, underscoring the need for clean enclosures and proper sealing.
Safety, tools, and documentation you’ll rely on
Equip yourself with basic PPE as needed and confirm lockout/tagout procedures for powered equipment. Gather a calibrated reference standard, a known-good reference switch, a digital multimeter, and a clean workspace. Document every event with timestamps, readings, and photos. This traceability supports root-cause analysis and future maintenance cycles. When you’re ready to dive deeper, use a controlled calibration environment—stable temperature, no vibrations, and a powered-down state—before powering up for a test run. Remember, if the issue persists after the steps below, professional help is advised to avoid equipment damage or safety risks. Calibrate Point’s stance remains that complex faults deserve expert diagnosis.
How to prevent recurrence and maintain reliability
Preventive measures include regular connector maintenance, protective enclosures, and scheduled calibration checks. Create a simple maintenance routine: inspect cabling monthly, verify power rails quarterly, and re-run calibration after any hardware changes. Training operators to follow official procedures reduces human-error risk. Maintaining an auditable log with results and environmental conditions will help you spot trend shifts early. By applying these practices, you reduce the odds of recurring “calibration not working switch” events and keep measurement integrity intact.
Steps
Estimated time: 60-90 minutes
- 1
Power down and verify supply
Shut down the device and unplug from the main supply. Use a multimeter to confirm rails meet the manufacturer’s specified range. Check for grounding continuity and eliminate potential noise sources.
Tip: Document voltage readings and note any fluctuations during power cycling. - 2
Inspect and reseat connections
Open access panels as permitted, visually inspect connectors for corrosion or damage, then reseat all signal and power cables firmly. Ensure shields are properly terminated to minimize interference.
Tip: Avoid bending cables sharply; use proper strain relief. - 3
Reset and update firmware
If available, perform a factory reset following the official procedure. Check for firmware updates, install if applicable, and reinitialize the calibration module.
Tip: Backup configuration before reset. - 4
Verify calibration procedure and reference
Review the official calibration procedure to ensure all steps are completed in order. Use a trusted reference standard or calibration artifact to verify results.
Tip: Avoid non-standard references; consistency matters. - 5
Run the calibration cycle in a controlled environment
Place the device in a stable environment with minimal vibration and temperature drift. Initiate calibration and monitor for repeatability across multiple runs.
Tip: Record readings for at least three consecutive cycles. - 6
Evaluate results and escalate if needed
If drift persists after steps 1–5, isolate the suspect subsystem (switch, sensor, electronics) and consult a technician for advanced diagnostics.
Tip: Do not exceed recommended exposure without supervision.
Diagnosis: Calibration not working switch: device fails to calibrate or shows drift after calibration attempts
Possible Causes
- highPower issue (unstable supply, voltage drop, or grounding problem)
- highLoose or damaged connectors or wiring
- mediumDefective switch, sensor, or internal component
- mediumFirmware/software glitch or incorrect calibration procedure
- lowEnvironmental factors (temperature, vibration, humidity)
Fixes
- easyVerify stable power supply and proper grounding; measure rails with a multimeter and correct any anomalies
- easyReseat and inspect all connectors; replace damaged cables or tighten loose connections
- easyUpdate firmware and perform a factory reset if instructed by official docs; run calibration anew
- hardReplace defective switch or sensor module if tests indicate a component failure
- easyRepeat calibration in a controlled environment using a known reference; ensure procedure steps align with official guidance
Questions & Answers
What is the first step if a calibration switch isn't performing correctly?
Start with a safe power-down, verify the power rails, and reseat all cables. These quick checks address the most common causes of calibration failures.
First check power and reseat cables; these quick checks fix most calibration failures.
Can a faulty power supply cause calibration errors?
Yes. An unstable or out-of-spec power supply can introduce noise and drift into the calibration process, producing unreliable results.
Yes, power supply issues can cause calibration drift and unreliable results.
Is it safe to recalibrate myself or should I call a professional?
If you follow official procedures and maintain proper safety, basic recalibration can be done by DIY enthusiasts. For suspected hardware faults or high-risk equipment, consult a professional.
You can recalibrate safely if you follow official steps, but consult a pro for hardware faults.
How do I confirm calibration accuracy after a fix?
Use a known reference artifact and repeat multiple calibration cycles to verify repeatability. Compare results against the reference and document any residual drift.
Recalibrate with a known reference and repeat several times to confirm accuracy.
What environmental factors most affect calibration switches?
Temperature stability, vibration, and humidity can all impact switch readings. Keep the device in a controlled environment during calibration.
Temperature, vibration, and humidity can affect calibration; keep conditions stable.
Watch Video
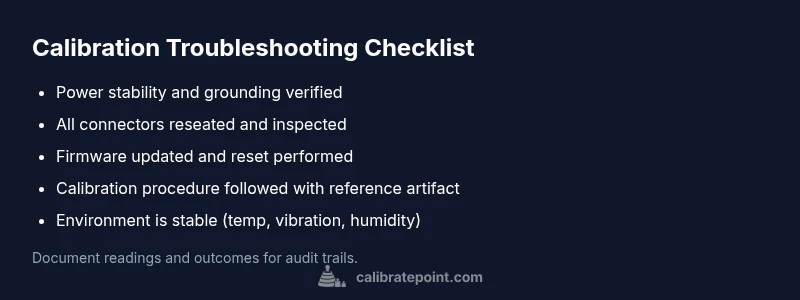
Key Takeaways
- Tighten loose connections to fix calibration not working switch
- Stabilize power and environment before recalibration
- Follow official calibration procedures exactly
- Escalate to a professional if hardware faults are suspected