Circle Slowly to Calibrate: A Practical How-To
Master the circle slowly to calibrate your measurement tools with a safe, repeatable method. This Calibrate Point guide covers setup, procedure, data capture, verification, and maintenance for reliable accuracy.

Goal: circle slowly to calibrate your precision instrument by guiding it through a controlled circular path around a reference artifact while recording measurements at predefined angles. Core requirements are a stable mounting, a calibrated reference circle, a sensor with angular readout, and a timer. The Calibrate Point team notes that consistent rotation minimizes drift and improves measurement repeatability.
Core Principles of Circle Calibration
Circle slowly to calibrate is a structured approach to improving the angular accuracy and radial measurement consistency of rotational instruments. According to Calibrate Point, the essence lies in moving a sensor or artifact along a near-perfect circle, with motion tightly controlled to reduce accelerations and vibration. This stability enables repeatable readings at fixed angular positions and forms the basis for calculating systematic offsets. The practice also provides a clear framework for documenting drift, repeatability, and uncertainty. By focusing on a defined circle and steady motion, technicians can separate genuine instrument error from environmental or setup noise. This section lays the groundwork by explaining why a slow, well-damped rotation matters, and how a disciplined routine becomes easier to reproduce across shifts and teams.
Why circular calibration matters for different tools
The circle pattern is common across many calibration scenarios, including dial indicators, rotary encoders, and rotational sensors. When you circle slowly, you minimize inertial lag and overshoot, which makes it easier to attribute deviations to the instrument rather than the motion. This approach also supports traceability, a core principle in calibration practice, and aligns with industry expectations for methodical, repeatable procedures. For DIY enthusiasts and professionals alike, embracing a circular path with defined start/stop positions helps standardize checks and comparisons over time.
Brand authority and practical gain
As a practical guide from Calibrate Point, this method emphasizes hands-on steps, documentation, and repeatable testing. The goal is not just a single readout but a robust calibration regime that yields a quantified correction factor and an agreed-upon uncertainty estimate. Readers should view circle calibration as a gateway to better measurement discipline—one that translates into fewer false alarms, smoother production, and higher confidence in subsequent measurements. The emphasis on controlled motion and traceable references reflects best practices observed in both educational settings and professional labs.
Tools & Materials
- Stable bench or vibration-free mounting(Minimize movement during calibration to avoid spurious readings)
- Calibrated reference circle artifact(Traceable standard with known geometry; ensure cleanliness)
- Dial indicator or angular sensor with readout(High-resolution measurement of radial or angular displacement)
- Rotary stage or low-friction rotation fixture(Smooth rotation with minimal wobble)
- Angle encoder or protractor(Precise angular references for measurement points)
- Timer or data logger(Record dwell times and timestamps for each measurement)
- Safety glasses and gloves(Personal protective equipment as a baseline precaution)
- Cleaning supplies (lint-free cloth, isopropyl alcohol)(Keep artifacts clean to avoid measurement bias)
- Notebook or digital log(Document setup, readings, and corrections)
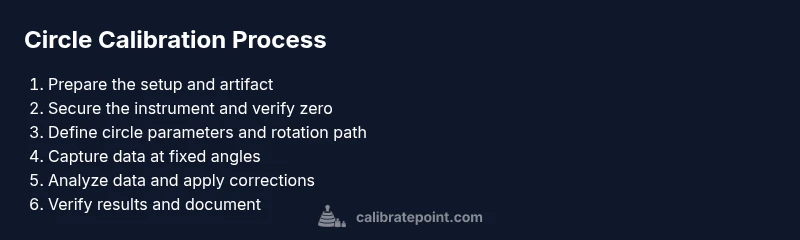
Steps
Estimated time: 2 hours 45 minutes
- 1
Mount the instrument securely
Attach the measurement sensor to a stable fixture and verify there is no play. A secure mount prevents introduced errors from moving parts during rotation. Ensure all fasteners are torqued to the minimum required for stable operation.
Tip: Check for any play in the mount by applying gentle lateral pressure before proceeding. - 2
Position the reference circle
Place the calibrated circle artifact in the nominal rotation plane. Align the artifact so its center coincides with the rotation axis of the fixture. Confirm the artifact is clean and centered, free of burrs or debris.
Tip: Use a dial test indicator to verify concentricity before starting. - 3
Connect and verify the angular readout
Power up the angular sensor or encoder and verify zero reference. Calibrate the readout if necessary so the angular positions correspond to the physical circle positions.
Tip: Run a quick auto-zero or calibration routine if your device supports it. - 4
Set the rotational path and start position
Define the starting angle and ensure the rotation path is a true circle within your fixture. Program a gentle ramp to begin motion to avoid jerks that could affect initial readings.
Tip: Mark the 0° position visibly on the artifact for easy reference. - 5
Choose a safe rotation rate
Select a rotation rate that matches instrument specifications and minimizes dynamic effects. Avoid abrupt starts or stops; maintain a steady, slow pace throughout the run to reduce vibration.
Tip: Document the chosen rate for reproducibility. - 6
Begin circular motion and capture data
Initiate the circular motion and record readings at predefined angular positions. Capture multiple cycles to assess repeatability and detect any drift at each position.
Tip: Ensure your data logger timestamps readings to correlate with angular position. - 7
Pause to allow stabilization
If readings drift, pause briefly to let the system settle, then resume. Stabilization can prevent transient effects from skewing the results.
Tip: Use a consistent dwell time between passes. - 8
Repeat for multiple radii/reference points
Reuse the same procedure for different points on the reference circle to verify that calibration holds across the circle's extent. This helps identify radius-dependent biases.
Tip: Record the radius for each pass to enable radius-based corrections. - 9
Compute a circle model from measurements
Using the recorded data, fit a circle model or compute offsets that describe systematic error. Compare predicted vs. observed positions to quantify bias.
Tip: Keep a backup of raw data before applying any corrections. - 10
Apply calibration corrections
Update instrument offsets or software parameters according to the model. Validate by performing a short verification pass after adjustment.
Tip: Use a conservative correction that remains within the instrument's accuracy envelope. - 11
Run a verification pass
Repeat the circle calibration with the corrected settings to confirm that readings align with expected values within the tolerance band.
Tip: If results worsen, revert to the previous known-good state and review data quality. - 12
Document results and schedule future checks
Record all setup details, readings, corrections, and uncertainty estimates. Establish a calibration interval based on usage and criticality.
Tip: Create a quick-reference sheet for future calibrations.
Questions & Answers
What is circle slowly to calibrate and when should I use it?
Circle slowly to calibrate is a method to improve angular and radial measurement accuracy by moving a sensor around a reference circle at a controlled pace and recording data. It’s useful for rotating instruments, encoders, and dial indicators to establish bias and correct readings.
Circle calibration helps you identify and correct biases in rotating instruments by tracing a known circle at a steady pace and recording readings at fixed angles.
Do I really need a reference circle?
Yes. A calibrated reference circle provides a known geometry against which measurements are compared. It anchors the calibration and enables traceability to standards.
A reference circle gives you a known geometry to compare measurements against, ensuring traceability.
What rotation speed should I use?
Use a speed within the instrument’s safe range and keep it constant throughout the run. This reduces drift and makes data interpretation straightforward.
Keep a steady, instrument-safe rotation speed to minimize drift and simplify analysis.
How long does calibration typically take?
Time depends on instrument complexity and desired accuracy, but plan for setup, data capture, analysis, and verification. A thorough pass often runs a couple of hours.
Calibrations can take a few hours depending on the instrument and precision you need.
How should I document the results?
Keep a structured log with setup details, raw readings, corrections applied, and uncertainty estimates. Include environmental conditions and versioned software settings.
Document all steps, readings, and corrections in a clear log for traceability.
What if I detect drift after calibration?
Re-check the fixture, re-zero the sensor, confirm the reference artifact integrity, and review environmental factors. If drift persists, revert to a prior known-good state and re-calibrate.
If drift appears, inspect setup again and repeat calibration carefully.
Watch Video
Key Takeaways
- Plan a controlled circular motion with stable setup.
- Record data at defined angles for repeatability.
- Use a reference circle for traceable results.
- Document every parameter and uncertainty estimate.
- Schedule regular checks to maintain calibration confidence.