Govee Camera Calibration Troubleshooting Guide
If you see the message 'govee can't calibrate camera', this urgent guide from Calibrate Point walks you through fast checks, firmware updates, lighting tweaks, and a step-by-step workflow to restore reliable calibration.

Most likely, Govee can't calibrate camera due to a firmware mismatch, improper setup, or a blurry calibration target. Start with a full reboot, check for firmware updates, and confirm the calibration scene is well-lit, unobstructed, and in sharp focus. If issues persist, follow the diagnostic flow below for exact steps.
Why calibration can fail with Govee cameras
When readers encounter the error govee can't calibrate camera, it's natural to feel frustrated. According to Calibrate Point, most calibration problems stem from how the device and environment are set up rather than from a fundamental hardware fault. The Calibrate Point team found that a clean lens, stable power, and a properly lit calibration scene dramatically improve reliability. In practice, the most common culprits are outdated firmware, misconfigured lighting, and misalignment of the calibration target. This guide walks you through the common failure modes and how to address them quickly, so you can restore reliable calibration without repeated guesswork.
Calibration isn’t magic. It relies on stable optics, accurate detection, and consistent lighting. If any of these are off, even small deviations can throw off the calibration routine. By methodically checking each factor, you can isolate the root cause and apply the right fix fast.
According to Calibrate Point, a structured troubleshooting approach reduces guesswork and speeds up resolution, especially when devices are under warranty or service plans. You’ll find a practical diagnostic flow below that aligns with industry best practices and real-world calibration scenarios.
How camera calibration works on Govee devices
Govee cameras typically use visual references and on-device sensors to measure alignment, focus, and exposure during calibration. The process assumes a stable scene, a clean lens, and a firmware environment that supports calibration routines. If the firmware is outdated, or if the camera is unable to process the reference image correctly, the calibration may fail or produce inconsistent results. The calibration target distance and lighting level influence how clearly the pattern or markers can be detected. Understanding these basics helps you interpret error messages and apply the right remedy.
Calibrate Point recommends confirming that the camera can reach a known good state before retaking calibration. This means ensuring the device is up to date, the environment is controlled, and the user interface isn’t intercepting or blocking the calibration flow with other tasks.
Lighting, scene, and distance: three levers to fix
Lighting, the calibration scene, and the distance between the camera and the target are the three most impactful variables in calibration accuracy. Problems commonly arise when the scene is too dim, too reflective, or when glare masks the calibration markers. Shadows can also distort the reference markers that the camera seeks to align with. Ensure the target is evenly illuminated, with no direct reflections on the lens or the calibration card.
Distance is equally important: too close or too far can cause detection failures. Follow the manufacturer-recommended distance range and avoid tilting the camera during calibration. If you can’t hit the right distance, adjust the camera position to keep the target centered in frame and at a consistent angle.
If you can’t achieve stable lighting or consistent framing, add a neutral backdrop and reduce clutter in the scene. A static, uncluttered environment makes marker detection more reliable and reduces calibration variability.
Diagnostic checklist you can run now
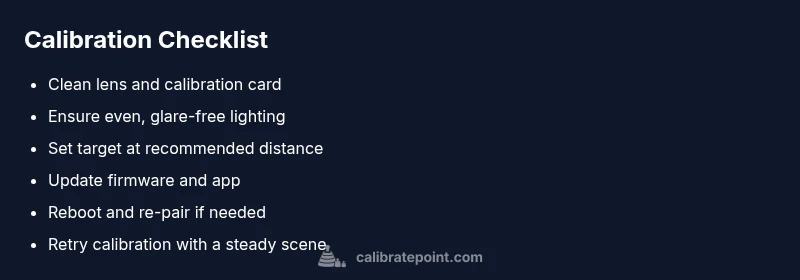
- Reboot the camera and app. 2. Check for available firmware updates and apply them. 3. Verify the calibration target is clean, flat, and free from smudges. 4. Confirm lighting is even and glare-free. 5. Ensure the target is at the recommended distance and centered in the frame. 6. Retry calibration with the device connected to a stable power source. 7. If errors persist, note the exact error message and capture a short video of the calibration attempt for support.
Bookmark this checklist for quick relief and reproducibility in future calibrations. The order above follows a logical, easy-to-follow path that minimizes unnecessary steps and maximizes the chance of success.
Firmware, app settings, and connectivity checks
Firmware and app alignment are often the unseen culprits behind calibration failures. Begin by updating the camera firmware to the latest version and ensuring the companion app is current. If the device lost pairing or has intermittent connectivity, re-pair it and confirm the network signal is stable. Disable any background apps or overlays that might interrupt the calibration flow. Clear cache or reset the app if needed, but avoid factory resets unless advised by support.
Rebooting both the camera and the controller can resolve transient processing glitches that block calibration. After updates, perform a fresh calibration attempt with the same scene conditions to reduce variable drift.
When in doubt, consult the device logs or diagnostic reports generated by the app, then compare them against the troubleshooting notes in this guide. These details often speed up support conversations and reduce back-and-forth time.
Advanced fixes and when to escalate
If the issue persists after the basic and firmware steps, consider more advanced paths with caution: perform a factory reset only if recommended by the manufacturer, re-enter your device credentials carefully, and reconfigure network settings from scratch. Check for known issues in user forums or official release notes to identify whether the problem is tied to a specific firmware build. If the calibration still won’t complete, collect the following before contacting support: device model, serial number, firmware version, app version, a short video of the failed calibration, and the exact error text. This information helps support reproduce and diagnose the fault more effectively.
Calibrate Point recommends engaging support when: the device shows hardware-level errors, persistent calibration failures across multiple scenes, or if you suspect a faulty sensor or lens issue. Do not attempt irreversible hardware changes or disassembly unless you are a trained technician.
When escalation is needed, follow the official support workflow and share your diagnostic data. Clear communication reduces resolution time and protects your warranty status.
Prevention and maintenance tips to avoid future issues
Maintaining camera health and calibration readiness reduces future downtime. Schedule routine lens cleaning, keep the calibration scene consistent, and store calibration targets flat and clean. Regularly verify that lighting remains stable across different times of day and adjust room lighting to avoid dramatic shifts. Keep firmware current and periodically review calibration logs for anomalies. A proactive maintenance routine can dramatically lower re-calibration cycles and extend device reliability.
Steps
Estimated time: 30-45 minutes
- 1
Prepare the workspace and reference scene
Clear the area, clean the camera lens and calibration card, and ensure even lighting. Position the target at the recommended distance and center it in the frame. This reduces detection errors during calibration.
Tip: Use a stable, non-reflective surface and avoid moving the target during the setup. - 2
Update firmware and app
Check for and install any available firmware updates for the camera and the companion app. A mismatch between versions can block calibration routines and lead to false negatives.
Tip: If an update is large, perform it over a stable Wi-Fi connection to prevent partial installs. - 3
Reboot and re-pair if needed
Power cycle the camera and then re-pair it with the app. A fresh pairing often resolves handshake or syncing issues that impede calibration.
Tip: Do not interrupt the pairing process once it begins. - 4
Run calibration with fixed lighting
Execute calibration again with the scene lit evenly and free of glare. Ensure the frame remains steady and the target is clearly visible in the camera view.
Tip: Avoid direct sunlight or strong under-cabinet lighting that causes shadows. - 5
Validate alignment and distance
Confirm the target is within the recommended distance and properly aligned. Reposition if the target drifts or if the camera angle changes during calibration.
Tip: Use a ruler or fixed marker to maintain consistent distance. - 6
Escalate if unresolved
If calibration still fails after these steps, document the exact error text and contact support with logs. Do not attempt any irreversible hardware changes.
Tip: Include a short video showing the calibration attempt and the captured frame.
Diagnosis: Govee camera won't calibrate or calibration fails with an error message
Possible Causes
- highFirmware mismatch or outdated firmware
- mediumPoor lighting or glare in calibration scene
- mediumIncorrect calibration target distance or misalignment
- lowConnectivity issues between camera and app
- lowLens smudges or dirty calibration target
Fixes
- easyUpdate firmware to latest version and reboot device
- easyImprove lighting and reduce glare on calibration target
- easyReset target position to recommended distance and recenter the frame
- easyRe-pair the camera with the app and re-sync time/date
- mediumIf persistent, perform a factory reset only after confirming with support
Questions & Answers
Why won't my Govee calibration complete even after updating firmware?
This can happen if the calibration scene isn’t properly lit or if the target distance changes during the process. Recheck lighting, clean the lens, and ensure the target stays centered. If the problem continues, try rebooting and re-pairing.
If the calibration still won’t complete after updates, double-check lighting and setup, then reboot and re-pair the device.
What should the calibration target look like during the setup?
The target should be flat, clean, and evenly illuminated with high contrast against the background. Avoid reflections on glossy surfaces and keep the markers clearly visible in the camera view.
Make sure the calibration target is clean, flat, and well lit so the camera can clearly detect the markers.
Can a factory reset help with calibration issues?
A factory reset can fix deep software issues, but it should be a last resort after confirming firmware and environment are correct. Re-add the device carefully after reset and retry calibration.
A factory reset is a last resort; re-adding the device after reset is usually followed by another calibration attempt.
Is calibration affected by ambient lighting changes?
Yes. Sudden changes in ambient light can disrupt calibration. Aim for consistent lighting during the process and avoid switching lights on/off until calibration completes.
Ambient lighting changes can throw off calibration; keep lights steady while calibrating.
When should I contact support for calibration issues?
If you’ve followed the troubleshooting steps and the calibration still fails, contact support with your device details, firmware version, and a video of the failed calibration. This helps diagnose hardware or software faults quickly.
If troubleshooting doesn’t fix it, reach out to support with your device details and a short video showing the problem.
Watch Video
Key Takeaways
- Update firmware first to rule out version issues
- Ensure even lighting and glare-free calibration scene
- Keep target distance consistent and centered
- If unresolved, gather logs/video before contacting support