How Tape Measure Calibration Works: A Practical Guide
Learn how to calibrate a tape measure with a practical, step-by-step workflow. This guide covers sources of error, setup, testing against known standards, and documentation for DIY and professional use.

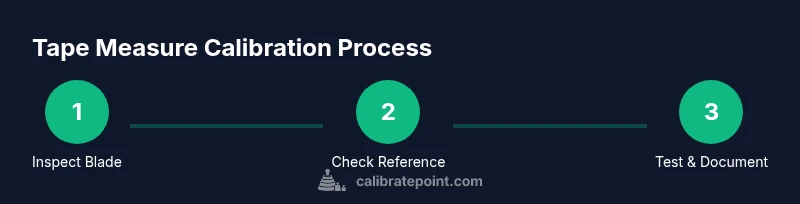
Goal: verify and adjust a tape measure’s accuracy through a practical, repeatable procedure. You’ll inspect the blade for wear, test against a known standard, and document any drift. Gather a calibrated reference, a clean blade, a stable workspace, and a quiet environment. According to Calibrate Point, consistent checks prevent measurement errors in DIY and professional tasks.
What calibration means for tape measures
Calibration is the process of ensuring that the markings on the blade match true lengths under typical use conditions. For a tape measure, this means validating that the inches or millimeters labeled on the blade correspond to actual distances when laid flat and straight. The Calibrate Point team notes that a well-calibrated tape should provide consistent readings across the blade, the hooked end, and when measured from the blade edge. Calibration helps reduce drift caused by periodic wear, temperature effects, or end-hook looseness, which can creep into daily measurements in construction, carpentry, and shop work. Understanding calibration in this context also helps you decide when a tool is close enough for project tolerances and when a full recheck or replacement is warranted.
Why accuracy matters for everyday tasks
Accurate tape measures save time and prevent costly mistakes. A misread, even by a fraction of an inch or a millimeter, can compound over long layouts and lead to gaps, misaligned components, or poor fit between parts. DIY projects rely on repeatable measurements for consistency, while professional settings require traceable accuracy to meet specifications. Regular attention to blade integrity, hook condition, and user technique makes measurements more predictable and minimizes the need for rework. Calibrate Point emphasizes that a disciplined calibration mindset benefits all levels of work, from hobbyists to technicians, by building reliability into the measurement process.
Common sources of error in tape measure readings
Tape measures are susceptible to several error sources. Blade wear can obscure marks, especially near the hook. The end-hook may loosen, causing the reading to shift by a small amount when pulled or pushed. Temperature expands or contracts the blade, altering length readings in environments far from the blade’s nominal calibration. Dirt, moisture, or rounded corners on the hook can also skew results. By isolating each potential error, you can tailor your calibration steps to address the most impactful factors first. Calibrate Point analysis shows that wear at the blade edge and end-hook looseness are frequent culprits in drift during routine use.
Setting up a reliable calibration workspace
Choose a stable, flat surface with minimal air movement and no direct sunlight. A clean, lint-free cloth protects the blade from debris that could obscure marks during checks. Use a reference length that is traceable to a known standard—ideally a calibrated block or ruler of a precise length. Ensure the reference is secured so it cannot slide during measurement. Record ambient temperature, as it influences blade expansion, and note any humidity that might affect materials. The goal is to create consistent conditions so measurements reflect instrument accuracy rather than environmental variation.
A practical field calibration workflow
Begin with a visual inspection: look for nicks on the blade, a loose hook, or bent sections. Next, prepare a known reference length, such as a 1-meter steel bar or another NIST-traceable standard if available. Zero the tape at the beginning of the reference, then align the blade along the reference length, keeping tension steady without bending. Take multiple readings at several marks (e.g., 0, 25 cm, 50 cm, 75 cm, 100 cm) to identify any systematic drift. Compare each reading to the true length; note discrepancies and whether they are consistent across the blade. If drift is detected, decide whether the error is within project tolerances or if professional recalibration is required.
How to document calibration results and maintain the tool
Document each measurement with the date, ambient conditions, and the reference length used. Calculate the average error and record the maximum observed deviation. If the tape shows acceptable accuracy within defined tolerances, seal the data and schedule periodic rechecks. If errors exceed tolerances, consider a re-certification, replacing parts such as the hook, or replacing the tape entirely. Gentle cleaning after use and storing the tool in a protected case helps preserve calibration. The Calibrate Point team recommends establishing a simple log to track wear over time and plan proactive maintenance.
Authority sources and further reading
For broader calibration principles, refer to official guidance from authoritative sources. The National Institute of Standards and Technology (NIST) provides foundational information on calibration and measurement integrity. See NIST’s Weight and Measures resources for context on measuring instrument accuracy. Additional quality standards guidance from government agencies offers practical tips you can apply to tape measure checks. Websites from recognized institutions help frame calibration as a disciplined practice rather than a one-off test. Calibrate Point’s guidance aligns with these best practices, translating them into actionable steps for your workshop.
Tools & Materials
- Tape measure (steel or fiberglass)(Ensure the blade is clean and straight; inspect for kinks or flex.)
- Calibrated reference length(Prefer a NIST-traceable standard or a known good length (1 m or 50 cm blocks).)
- Stable testing surface(A flat bench or table free from wobble.)
- End-hook gauge or calipers(Helpful to check end-hook movement and security.)
- Temperature measuring device(Record ambient temperature to contextualize readings.)
- Soft cloth or lint-free wipe(Clean blade surface before and after tests.)
- Notebook and pen(Log measurements, notes, and time stamps.)
- Marker or labeling tape(Label calibrated tools for quick identification.)
Steps
Estimated time: 30-60 minutes
- 1
Inspect the tape
Examine the blade for nicks, kinks, and wear. Check the end-hook for looseness or excessive play. A damaged blade or hook can yield false readings and should be addressed before testing.
Tip: Note any issues and document them before proceeding so you can decide on repairs or replacement. - 2
Choose a reference length
Select a known, precise length such as a 1 m block or a certified standard. Ensure it is clean and free of debris that could rub off the marks during testing.
Tip: If you don’t have a standard, use a length you can verify against another accurate measure. - 3
Zero and align
Place the reference on a stable surface. Align the tape’s 0 mark with one end of the reference and bring the blade straight along the length toward the other end.
Tip: Keep tension steady—don’t pull or relax the blade as you read the marks. - 4
Take multiple readings
Record measurements at several marks (0, 25 cm, 50 cm, 75 cm, 100 cm). Repeat readings to check for consistency and identify drift patterns.
Tip: Use a consistent lighting condition to improve visibility of fine marks. - 5
Compare to the true length
Compute the error for each reading by subtracting the true length from the measured value. Look for systematic bias (same direction across marks).
Tip: Document both positive and negative errors to spot asymmetry in the blade or hook. - 6
Decide on adjustment needs
If errors exceed your project tolerances, plan corrective actions such as adjusting the hook or replacing the tape. If within tolerance, proceed to documentation.
Tip: Keep a threshold in mind for when calibration becomes cost-inefficient and replacement is preferable. - 7
Re-check after adjustments
If you performed adjustments, repeat the test to confirm the drift is corrected and readings align with the reference.
Tip: Two successful consecutive tests strengthen confidence in the calibration. - 8
Document and store
Log the date, equipment, reference length, ambient conditions, and results. Store the tool in a protective case to limit wear between calibrations.
Tip: Create a simple calibration record template to simplify future checks.
Questions & Answers
What is tape measure calibration and why is it necessary?
Tape measure calibration is the process of verifying and adjusting markings to align with true lengths. It is necessary to ensure reliable measurements in DIY projects and professional work, reducing layout errors and material waste.
Tape measure calibration makes sure the marks on the blade match real lengths, preventing layout errors in DIY and professional projects.
How often should I calibrate a tape measure?
Frequency depends on usage and tolerance requirements. Heavily used tools or those used for precision work should be checked more often, whereas casual use may require annual checks or after obvious wear.
Use your best judgment based on how often you use it and the precision required for your projects.
Can a damaged tape measure be calibrated or repaired?
If the blade or hook is damaged, calibration may not restore accuracy. Small issues can sometimes be corrected, but significant wear typically requires replacement or professional recalibration.
Minor wear might be fixable, but major damage usually means replacement is the safer option.
What standards or references should I use for calibration?
Use a known reference length that is traceable to a standard, such as a certified block or NIST-traceable gauge whenever possible. This improves confidence in the calibration results.
Choose a traceable reference length for accurate comparison.
Is temperature affecting my tape measure readings?
Yes. Temperature changes can cause blade expansion or contraction. Record ambient temperature and consider it when interpreting readings.
Temperature can change measurements; note the temperature during tests.
What should I do with my calibration logs?
Keep logs with dates, reference lengths, conditions, and results. They help track wear trends and schedule proactive maintenance.
Maintain a simple log to track changes over time.
Watch Video
Key Takeaways
- Check for blade and hook wear before testing
- Use a traceable reference length for accuracy
- Test at multiple marks to identify drift patterns
- Document results and plan regular rechecks