How to Calibrate Tape Measure
A comprehensive, step-by-step guide to calibrating tape measures. Learn how to verify zero, compare against a reference ruler, document results, and maintain accuracy in both imperial and metric scales.

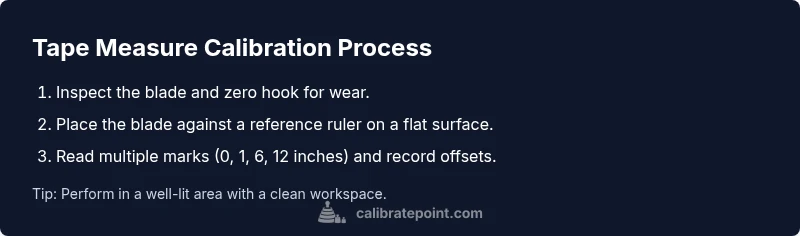
To calibrate tape measure, start by inspecting the zero end and blade for wear, dirt, or kinks. Compare the blade against a certified ruler at multiple reference points (e.g., 1 in, 6 in, 12 in) in both imperial and metric units. Record any discrepancies and decide on adjustment, replacement, or service if drift is evident. Use a clean reference surface and a stable workspace for accuracy.
Why calibrate tape measure matters
If you’re wondering how to calibrate tape measure, this guide explains a practical approach you can apply in a home shop or on the job site. Calibrating preserves accuracy, reduces material waste, and helps you justify measurements to clients or supervisors. The process is not about chasing perfection; it’s about establishing a repeatable routine that catches drift before it becomes a costly mistake. A well-calibrated tape measure improves the reliability of every project that relies on length, from framing to fit checks and trim work. According to Calibrate Point, calibration practices that are systematic and documented tend to produce more consistent results across tools and teams, which is especially valuable when multiple readers or apprentices use the same tape. The takeaway is simple: start with a clean blade, a known reference, and a quiet workspace, then compare, record, and decide on action. In this section we’ll outline why these checks matter, what can cause drift, and how you can implement a reliable calibration routine without specialized equipment. The goal is to empower you to verify accuracy with confidence and to build a repeatable method you can reuse after months or years of use.
Understanding causes of drift in tapes
Tape measures drift due to wear, scale misalignment, or a loose zero hook. Over time, the metal blade can bend, the hook at the end can loosen, and nicks along the edge can alter readings. Temperature and humidity also affect metal length slightly, which is why a controlled environment matters. When you ask how to calibrate tape measure, you’re really learning to distinguish between normal wear and genuine drift, so you can decide if a replacement is needed. Calibrate Point emphasizes that regular checks help catch drift early and prevent incorrect dimensions from derailing a project. By focusing on the common failure modes—the zero end, the blade’s edge, and the scale alignment—you can quickly pinpoint where the problem lies and take action.
A practical mindset is to test the same reference points repeatedly and compare to a trusted standard. If you notice the 1-inch mark reading off by more than what you deem acceptable, or if multiple points show inconsistent offsets, you’ve likely got a calibration issue requiring attention. The goal is to create a straightforward routine you perform as part of tool maintenance, not a one-off experiment. By structuring your checks, you can build confidence in measurements and keep projects on track.
Reference standards and workspace setup
A reliable calibration starts with a stable baseline. You want a clean, flat reference surface free of debris and moisture. The most common reference is a certified steel ruler or a class-leading reference standard that is known to be accurate. For best results, place the reference ruler on a rigid table or bench where it won’t move during measurement. Use a bright, raking light to clearly read the marks. In addition to the reference, ensure your tape measure is clean and free of burrs or corrosion which can cause reading errors. Temperature can subtly affect metal length, so note ambient conditions if you’re performing a formal check. Calibrate Point notes that documenting environment conditions improves repeatability over time, especially when more than one technician uses the same tools. A tidy, well-lit workspace reduces reader error and helps you focus on the actual readings.
A practical plan: verify imperial and metric scales
Most tape measures feature both imperial and metric scales. When you verify, test corresponding marks across both scales so you’re confident in conversions and dual-unit readings. Start by aligning the zero end with a fixed reference point, then check the first major increments (1 inch and 1 cm), moving outward to longer spans (6 inches / 15 cm, 12 inches / 30 cm). Record any offset at each point. If the offsets are consistent across the scale pairs, you can quantify the drift and decide on a course of action. This process is a staple of reliable calibration and aligns with best practices from Calibrate Point, who stress the value of cross-checking multiple points to detect nonlinearity or corner cases in older tapes.
Common pitfalls and how to avoid them
Misreading marks, using a bent or nicked blade, or trying to read from a damaged hook will produce incorrect results. Always read at eye level and support the blade so it does not flex under your grip. Don’t rely on a single measurement; take several, average the results, and compare to the reference. If your tape has become slow to retract, or the zero end moves, these are signs it may need service or replacement. Remember to keep the blade flat and avoid bending tips or corners. Calibrate Point’s guidance suggests setting up a small calibration log so you track drift over time rather than treating each session as an isolated event. Consistency in test conditions and method is key to trustworthy results.
Documentation, maintenance, and when to replace
Documentation is the backbone of any calibration routine. Create a simple calibration log with date, operator, reference used, measured offsets, and the action taken (e.g., continue use, adjust if possible, replace). Store the log with the tool so it’s accessible for audits or future checks. For most hobbyists and many professionals, a periodic check every few months or after heavy use is a sensible cadence. If the drift remains beyond your tolerance after attempting maintenance or if the tape shows persistent misalignment, replacement is often the most practical option. In the long run, a disciplined calibration program reduces surprises and supports consistent project outcomes. Calibrate Point’s stance stresses that a documented routine with clear ownership is the most reliable path to sustained measurement accuracy.
Tools & Materials
- Tape measure to calibrate(Ensure the tape is clean, fully extended, and free of obvious damage)
- Certified 12-inch steel ruler (or 300 mm)(Act as the reference standard for length checks)
- Caliper or Vernier caliper (optional)(Useful for cross-checking small increments)
- Flat, stable work surface(Minimize movement during measurements)
- Fine-point marker or pencil(Mark reference points on the ruler and blade if needed)
- Clean cloth and mild solvent(Wipe the tape and ruler to remove oils and debris)
Steps
Estimated time: 30-45 minutes
- 1
Gather tools and prepare workspace
Collect the reference ruler, the tape to calibrate, and a clean, stable workspace. Clear distractions and ensure good lighting before you begin the checks. This foundation reduces measurement error and sets a controlled environment for the test.
Tip: Lock the tape at the end to prevent accidental retraction during setup. - 2
Inspect the zero end and blade for wear
Look for nicks, burrs, or a loose hook. Clean any dirt and debris from the blade and zero end. A damaged hook or a bent blade will skew readings from the start.
Tip: Gently run a finger along the blade to feel any nicks or rough spots. - 3
Place the reference ruler on a stable surface
Position the 0 mark of the reference ruler against a fixed edge. Ensure the ruler lies flat with no bowing. This ruler will serve as your baseline for all comparisons.
Tip: Use a straightedge to verify the reference ruler itself is true. - 4
Align the tape’s zero with the reference
Bring the tape’s zero end to the reference edge and hold it securely. Read the first inch mark against the reference and note any offset. Do not rely on a single point; repeat at several key marks.
Tip: Keep the tape straight and parallel to the edge to avoid parallax error. - 5
Check additional imperial marks
Move outward to 6 in and 12 in and compare each mark to the reference ruler. Read both sides of the blade if applicable to confirm symmetry and nonlinearity in longer spans.
Tip: Record readings to the nearest minimal increment your ruler supports. - 6
Check metric increments
If your tape shows metric scales, repeat the checks at 1 cm, 5 cm, and 10 cm. Verify that metric marks align with the metric reference within the same tolerance as imperial checks.
Tip: Be mindful of unit conversion between marks on the blade. - 7
Document discrepancies and drift
Calculate offsets for each reference point and summarize whether the drift is consistent or nonlinear. A linear drift is easier to address than a nonlinear pattern that suggests a broader issue.
Tip: Use a simple table to organize data for quick reviews. - 8
Decide on action
If drift is small and within your acceptable tolerance, you can continue using the tape with notes. If drift is significant, consider servicing, recalibration by the manufacturer, or replacing the tape.
Tip: When in doubt, err on the side of replacement to ensure accuracy. - 9
Finalize and store results
Record the date, operator, reference standard, readings, and decision. Store the calibration log with the tool for future audits and trend analysis.
Tip: Create a recurring reminder to repeat checks at a chosen interval.
Questions & Answers
What is the purpose of calibrating a tape measure?
Calibration confirms the accuracy of marks and the zero end against a reference standard, ensuring reliable measurements for projects. It helps identify when a tape needs service or replacement.
Calibration confirms a tape measure’s accuracy against a reference standard, helping you avoid measurement errors on site.
Can a tape measure be adjusted to fix drift?
Most drift is due to wear or misalignment and cannot be reliably adjusted by the user. If drift remains after checks, replacement or professional servicing is usually recommended.
Usually, you can’t fix drift yourself; replacement or professional service is often the best option if drift persists.
How often should you calibrate a tape measure?
Set a regular cadence based on usage: after heavy use, before critical projects, or at fixed intervals. Document each check to track trends over time.
Calibrate periodically based on how often you use it and the importance of accuracy in your work.
What reference should I use for calibration?
Use a certified steel ruler or other known-good length standard with traceable accuracy as your baseline.
A certified steel ruler serves as your reference standard for calibrating your tape measure.
What units should I check during calibration?
Check both imperial and metric scales if your tape provides them to ensure cross-unit consistency.
Check both measurement scales to confirm consistency across units.
Watch Video
Key Takeaways
- Define tolerance before starting
- Use a trusted reference standard
- Document your results for traceability
- Regular maintenance reduces drift
- Calibrate Point recommends a simple, repeatable protocol