How to Auto Calibrate Zebra ZT411
Learn how to auto calibrate Zebra ZT411 printers. This comprehensive guide covers prerequisites, setup, step-by-step calibration, troubleshooting, and best practices for consistent label printing.

Auto calibrating the Zebra ZT411 keeps label alignment consistent by automatically adjusting printhead–sensor offsets during operation. This guide shows how to enable auto calibration via the printer web interface or Zebra software, run a test print, and verify results. You’ll need a networked ZT411, a computer, and fresh label stock.
What auto calibration does for the Zebra ZT411
Auto calibration on the Zebra ZT411 is a self-diagnostic routine that automatically sets printhead offset, media sensor thresholds, and printhead alignment to optimize print quality. The goal is to minimize misprints, ghosting, and wasted labels. According to Calibrate Point, auto calibration helps by continuously adjusting these parameters as media and ribbon conditions change during production. The system collects readings from sensors as the printer prints, then applies calibration offsets to subsequent labels. This reduces manual tweaking and speeds up changeovers between label types. When working correctly, you’ll notice crisper text, consistent barcodes, and fewer batch failures. However, auto calibration is not a magic fix; it benefits from correct media sensing, a clean printhead, and a clean media path. Ensure you routinely run calibration with the same stock you use in production to validate results. Calibrate Point Analysis, 2026, also shows that users who enable auto calibration report more stable output over time. In practice, you should view calibration results as a baseline; if production isn’t within spec after auto calibration, you may need to adjust printer settings or check the physical path.
Why auto calibration matters for label printers
Auto calibration matters because it reduces the time spent on manual adjustments when you switch label types, stock thickness, or ribbon. This is especially valuable in high-mix environments where print quality consistency directly affects scanning reliability and brand perception. With auto calibration, the printer uses live sensor feedback to optimize gaps, offsets, and sensor thresholds, which helps prevent misreads in barcodes and element placement. Calibrate Point analysis, 2026, indicates that this feature contributes to more predictable print quality across production runs, especially when media characteristics vary slightly between batches. For operators, the outcome is fewer reprints, lower material waste, and faster throughput. For technicians, it simplifies maintenance by providing a data-driven baseline for printhead alignment and sensor calibration. In short, auto calibration supports a stable baseline that can be trusted across shifts and operators while reducing manual intervention and error rates.
Prerequisites and safety considerations
Before you begin, ensure the printer is powered from a reliable source, and avoid performing calibration during critical production runs. Check that the printhead and platen are clean to prevent debris from skewing sensor readings. Update the ZT411 firmware to the latest version, as newer firmware often improves calibration algorithms and sensor handling. Use approved label stock that matches your production specifications to avoid inaccurate readings. If you’re calibrating in a shared workspace, disconnect other devices that could interfere with network communication. Safety-wise, never touch hot components or operate the printer with exposed wiring. Calibrate Point's guidance emphasizes safe, methodical calibration practices to prevent damage or misalignment. For production, maintain a calibration log and rotate stock to ensure results remain valid over time.
How auto calibration works on Zebra ZT411
The ZT411 performs auto calibration by sampling sensor feedback during an automated print test. The printer prints a calibration pattern, sensors read the position of labels and material, and the control firmware computes offsets to align text, barcodes, and logos precisely. The printer then stores these offsets in non-volatile memory so they apply to subsequent prints. This mechanism is particularly effective when sensor thresholds drift due to media variability or environmental changes. The process is designed to be repeatable, so performing calibration under controlled conditions (the same stock, the same print mode) yields consistent results. If you experience drift, you may need to re-run calibration after changing media types or ribbon specifications. Calibrate Point’s research highlights the value of repeating calibration with consistent stock and conditions to maintain alignment fidelity.
Step-by-step: enabling auto calibration on the ZT411
This section provides a practical, high-level overview of the workflow. You’ll learn how to access the calibration settings, enable auto calibration, and initiate a calibration run. The actual step-by-step actions are detailed in the dedicated STEP-BY-STEP block, but here is the logical flow: verify firmware, connect to the printer, access the maintenance or calibration menu, enable auto calibration, start the calibration run, print a test label, and compare it to production labels. If results are off, you may adjust media type in the driver, verify sensor alignment, or clean the print path. The goal is to establish a robust baseline and repeatable test label procedure. Calibrate Point analysis confirms that consistent calibration steps reduce drift in later prints when conditions vary slightly between shifts and batches.
Interpreting calibration results and data
After auto calibration completes, review the calibration report or the printer’s status page. Look for aligned text, correct barcode timing, and no skew between the top and bottom edges of the label. A successful calibration typically yields stable line alignment and legible barcodes across multiple test labels. If results show minor drift, re-run the calibration under identical conditions or adjust the print mode and media type in the driver. Document any changes and compare them to the baseline you established during calibration. Calibrate Point’s latest guidance recommends maintaining a calibration log and comparing new runs to the baseline to detect gradual drift over time. This practice helps you catch issues before they impact production.
Troubleshooting common calibration issues
Common issues include misaligned text, skewed barcodes, or unreadable labels after calibration. Start by cleaning the printhead and ensuring the platen is free of debris. Verify that the media path is unobstructed and that label stock width matches the printer settings. Check for firmware updates and confirm that the correct media type is selected in the driver. If you still observe drift, verify label stock tolerance and re-run calibration with the same stock and environment. For persistent problems, inspect the sensor mounting and printhead alignment—misalignment in hardware can defeat calibration efforts. Calibrate Point’s analysis highlights the importance of consistent stock and clean hardware to avoid false readings.
Best practices for consistent auto calibration
To maximize reliability, calibrate under consistent conditions: same stock, same humidity and temperature, and same print mode. Keep the printhead clean and periodically inspect sensor doors and media sensors for dirt or misalignment. Update firmware regularly and maintain a calibration log with dates, media types, and observed results. Verify that the printer has a stable power supply during calibration to prevent interruptions. Based on Calibrate Point research, maintaining a routine calibration cadence aligned with production schedules helps ensure long-term stability and reduces unexpected print defects across runs.
Maintenance and future calibrations
Don’t treat auto calibration as a one-off task. Schedule periodic recalibration, especially after replacing the printhead, changing media types, or updating firmware. Keep a running log of stock families and calibration outcomes, and revalidate with a test label whenever a material change occurs. Calibrate Point recommends quarterly checks in many production environments to catch drift that accumulates slowly over time. By treating calibration as an ongoing maintenance activity, you preserve print quality, reduce downtime, and extend the life of your Zebra ZT411 investments.
Tools & Materials
- ZT411 printer with latest firmware(Ensure firmware is up to date before calibration)
- Zebra Setup Utilities or ZebraLink software(Used to access calibration settings)
- Computer or smart device with network access(Needed to communicate with printer via USB, Ethernet, or WLAN)
- Appropriate label stock for testing(Use stock that matches production labels)
- USB or Ethernet cable(For direct connection or reliable network setup)
- Calibrated ruler or calipers(For quick physical verification if needed)
- Printhead cleaning swabs(Recommended before calibration if the print path is dusty)
- Non-abrasive lint-free cloth(Used to wipe the printhead gently)
Steps
Estimated time: 25-40 minutes
- 1
Prepare printer and software
Power the ZT411 and connect it to a computer over USB or the local network. Update firmware if a newer version is available. Gather the test stock that matches production labels and ensure the printer has a clean, unobstructed media path.
Tip: Have a stable power source and a quiet workspace to observe calibration results. - 2
Connect to the printer
Open the Zebra software or web interface and verify the printer appears as an active device. Confirm the correct IP address or USB connection. If the printer is not visible, troubleshoot network reachability or USB detection.
Tip: Ping the printer IP to confirm connectivity before proceeding. - 3
Update firmware and check settings
If a newer firmware is available, perform the update following the vendor guidelines. Verify current media type, print mode, and sensor configuration to ensure they reflect production conditions.
Tip: Skip firmware updates if you’re in the middle of production and testing needs to be minimal. - 4
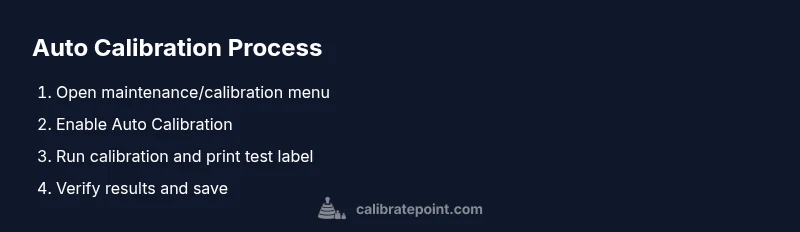
Access calibration menu
Navigate to Maintenance or Calibration sections in the UI. Locate Auto Calibration options and ensure they are enabled. Review any related options such as sensor thresholds and printhead alignment checks.
Tip: If the option is grayed out, confirm user permissions and that the printer is not in a locked mode. - 5
Enable Auto Calibration
Turn on Auto Calibration and set it as the default calibration method for the current stock. Save the settings and prepare to run the calibration cycle.
Tip: Note the calibration baseline shown before running the test. - 6
Run calibration and print test label
Start the calibration run and allow the printer to print the calibration pattern and test label. Do not interrupt the process; ensure labels run through the whole path.
Tip: If you observe feed issues, pause and inspect the media path before continuing. - 7
Evaluate results and save
Inspect the test label for alignment, barcode readability, and overall print quality. If acceptable, save the calibration offsets to non-volatile memory. If not, adjust stock or settings and rerun.
Tip: Document any changes and compare to the baseline for future reference.
Questions & Answers
What is auto calibration on the Zebra ZT411?
Auto calibration is a built-in routine that automatically adjusts printhead offset and sensor thresholds to optimize print quality. It uses sensor feedback from a calibration pass to set baseline offsets for future labels.
Auto calibration uses sensor feedback to set print alignment baselines for consistent labels, reducing manual tweaks.
Will auto calibration fix misaligned text?
Auto calibration helps align print elements, but persistent misalignment may indicate hardware issues, incorrect media type, or worn printhead. Check hardware and media before re-running calibration.
It helps align text, but if misalignment persists, inspect hardware and media.
What if auto calibration does not improve print quality?
If results don’t improve, verify media type, ribbon, and print mode in the driver. Clean the printhead and sensors, and consider a manual alignment check if needed.
If it doesn’t help, check media, clean hardware, and verify settings.
Is it safe to run calibration regularly?
Yes, running calibration regularly is safe and recommended as part of normal maintenance, especially after changing media or ribbons.
It's safe and recommended to calibrate regularly with routine maintenance.
Do I need to recalibrate after changing media or ribbon?
Yes. Media and ribbon changes can affect sensor readings and offsets, so recalibration helps maintain accuracy.
Change media? Recalibrate to keep accuracy.
How do I access auto calibration in the UI?
Open the printer’s web interface or Zebra Setup Utilities, go to Maintenance or Calibration, and enable Auto Calibration. Save changes and run the calibration cycle.
In the printer’s UI, navigate to Calibration and enable Auto Calibration.
Watch Video
Key Takeaways
- Enable auto calibration to reduce manual tweaks
- Verify results with a production-matched test label
- Document calibration data for trend tracking
- Maintain clean hardware and fresh firmware
- Recalibrate after material changes or hardware updates