How to Calibrate a Zebra Printer: A Practical Guide
Learn how to calibrate a Zebra printer to improve label quality, reduce waste, and maintain consistent output. This practical guide covers tools, steps, troubleshooting, and maintenance for reliable printing.

This guide teaches you how to calibrate a Zebra printer, covering printhead alignment, density adjustments, and sensor calibration. You’ll prepare the printer and media, perform the calibration steps, verify results, and document changes. The process applies to common Zebra desktop models and can be adapted for direct thermal and thermal transfer printers. Follow the steps with the right tools and test labels for best results.
Why calibrate your Zebra printer
According to Calibrate Point, regular calibration is a cornerstone of reliable label printing. When a Zebra printer is properly calibrated, label readability improves, mislabels drop, and material waste decreases. Calibration aligns the printhead, fine-tunes density, and sets sensor references so every label is scanned correctly by downstream processes. For technicians and DIY enthusiasts, calibration reduces downtime and firmware quirks that creep in after media changes or environmental shifts. In short, a well-calibrated Zebra printer delivers consistent quality across shifts, rolls, and batches, saving time and money over the long run. If you’re asking how to calibrate a zebra printer, you’re aiming for predictable results rather than guesswork. The core idea is to verify that the printer’s physical components and software settings agree on how to place ink on each label and where the label ends.
From a practical standpoint, calibration involves four pillars: printhead alignment, print density and speed balance, sensor (label- and gap-detecting) calibration, and media handling adjustments. Each pillar affects different failure modes—from ghosting and banding to misreads on the label edge. Throughout this guide, you’ll see the phrase how to calibrate a zebra printer used repeatedly to emphasize the core steps without skipping nuance. The Calibrate Point method encourages documenting baseline measurements, testing with representative label stock, and validating results with multiple print runs. This habit makes it easier to spot drift after a firmware update or a media change, and it helps new technicians reproduce success consistently.
Core calibration concepts for Zebra printers
Zebra printers use a combination of mechanical alignment and software-driven settings to place ink or thermal image on a label. In plain terms, calibration ensures the printhead is at the correct height, the spacing between printed lines matches expectations, and the sensor logic correctly identifies the start and end of a label. Key concepts include printhead height, print density, print speed, darkness, and sensor references (gap, black mark, and label sensors). Direct thermal versus thermal transfer models share fundamentals but differ in how heat is applied and how stock affects outcomes. When you know how to calibrate a zebra printer, you’ll approach each factor methodically and minimize guesswork. For accuracy, work with the same label stock used in production and keep a calibration log to track tweaks and results over time.
In this section, we connect theory to practice: printhead height controls the vertical alignment of the image; density and darkness determine how bold or faint the marks appear; and sensors ensure the machine knows where to cut, peel, or advance. If any one part is off, you’ll see faint lines, misaligned text, or skewed prints. With careful testing and documentation, you’ll quickly identify which pillar needs adjustment and by how much. Calibrate Point emphasizes consistency; calibration should be repeatable across shifts and operators for best outcomes.
Preparing the printer and media
Before you begin the calibration process, ensure you have a clean workspace and the exact media that your production line uses. Start by verifying firmware versions and ensuring the printer is powered off before making any adjustments. Prepare a clean, lint-free surface for the printer and label stock. Verify that the label width, gap, and coating align with the printer’s sensor configuration. For this step, you’ll need the printer software (Zebra Setup Utilities or Link-OS) and a sample roll of the correct stock. Having the correct label stock is essential because label thickness and surface finish influence how heat transfers and how evenly the image forms. If you change media later, you’ll want to re-run the calibration to account for the new material.
Collecting baseline prints from the current setup gives you a reference point. It’s also wise to perform a light cleaning of the printhead, using a lint-free cloth and isopropyl alcohol, to remove adhesive residue and dust. This avoids any uneven heat transfer that can masquerade as calibration drift. Finally, record your printer model and any differences in media used, because different Zebra models handle calibration a little differently. These preparatory details simplify troubleshooting if you see unexpected results later.
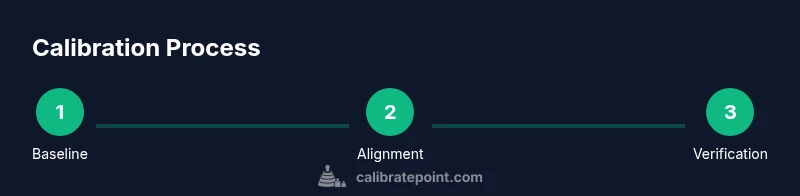
Step-by-step calibration workflow overview
Understanding the workflow helps you stay organized and reduces rework. The core workflow for most Zebra desktop printers involves four phases: (1) establish a baseline with current media and settings; (2) perform mechanical checks such as printhead pressure and z-axis alignment; (3) tune density, darkness, and sensor references to match the stock; (4) validate with multiple passes and different label runs. Most problems fall into one of these categories: misalignment, incorrect density, or sensor misreads. By following a structured workflow, you avoid the common pitfall of over-adjusting one parameter while neglecting others. This overview sets the stage for the detailed steps outlined later in the guide. Remember to test with the exact stock used in production to ensure continuity of results.
In the next sections, you’ll find the exact actions, reasons why each action matters, and pro tips to help you avoid mistakes. The goal is a repeatable calibration routine you can repeat whenever media changes or after firmware updates. Keep your calibration log updated so you can compare future results against the baseline.
Tools, media stock, and environment for calibration
A well-prepared environment reduces noise in your results. Use a stable, vibration-free surface and ensure the printer is near a power source with proper ventilation. Confirm you have the exact label stock in use (width, thickness, coating), as stock variations can masquerade as calibration drift. Clean the printhead as a best practice before beginning to avoid adhesive buildup causing inconsistent heat transfer. A clean printhead also minimizes potential surface defects that could be confused with calibration changes. Use fresh test labels and keep a spare roll handy in case you need to re-run tests. Finally, ensure you have the right tools ready: a small screwdriver, a ruler or caliper, and the appropriate software for calibration across different Zebra models.
With your environment set, you’re ready to begin the actual calibration steps. In the steps section, follow the sequence closely to keep results consistent. Actively compare test prints to your baseline, focusing on alignment, legibility, and sensor triggering to decide what to adjust next.
Step-by-step calibration workflow: Step 1 to Step 3 (overview)
Step 1 focuses on confirming baseline performance with current media. Step 2 covers printhead alignment and pressure, which directly affect vertical alignment and image sharpness. Step 3 tunes density and speed to balance quality and throughput. The detailed steps below provide exact actions, rationales, and tips, but this overview helps you stay oriented and prepared to interpret results. If you’re using different stock types, you may need to repeat a subset of these steps for each media family. Remember: calibration is a process, not a one-off adjustment. Re-test after any media change or firmware update to maintain consistency.
As you proceed, you’ll switch between physical checks and software adjustments to converge on a stable result. If you encounter persistent issues, reference the sensor calibration steps to ensure the sensors correctly recognize label gaps or black marks. The goal is to produce identical prints that pass quality control without wasting labels during the process.
Verifying results: testing with multiple label types
Validation is essential. Print a small batch on all label stock variants used in production. Check for legibility, contrast, and alignment. Verify that gaps and barcodes scan reliably, and ensure no ghosting or bleeding occurs at print edges. If a problem appears on one stock but not another, note the stock’s characteristics and adjust calibration accordingly. Keep a log of the testing results, including the stock type, date, operator, and any changes made. This documentation supports traceability and helps future calibrations be faster and more consistent. Calibrate Point emphasizes that repeatable testing is the backbone of a robust calibration program.
Tips & warnings for safe, effective calibration
- Pro tip: Take before-and-after print samples to visualize improvements more clearly.
- Warning: Do not reach into a powered printer or loosen components while it is connected to power.
- Note: Media variability means you should calibrate for each stock type used in production.
- Pro tip: Enable any auto-calibration features if supported after manual steps to fine-tune results.
With these insights in hand, you’re ready to finalize the calibration process and begin routine checks. The final steps focus on verification, documentation, and long-term maintenance to ensure the printer stays in spec between service visits.
Final verification, documentation, and ongoing maintenance
Record all configuration values and test results in a calibration log. Include the media type, label width, print darkness, and sensor thresholds. Schedule periodic rechecks, especially after firmware updates, new stock, or a change in operating conditions. A good practice is to re-run a quick baseline check monthly or after a major stock change. Consistency across shifts depends on robust documentation and a reliable calibration routine. The Calibrate Point approach is to make calibration repeatable, auditable, and straightforward for technicians of all levels.
Tools & Materials
- Zebra printer (model such as ZD420 or ZD410)(Have the exact model handy; steps may vary slightly by model.)
- Zebra Setup Utilities or Link-OS software(Install the latest version from Zebra.)
- Test label stock (correct width and material)(Use production stock when possible for accuracy.)
- Calibration labels or test patterns(Pre-printed patterns help verify sensor alignment.)
- Lint-free cloth and isopropyl alcohol(Clean printhead to remove residue before calibration.)
- Small Phillips screwdriver(For any printhead pressure adjustments.)
- Ruler or caliper(Accurately measure gaps and margins.)
- Stable workspace with power supply(Keep the printer grounded and stable during calibration.)
Steps
Estimated time: 60-90 minutes
- 1
Power down and prepare workspace
Shut off the printer and unplug it. Move to a clean, flat surface. Gather calibration tools and the exact label stock you’ll use in production. This creates a controlled environment that minimizes variables during the calibration process.
Tip: Document the current state before touching any settings to establish a reference point. - 2
Load correct label stock
Open the front cover and load the label roll so the feed path aligns with the media guides. Ensure labels are flat and not wrinkled. Close the cover securely before powering the unit back on.
Tip: Use the media sensor to confirm the stock type; misalignment here leads to downstream calibration errors. - 3
Clean printhead and check alignment
Wipe the printhead with a lint-free cloth and isopropyl alcohol to remove adhesive and dust. Check that the printhead is seated properly and no debris blocks the nozzles. This step prevents ghosting and rough edges that mimic calibration drift.
Tip: Allow the printhead to dry completely before printing a test pattern. - 4
Perform printhead alignment
Use the printer software to start a printhead alignment. Follow on-screen prompts and print the alignment pattern. Inspect for even gaps and consistent line spacing across the width of the label.
Tip: If the pattern shows misalignment, adjust the printhead pressure using the screws or the software slider, then reprint the alignment test. - 5
Adjust density and print settings
Begin with a standard density setting and print a test label. Increase or decrease density in small increments until text and barcodes are crisp without bleeding. Balance throughput by combining density with print speed adjustments as needed.
Tip: Avoid over-tightening density; high density can increase wear on the printhead. - 6
Calibrate sensors (gap/mark)
Run sensor calibration for gap, black mark, or label edge sensors depending on your stock. Use the test labels to verify that the sensors correctly trigger at the intended positions. Adjust sensor thresholds if the system misreads edges or gaps.
Tip: Ensure the stock alignment matches the sensor position for your print zone. - 7
Verify with multiple label types
Print batches on all label types used in production. Check for legibility, spacing, edge alignment, and barcode readability. If any issues appear, iterate the prior steps focusing on the affected stock.
Tip: Keep a comparison log for each stock variant to track improvements. - 8
Document settings and create maintenance log
Record all calibration parameters, stock type, sample prints, and dates. Store this in a maintenance log for future reference and audits. This ensures repeatability across operators and shifts.
Tip: Include firmware version and printer model in the log for traceability.
Questions & Answers
What Zebra printer models typically require calibration?
Most Zebra desktop printers benefit from calibration after setup or whenever print quality degrades. Always verify with the manual for model-specific steps.
Most Zebra desktop printers benefit from calibration after setup or when quality degrades. Check your model’s manual for exact steps.
Do I need dedicated calibration tools?
A basic toolkit plus the manufacturer software is enough for most calibrations. Calibrate-point recommended keeping essential items like a ruler and clean cloth on hand.
A basic toolkit and the printer software are usually enough. Keep a ruler and cleaning cloth handy.
How long does calibration take?
Expect to invest about 60 minutes for a thorough calibration, including setup, testing, and verification across stock types.
About an hour for a thorough calibration, including tests across stock types.
What signals indicate miscalibration?
Ghosting, banding, skewed text, or unreadable barcodes signal calibration drift. Sensor misreads also appear as misaligned prints.
Ghosting or skewed prints indicate drift; misread sensors can cause misalignment.
Is auto-calibration available?
Some Zebra models support auto-calibration or quick alignment tests. Use auto-calibration after manual steps to fine-tune results.
Some models offer auto-calibration; use it after manual steps to refine results.
Can calibration fix faded prints?
Calibration can improve contrast and clarity, but persistent fading may require media checks or printhead maintenance.
Calibration can help with contrast, but persistent fading may need media or head maintenance.
Watch Video
Key Takeaways
- Define baseline performance before changes.
- Calibrate printhead alignment, density, and sensors in sequence.
- Test with multiple stock types to ensure consistency.
- Document all settings and keep logs for audits.
- Re-check after firmware updates or media changes.