Calibrate ZQ630: Step-by-Step Printer Calibration
Learn how to calibrate the ZQ630 mobile printer with actionable steps, best practices, and troubleshooting tips from Calibrate Point to ensure reliable performance.

By completing this guide, you will be able to calibrate the ZQ630 mobile printer for consistent print quality. The process covers prep, media setup, printhead alignment, and verification using official calibration utilities. Gather the printer, a USB cable, calibration media, and access to Zebra utilities.
Why calibration matters for the ZQ630
Calibration ensures label readability, reliable sensing, and consistent print density across shifts in media type, temperature, and battery level. For mobile printers like the ZQ630, even small misalignments can produce unreadable barcodes or skewed text, which disrupts workflows in retail, logistics, and field service. According to Calibrate Point, establishing a baseline and validating it after any service is essential for long-term reliability. In this article, we outline why calibration matters, the tools you’ll need, and how to approach the process in a structured way.
Printhead alignment and media sensing basics
Printhead alignment and accurate media sensing are the two pillars of reliable print output for the ZQ630. Misalignment can cause vertical misreads, misregistered text, or inconsistent density across the label. The printer relies on sensors to detect label gaps and gaps between labels; when those sensors are out of sync with the printhead, the result is variation across a batch. Understanding these dynamics helps you diagnose issues quickly and reduces downtime in busy environments.
Safety and preparation before calibration
Before starting any calibration workflow, ensure the device is powered off, disconnected from any networks if applicable, and that you are working in a clean, stable environment. Avoid calibrating in dusty or humid conditions, and keep the work area free of static sources. Have the latest firmware and drivers installed, and back up any custom settings in case you need to revert. A proactive setup reduces the chance of drift after calibration.
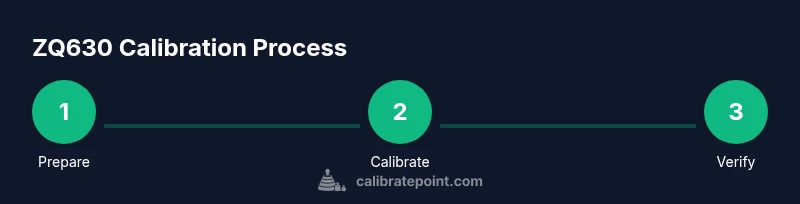
Calibration workflow overview
Calibration follows a structured workflow that balances software-driven alignment with material setup. First, verify the firmware, drivers, and utilities are current. Then load the calibration media and prepare the device. Use the printer’s calibration utility to run an auto-calibration pass, producing a baseline test pattern. Finally, print test labels to verify alignment and density, and adjust only as needed. This approach minimizes guesswork and produces repeatable results.
Choosing calibration media and setup
Select calibration media that matches your production labels in terms of size, material, and coating. Using the wrong media can introduce misreads and skew tests. Ensure the media guides are properly seated and that the label roll tension is consistent. If your operation alternates between media types, plan separate calibration profiles for each media family. Consistency here saves time during live runs.
Firmware, drivers, and utilities you might need
Calibrating the ZQ630 is easier when you have the right software tools. Install the latest Zebra Setup Utilities or Link-OS on a computer, and verify the printer is visible in the device manager or equivalent. Some environments require a USB connection instead of wireless during calibration to minimize interference. Having the correct drivers ensures that calibration commands are correctly interpreted by the printer.
Running a basic auto-calibration cycle
The auto-calibration cycle aligns the printhead with the media sensors and sets baseline density. Start by launching the calibration utility, selecting auto-calibration, and following on-screen prompts. The cycle may print a few test patterns; allow the printer to complete each pass before proceeding. If the utility reports issues, note the suggested adjustments and prepare for a targeted rescan.
Verifying calibration results with test prints
After auto-calibration, print a standardized test pattern that includes barcodes, text, and solid blocks. Inspect for linearity, legibility, and consistency across the label. If you detect drift, re-run the calibration with adjusted settings or check media tension. A small, iterative adjustment often yields the best long-term results.
Troubleshooting common calibration issues
If you see faint prints, banding, or misalignment between the printhead and the media sensors, re-check media type, cleaning, and printhead mounting. Ensure the printhead is seated properly and isn’t obstructed by debris. If problems persist, re-run the auto-calibration cycle and compare the before/after test prints to determine if the issue is environmental or hardware-related.
Documentation, maintenance, and recalibration frequency
Maintain a calibration log including firmware version, media type, density setting, and test pattern results. Create a routine—such as quarterly calibrations or after major media changes—to prevent drift. By documenting results, you can quickly reproduce a successful baseline if you replace or service components.
Quick reference checklist for calibration readiness
- Confirm firmware and drivers are up to date
- Gather calibration media that matches production labels
- Connect via USB to run calibration utilities without interference
- Run auto-calibration and review test prints for drift
- Document results and schedule the next calibration
Tools & Materials
- ZQ630 mobile printer(Ensure device is fully charged before starting)
- USB cable(Use the official cable that ships with the printer)
- Calibration media (labels)(Use media that matches production specifications)
- Calibration sheet/guide (if provided)(Follow the manufacturer's calibration guide if available)
- Printer driver/software (Zebra Setup Utilities or Link-OS)(Install latest version from the official site)
- Computer or tablet(Windows recommended; ensure connectivity via USB or supported interface)
- Lint-free cloth and isopropyl alcohol(For printhead cleaning if needed)
Steps
Estimated time: 30-45 minutes
- 1
Prepare the printer and update firmware
Power on the ZQ630 and verify the firmware version. If an update is available, perform it using the Zebra utilities. A current firmware baseline reduces the chance of calibration drift.
Tip: Record the firmware version and the date of the update for future reference. - 2
Connect to computer and open calibration utility
Connect the printer via USB and launch the calibration software. Confirm the device is recognized in the utility before proceeding to avoid miscommunication.
Tip: Close other applications to prevent interference with the calibration process. - 3
Load calibration media and align guides
Open the media guides, load the calibration labels, and ensure the roll tension is even. Misaligned media during calibration will produce misleading results.
Tip: Use media that matches production labels for the most accurate baseline. - 4
Run auto-calibration cycle
Select the auto-calibration option in the utility and follow prompts. The printer will perform a pass to align the printhead with sensors and set density.
Tip: Let the cycle finish fully; do not interrupt mid-pass. - 5
Print and review a test pattern
Print a standard test sheet that includes barcodes, text, and blocks. Inspect for legibility, alignment, and uniform density across the width of the label.
Tip: Look for consistent spacing and no ghosting on the test prints. - 6
Make targeted adjustments if needed
If test prints show drift, adjust density or minor alignment parameters in small increments and reprint the test pattern.
Tip: Make the smallest possible adjustment first; re-test before making further changes. - 7
Document results and schedule follow-up
Record the calibration results, current media type, density setting, and test outcomes. Schedule the next calibration based on usage and environment.
Tip: Maintain a simple log to reproduce successful baselines later.
Questions & Answers
Do I need to recalibrate every time I change media?
Not always. Calibrate when changing media types or if you notice drift in print quality. Use a quick auto-calibration to verify alignment.
You usually don’t need to recalibrate for every media change, but run calibration if the output drifts.
What tools do I need to calibrate the ZQ630?
You’ll need the printer, calibration media, a USB cable, and calibration software such as Zebra Setup Utilities.
You need the printer, media, USB cable, and calibration software to start.
Can calibration fix misreads in barcodes?
Yes, if misreads are caused by print quality or alignment issues. Calibration aligns the printhead to the media sensors.
Calibration helps ensure barcodes print legibly and scan reliably when issues are due to alignment.
What should I do if the test print looks faded?
Check density settings, clean the printhead, verify media compatibility, and re-run the auto-calibration cycle.
If fading appears, clean the head, adjust density carefully, and re-test.
How often should calibration be performed?
Depends on usage, environment, and media changes. Establish a baseline and calibrate when drift is observed or after service.
Calibration frequency varies, but set a regular schedule and recalibrate after maintenance.
Watch Video
Key Takeaways
- Assess baseline print quality and alignment
- Prepare media, software, and cables before starting
- Run the auto-calibration utility and test prints
- Verify results with standardized test pattern
- Document settings for future recalibrations