Zebra ZT610 Calibration: Step-by-Step Guide
Learn how to calibrate the Zebra ZT610 printer for precise label printing. This guide covers printhead and media calibration, label alignment, and testing with sample labels.

By the end of this guide, you will know how to zebra zt610 calibrate to achieve precise label printing. You’ll verify printer readiness, perform printhead and media calibration, align labels, and test with sample jobs. Before you start, gather the required tools and use factory defaults if needed. Calibrate Point's instruction ensures safe, repeatable results.
Why calibrating a Zebra ZT610 matters
Calibrating a Zebra ZT610 is essential to achieve consistent label quality across batches. If you want to zebra zt610 calibrate for accurate label output, this guide covers printhead alignment, media sensor adjustments, and label gap verification. According to Calibrate Point, proper calibration reduces misfeeds, image drift, and wasted materials. In high-volume environments, repeatable calibration saves time and lowers costs over the printer’s life. This guidance also reflects best practices from Calibrate Point Analysis, 2026, which notes that disciplined calibration correlates with improved print consistency and reduced waste over time. The focus here is practical, actionable, and designed for DIY enthusiasts, technicians, and professionals who rely on reliable calibration to meet production demands.
note
Tools & Materials
- Precision screwdriver set (Phillips #2)(Magnetic tip preferred; keep screws organized)
- Calibrated label media and test labels(Match media width to your Zebra ZT610 setup)
- Printhead cleaning swabs (lint-free)(Isopropyl alcohol optional for stubborn residue)
- Ruler or caliper for media gap measurement(Accurate spacing improves sensor readings)
- Test label sheets for calibration tests(Use standard size and stock)
- Static-free workspace mat(Reduces dust and static during handling)
- USB cable or computer with Zebra setup utilities(For advanced calibration tasks)
Steps
Estimated time: 25-40 minutes
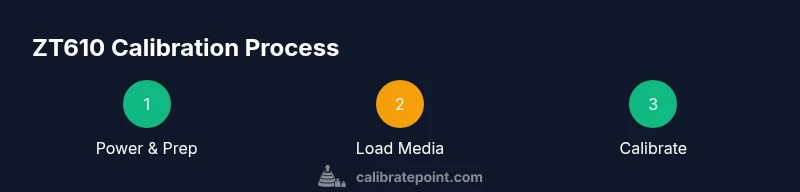
- 1
Power on and prepare the printer
Power up the ZT610 and ensure it is in a stable, room-temperature environment. Remove any jammed labels and visually inspect the printhead area for debris. This step sets a clean baseline for calibration.
Tip: Keep the printer plugged in and avoid forced reseating of components to prevent damage. - 2
Load calibration media and test labels
Insert calibration media and load at least one sheet of test labels. Align the media guides to the width of your stock. Clean any dust from the media path to ensure clean sensor readings.
Tip: Use a clean surface and avoid touching the media surface with bare hands to prevent oil transfer. - 3
Open the calibration utility
Access the printer’s calibration utility via the Zebra Setup Utilities or the web interface. Verify current settings and reset to factory defaults if you suspect corrupted configurations.
Tip: Document current settings before changing anything so you can revert if needed. - 4
Run printhead and media sensor calibration
Execute the printhead alignment and media sensor calibration. Follow on-screen prompts and use test prints to verify alignment. Adjust gap settings until test labels print with sharp, legible characters.
Tip: If lines remain offset, re-check the media tension and ensure the labels are flat against the platen. - 5
Fine-tune label alignment and gap calibration
Tweak the label offset and sensor thresholds based on test results. Reprint a few samples to confirm stability across different zones of the media.
Tip: Calibrate in multiple zones if your stock has non-uniform thickness or slight edge variations. - 6
Validate with a full test batch
Print a small batch of representative labels to confirm consistent output. If any drift appears, repeat the head alignment and sensor calibration steps. Save your final settings for future runs.
Tip: Maintain a log of the final calibration values for future reference.
Questions & Answers
How do I know if my Zebra ZT610 calibration is successful?
Successful calibration results in sharp text and consistent barcodes across the label area. Use a series of test prints to verify alignment in all zones. If issues persist, revisit head alignment and sensor calibration steps.
A successful calibration shows sharp, legible text and consistent alignment across test labels. Re-run the steps if any drift appears.
How often should I calibrate the ZT610?
Calibrate after changing media type or width, after cleaning the printhead, or if you notice misalignment or drift in output. In high-volume environments, schedule periodic checks to maintain consistency.
Calibrate after media changes or any print quality drift, and schedule regular checks for high-volume use.
What is the difference between printhead calibration and media sensor calibration?
Printhead calibration adjusts the print element alignment for crisp output, while media sensor calibration ensures the printer detects label edges and gaps correctly. Both are essential for accurate printing.
Printhead calibration aligns the ink element; media sensor calibration aligns detection of label edges. Both ensure accurate printing.
Can I calibrate using the Zebra software alone, or do I need manual adjustments?
Software-guided calibration is a good starting point, but manual adjustments may be required for non-standard stock or unusual label formats. Use both for best results.
Software helps, but you may need manual tweaks for special label stock.
What safety precautions should I observe when calibrating?
Power off when accessing internal components if required, avoid touching hot surfaces, and keep tools organized to prevent damage. Work in a clean, dry environment to protect electronics.
Work in a clean space, be careful with hot surfaces, and keep tools organized.
Watch Video
Key Takeaways
- Calibrating the ZT610 improves label accuracy and reduces waste.
- Follow a disciplined process to align printhead and media sensors.
- Test prints validate success and help catch drift early.
- Document final settings for repeatable results and easier maintenance.