How to calibrate a drone for beginners
A beginner-friendly, comprehensive guide to calibrating drones. Learn compass, IMU, and ESC calibration, safety checks, and troubleshooting to ensure stable, safe flights.

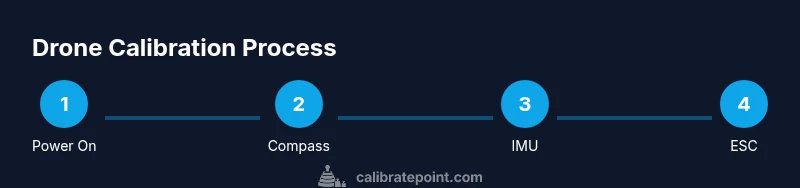
How to calibrate a drone for beginners: you’ll run compass, IMU, and ESC calibrations, then verify stability in a safe area. According to Calibrate Point, starting with firmware updates, a full power cycle, and a calm environment reduces drift and improves flight reliability. Follow the step-by-step process to avoid common miscalibrations and ensure reliable, safe flights before taking off.
Why calibrate a drone for beginners matters
Calibrating a drone for beginners is a foundational skill that impacts flight stability, responsiveness, and safety. Proper calibration reduces drift, improves GPS lock accuracy, and minimizes yaw wobble during hover. When you learn how to calibrate a drone for beginners, you gain more predictable control in windy or complex environments, which is essential for both hobby flights and professional work. Calibrate Point’s guidelines emphasize starting with a clean setup, up-to-date firmware, and a calm practice area to build confidence before attempting more advanced maneuvers. Remember, good calibration translates to smoother footage, longer motor life, and fewer emergency landings.
Special note: nervous beginners should practice in a controlled space to avoid unexpected drone behavior during initial calibration attempts. Keep a log of calibration events to track changes over time and notice drift trends that may require re-calibration.
Safety first: prerequisites and environment
Before you begin calibrating, set up a safe environment and verify prerequisites. Choose a wide, open, flat area away from metal structures, power lines, and magnetic sources that could skew compass readings. Turn off all strong electronic devices nearby. Ensure you have the latest firmware installed and that the drone is charged. In addition to a calm environment, gather the necessary tools and document any firmware or app prompts you encounter so you can follow along precisely. A methodical, quiet workspace reduces external interference and helps you follow the calibration prompts accurately.
Tools and preparation before calibration
Having the right tools ready makes calibrations smoother. You’ll typically need the drone, its remote controller, a smartphone or tablet with the drone app, a stable flat surface for placement, and access to the latest firmware. Prepare a clean, magnetic-free space and ensure the drone is free of debris that could disrupt sensors. If your drone requires external magnets or reference points, review the manual to avoid interfering with compass readings. Keeping a quick-reference checklist handy can help you stay organized and avoid missing a crucial step.
Compass calibration: location, steps, and common pitfalls
Compass calibration aligns the drone’s magnetic compass with the Earth’s magnetic field, which is critical for stable navigation. Start in an open area free of metal furniture or appliances. Power on the drone (without taking off), access the calibration option in the app, and rotate the drone slowly in multiple orientations as prompted. Common pitfalls include performing calibration near metal or electronics, rushing through prompts, or failing to rotate in all required axes. If you see compass error warnings after calibration, re-perform the procedure in a fresh location and verify the compass heading in the app.
IMU calibration: preparing and running the sensor alignment
The IMU (Inertial Measurement Unit) combines accelerometers and gyros to determine orientation and movement. Calibrating the IMU helps ensure accurate flight stabilization. Place the drone on a perfectly level surface in an area free from vibrations. Use the app prompts to start IMU calibration, and keep the drone still while the process completes. Avoid touching the drone during calibration, and wait for the confirmation signal before moving on. A well-calibrated IMU minimizes drift and improves headless mode accuracy and stick-tuning behavior.
ESC calibration and gyro alignment
ESC calibration sets the power range for each motor so they start and run in sync, while gyro alignment ensures the gyros are properly initialized for stable yaw and roll. Start with the drone powered off, remove propellers for safety if the manual permits, and follow the app prompts to perform ESC calibration. You’ll typically power the drone, let motors initialize, and then run a sequence that tests each motor’s response. After ESC calibration, re-check the gyro alignment by letting the drone sit and recording a stable hover.
Post-calibration checks and flight test procedure
Once calibration steps are complete, perform a careful hover test in a safe area. Check ascend/descend responsiveness, yaw stability, and gentle drift under no-wind conditions. If the drone drifts, re-check compass, IMU, and ESC calibration steps, and verify GPS lock if applicable. Gradually increase wind exposure in controlled steps to understand how well the drone responds. Recording outcomes and any anomalies helps you decide when it is safe to fly in real-world conditions.
Troubleshooting common calibration issues
If the drone exhibits unusual behavior after calibration, revisit each step in order (compass, IMU, ESC). Common issues include inaccurate compass readings due to magnetic interference, IMU drift from vibrations, and motor mis-timing from ESC calibration. Recalibrate in a new area, verify firmware integrity, and reboot the system between steps. When in doubt, reset to factory defaults and re-run the calibration sequence using the latest app prompts.
Authority sources and further reading
For credible calibration guidance, consult official and educational resources. Always prioritize manufacturer manuals for your specific drone model. You can also review trusted calibration references that discuss sensor fusion, magnetometer placement, and safe flight testing in controlled settings.
Tools & Materials
- Drone unit (powered off)(Model being calibrated; remove any protective shields if required by the manual)
- Remote controller(Paired with the drone; keep batteries charged)
- Smartphone or tablet with drone app(Used to run calibration prompts and view real-time data)
- Flat, non-magnetic calibration surface(At least 2 meters square; avoid metal furniture)
- Current firmware version(Check and update before calibrations)
- Screwdriver (if needed)(For propeller removal if required by the manual)
- Safety gloves (optional)(Extra protection during maintenance)
- Calibrated reference for GPS (optional)(Aids initial GPS lock in challenging environments)
Steps
Estimated time: 45-60 minutes
- 1
Power on and update firmware
Power on the drone and remote controller, connect the app, and verify firmware is up to date. This ensures calibration prompts follow the latest sensor behaviors. If an update is available, perform it and restart the system before starting any calibration steps.
Tip: Back up important flight data if the app offers a log export. - 2
Prepare the calibration area and connect devices
Place the drone on a flat, non-magnetic surface in a calm environment. Ensure the app is connected and ready to guide you through compass, IMU, and ESC prompts. Remove propellers if your manual requires it for safety during calibration.
Tip: Remove metal jewelry and keep magnets away from the workspace. - 3
Calibrate the compass
Follow the app prompts to rotate the drone in multiple orientations, keeping movements smooth and deliberate. Avoid magnetic interference by staying away from metal objects. Confirm the compass is balanced before moving on.
Tip: Perform the swap in different axis directions as instructed by the app. - 4
Calibrate the IMU
Start the IMU calibration when the drone sits perfectly flat. Do not touch the drone during calibration, and wait for confirmation that the IMU is calibrated. A stable IMU reduces drift and improves stability during hover.
Tip: If vibrations are present, address them before proceeding. - 5
Calibrate the ESCs and gyro
Proceed with ESC calibration by following the sequence provided in the app. After ESC calibration, verify the gyro alignment by performing a small hover test and noting any response delays.
Tip: Do not power the drone mid-calibration unless prompted. - 6
Flight test and final adjustments
With calibration complete, perform a gentle hover and test ascent and descent to ensure consistent response. If drift or wobble appears, re-check compass and IMU data and consider another calibration cycle.
Tip: Document your results for future reference.
Questions & Answers
Do I need to calibrate before every flight?
Not every flight, but you should recalibrate after firmware updates, noticeable sensor drift, or after a hard crash. Regular calibration helps maintain stability and safe flight behavior.
You should recalibrate after firmware updates or if the drone seems unstable after a crash or rough landing.
What if compass calibration keeps failing?
Move to a different, magnetically clean location and repeat the compass calibration. If failures persist, consult the manufacturer’s support or refer to the drone’s manual for model-specific guidance.
Try recalibrating in a new area free of magnets; if it still fails, check the manual or contact support.
How long does calibration typically take?
Most calibrated sequences take 30 to 60 minutes, depending on the drone model and how thoroughly you verify each step. Allow extra time if you log results or perform multiple attempts.
Usually around 30 to 60 minutes, depending on the model and how many checks you perform.
Can calibration be done indoors?
Indoor calibration is possible in a large, clear space away from metal objects and electronics. Outdoor calibration is often preferred for reliable compass readings, but indoors works if the area is magnetically clean.
Yes, indoors is fine if the area is clear of magnetic interference; outdoors is ideal for compass accuracy.
Do I need special tools beyond the drone app?
Usually no extra hardware is required beyond the drone, its controller, and a recent app. Some models may benefit from a simple magnet-free surface or a basic screwdriver for prop removal.
No special tools are usually required beyond the drone and app, though a simple screwdriver can help if props need removal.
Where can I learn more credible calibration techniques?
Start with manufacturer manuals and reputable calibration guides from aviation and engineering education sites. Calibrate Point recommends cross-referencing official docs with independent tutorials to build a robust calibration routine.
Consult manufacturer docs and trusted educational sources to enhance your calibration routine.
Watch Video
Key Takeaways
- Calibrate in a magnetic-free, calm environment.
- Follow compass, IMU, then ESC steps in order.
- Test hover gradually and record outcomes.
- Keep firmware up to date and log calibration results.