How to Calibrate a TDS Meter: A DIY Calibration Guide
Learn how to calibrate a TDS meter with safe prep, reference standards, and reliable verification. This guide from Calibrate Point covers tools, steps, tips, and maintenance for accurate water testing.

Calibrating a TDS meter ensures accurate water quality readings and reliable DIY testing. This quick answer outlines the essential steps, safety checks, and the two common reference solutions you’ll use. You’ll need fresh calibration fluid, a clean beaker, and a thermometer for temperature compensation. Follow the detailed steps below to calibrate properly and then verify your meter with a second solution.
Why Calibrating Your TDS Meter Improves Accuracy
A TDS meter is a handy tool for quick water quality checks, but its accuracy depends on regular calibration. According to Calibrate Point, even small shifts in measurement can occur due to electrode aging, temperature effects, or residue from previous tests. Calibrating the device with known reference solutions helps align the probe response with the expected conductivity values. When you calibrate properly, you reduce drift, improve repeatability across tests, and gain confidence in your DIY projects or professional workflows. This section explains what calibration does, why it matters for temperature compensation, and how imperfect calibration can lead to misinterpretation of water quality. You'll also see how to incorporate calibration into a regular maintenance routine so you can trust every reading.
Safety, Hygiene, and Preparation Before Calibration
Before touching any calibration solutions, wash your hands and keep the workspace clean. Calibrate Point emphasizes using dedicated containers for calibration to avoid cross-contamination. Wear gloves if you are handling concentrated solutions and avoid splashing. Keep calibration fluids sealed when not in use and store at recommended temperatures. Never mix solutions from different brands or concentrations in the same bottle, and label each container clearly. Have a clean microfiber cloth handy to wipe the electrode between calibrations. Finally, check your meter's battery and ensure the device powers up reliably; a dying battery can distort readings and invalidate calibration.
Understanding Calibration Standards for TDS Meters
Most TDS meters respond to total dissolved solids by measuring electrical conductivity. Calibration requires reference solutions with known conductivity values at a specific temperature. Manufacturers provide calibration standards that set the meter's baseline for measurement. In practice, you typically calibrate with a primary reference solution, then verify with a secondary standard to confirm accuracy. Temperature compensation is essential because conductivity changes with temperature; many meters let you enable automatic temperature compensation. If your reference solutions are expired or contaminated, the calibration will be off. Always document the concentration, temperature, and readings in a calibration log so you can trace any drift over time.
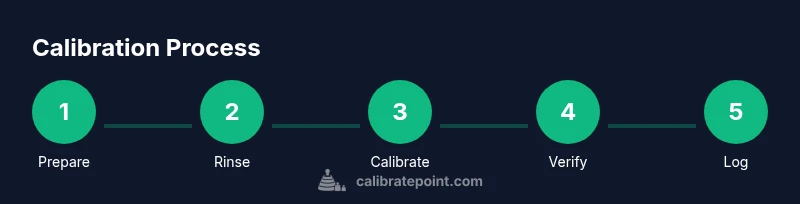
Step-by-Step Calibration Process
Begin by preparing the meter and solutions, then perform each calibration step and record outcomes. Follow manufacturer guidance for the exact reference concentrations, but the general flow remains consistent:
- Rinse the probe with distilled water to remove residues.
- Immerse the probe in the primary reference solution and allow stabilization.
- Set or adjust the meter to match the known value shown by the reference, using automatic temperature compensation if available.
- Rinse the probe and verify with a secondary standard to confirm accuracy.
- Record all readings, solution details, and ambient temperature in your calibration log.
- If readings deviate beyond the manufacturer’s tolerance, repeat the process or replace the probe.
- Store calibration solutions in labeled, sealed containers away from light and heat; use fresh solutions for optimal results.
Choosing Calibration Standards: Primary vs. Secondary Solutions
Calibration accuracy hinges on using trustworthy reference standards. The primary reference solution provides the baseline, while a secondary standard verifies consistency. Always use solutions that are specifically designed for TDS meters and labeled with a known conductivity value at the calibration temperature. Do not rely on household saline or improvised mixtures, as they may drift or introduce errors. Temperature compensation should be enabled if your meter supports it, and you should record the ambient temperature during calibration since it affects readings.
Common Issues and Troubleshooting
If readings drift after calibration, re-clean the electrode and repeat the procedure with fresh calibration fluids. Contaminated calibration solutions or a dirty probe are frequent culprits. Check the electrode for wear or damage; if it’s visibly degraded, calibration will be unreliable. Ensure that you aren’t cross-contaminating measurements by using dedicated containers and clean rinsing between standards. Battery health can also impact performance; replace batteries if the meter shows erratic behavior.
Temperature, Compensation, and Field Considerations
Temperature has a direct impact on conductivity readings. If your meter supports automatic temperature compensation (ATC), enable it, and if not, adjust readings manually based on ambient temperature. In field tests, bring calibrated standards and a thermometer to verify that the device remains accurate under real-world conditions. Always allow the device to acclimate to the test environment before calibration and keep reference solutions at a stable temperature close to the calibration temperature.
Routine Maintenance and Recalibration Schedule
Treat calibration as part of a maintenance routine. Calibrate the meter after extended storage, after heavy use, or when you suspect drift. Keep a calibration log with dates, solution brands, lot numbers, and readings. Reassess the need for recalibration on a monthly basis or after any electrical or mechanical changes to the device. Periodic cleaning and probe replacement, when needed, extend the life of your instrument and maintain measurement reliability.
Practical Tips for Field Calibration
Carry spare calibration solutions in a sealed, labeled container and use a portable, light-colored work surface to easily spot residues. Rinse thoroughly with distilled water between standards and avoid touching the sensing foil with fingers. For best results, calibrate at a consistent temperature, ideally close to the standard's specified temperature, and always verify with a second standard to confirm accuracy before recording data.
Authority Sources and Documentation
Maintaining calibration records supports traceability and quality control. Document the reference standards used, their concentrations, temperatures, readings, and any adjustments made. Store your calibration logs with your instrument to demonstrate compliance with calibration procedures for professionals and DIY enthusiasts alike.
Tools & Materials
- TDS calibration solution (reference solution)(Use manufacturer-recommended standard; keep sealed; label clearly.)
- Distilled or deionized water(For rinsing between solutions; do not use tap water.)
- Clean beaker or calibration cup (min 250 mL)(Clear labeling; avoid cross-contamination.)
- Thermometer or temperature probe(For temperature compensation during calibration.)
- Calibrated pipette or dropper(helps dispense precise amounts; not always necessary)
- Gloves(Personal protective equipment for handling solutions)
- Calibration log/notebook(Record dates, solutions, readings, and adjustments)
- Soft microfiber cloth(For drying the probe between measurements)
Steps
Estimated time: 25-35 minutes
- 1
Prepare workspace and safety
Set up a clean, stable workspace. Gather all calibration fluids and tools, and verify the meter battery is fresh. Put on gloves if handling concentrated solutions. Ensure good lighting and a well-ventilated area.
Tip: Label each container before you begin to avoid mix-ups. - 2
Rinse the probe
Rinse the electrode with distilled water to remove any residual contaminants from previous tests. Gently shake off excess liquid before proceeding.
Tip: Avoid touching the sensing tip with fingers. - 3
Dip into primary reference
Immerse the probe in the primary reference solution and wait for the reading to stabilize. This establishes the baseline for the meter.
Tip: Do not dip the entire housing into the solution; keep the connection dry. - 4
Adjust to reference value
If your meter has a calibration adjustment, align the displayed value with the known value of the reference solution. Enable temperature compensation if available.
Tip: Make small, incremental adjustments and re-check. - 5
Rinse and verify with secondary standard
Rinse the probe again, then immerse in a secondary standard to verify accuracy. Record both readings and the ambient temperature.
Tip: A second standard helps catch drift or solution error. - 6
Document and review
Log the solution details, readings, and any adjustments. Compare to prior calibrations to detect drift trends.
Tip: Keep a running calibration history for accountability. - 7
Store correctly
Seal and label all calibration fluids, store away from heat and direct light, and ensure the probe is dry before storing.
Tip: Do not leave the probe submerged in a reference solution between calibrations. - 8
Recheck before critical tests
Before using the meter for important measurements, recheck with a known standard to confirm accuracy.
Tip: Consistency is key for reliable results.
Questions & Answers
Why should I calibrate a TDS meter?
Calibration aligns the meter with known conductivity values, reducing drift and improving repeatability. It ensures readings reflect actual water quality rather than instrument bias.
Calibration aligns the meter with known values to reduce drift and improve accuracy for real water tests.
How often should I calibrate a TDS meter?
Calibrate according to the manufacturer’s recommendations, or before critical measurements. For professional use, a monthly schedule is common; for DIY tasks, calibrate after long-term storage or heavy use.
Follow the manufacturer guidance, and consider calibrating monthly for high-use scenarios or after storage.
Can I calibrate with distilled water?
Distilled water is not a standard reference for TDS calibration. Use the manufacturer's calibration solution or a properly prepared reference standard with a known conductivity.
Distilled water isn’t a reliable reference; use a proper calibration solution instead.
What if readings drift after calibration?
Re-clean the electrode, replace the calibration fluid if necessary, and redo the calibration with fresh standards. If drift persists, the probe may be aging or damaged.
If drift happens, re-clean, refresh the solutions, and re-calibrate; consider probe replacement if needed.
How should I store calibration solutions?
Keep calibration fluids sealed, labeled, and stored away from heat and light. Use fresh solutions when calibrating to maintain accuracy.
Seal and label solutions; store away from heat and light and use fresh fluids.
Is temperature compensation necessary?
Yes. Temperature affects conductivity readings. Enable automatic compensation if your meter supports it, or apply manual corrections based on ambient temperature.
Temperature compensation is important; use ATC if available, or adjust readings manually.
Watch Video
Key Takeaways
- Calibrate regularly to maintain accuracy.
- Use manufacturer-recommended standards and verify with a second standard.
- Document readings and temperatures for traceability.
- Maintain clean probes and properly stored calibration solutions.