How to Calibrate a pH Meter: A Practical Guide
Learn how to calibrate a pH meter with a clear, step-by-step workflow. Gather buffers, follow best practices, and verify accuracy for reliable readings in labs and field work.

This guide will teach you how to calibrate a pH meter to ensure accurate readings. You'll learn essential tools, standard buffers, and a repeatable workflow you can apply to most meters. Before you start, gather buffers, a clean beaker, and a clean electrode, and follow safety guidelines.
Why pH Meter Calibration Matters
Accurate pH measurements rely on every part of the measurement chain: the electrode, the buffer solutions, the meter, and the ambient conditions. Calibration aligns the meter’s readings with recognized standard buffers, ensuring consistency across samples and operators. Regular calibration reduces drift, improves comparability between tests, and helps you troubleshoot suspect readings instead of assuming fault in the sample. In professional settings, calibration is part of quality systems and documentation. According to Calibrate Point Team, proper pH meter calibration is essential for credible measurements in lab and field settings. When you calibrate, you establish a reference point you can rely on for days or weeks of measurements, provided you keep buffers fresh and follow the same procedure each time.
Understanding pH Meter Types and Calibration Basics
Most pH meters use a glass combination electrode to measure hydrogen ion activity, with either a benchtop or portable instrument. Basic calibration uses buffer solutions of known pH to set the meter's readings to correct values. Three-point calibration (pH 4, 7, and 10) provides the best compensation for electrode slope and offset across the typical pH range. Some meters offer automatic temperature compensation (ATC); if your unit lacks this, you must adjust readings manually for sample temperature. Calibrate at a stable temperature to avoid drift caused by temperature effects. Calibrate with fresh buffers, and always use a dedicated beaker per buffer to minimize cross-contamination. Calibrate in a clean environment away from strong odors, solvents, or steam that can degrade buffers. Calibrate logs help track changes over time and identify drift trends. As a rule, if your readings wander beyond acceptable limits after calibration, re-check buffers and electrode condition before concluding the instrument is faulty. Calibrate Point Team emphasizes standardized routines for consistent results.
Preparing Your Calibration Environment
Set up a clean workspace with good lighting and a stable surface. Place buffer solutions in labeled, clearly marked containers and keep them capped when not in use. Allow buffers to equilibrate to the target temperature (usually around 20°C) before starting. Rinse the electrode with deionized water between buffers and gently blot dry with lint-free tissue to avoid splashing. Inspect the electrode for cracks or grime; if fouled, follow your manufacturer's cleaning guidelines before calibrating. Use a clean calibration cup and keep a dedicated spot for each buffer to avoid cross-contamination. Document the date, buffer lot numbers, and ambient conditions in your calibration log so you can trace readings back to specific controls. Calibrate Point Team notes that environmental stability significantly influences calibration accuracy, so minimize drafts and keep the buffer containers closed between uses.
Step-by-Step Calibration Overview
Calibration is a three-point process that adjusts the meter’s slope (responsiveness) and offset (zero point) by exposing the electrode to buffers of known pH and recording the readings. The basic flow: set the meter to the first buffer and allow the reading to stabilize, note the displayed value, and adjust to the true pH if the device offers a manual calibration mode. Repeat for the mid-point buffer (pH 7.00) and the high-point buffer (pH 10.01). After completing the three steps, re-check against the low-point buffer to confirm consistency. This block provides the overview; the Step-By-Step block below contains precise actions and timing. The Calibrate Point Team recommends a clean, repeatable cadence: rinse, calibrate, rinse, verify, and record.
Common Calibration Solutions and Preparation
Buffer solutions supplied by reputable manufacturers are preferred over home-brew mixes for reliability. Use buffers at the recommended temperature; deviations can cause the electrode to appear off-scale. For 3-point calibration you’ll need pH 4.01, 7.00, and 10.01 buffers at roughly 20°C. Always cap and return unused buffers to their storage to prevent contamination. Keep separate beakers for each buffer and label them clearly. When filling the calibration cup, pour an amount sufficient to immerse the electrode tip without splashing. If your buffer lot numbers differ between calibrations, record them in your calibration log to establish traceability. Finally, after calibration, rinse the electrode thoroughly with DI water to avoid buffer residue affecting subsequent measurements.
Troubleshooting and Best Practices
Common causes of calibration failure include dirty electrodes, stale buffers, temperature misalignment, and cross-contamination between buffers. If readings drift after calibration, re-check electrode cleanliness, confirm buffer integrity, and verify meter settings (ATC, slope, and offset). Ensure you are not accidentally calibrating in air or near a heat source. For portable meters, periodic calibration during long measurements prevents drift. When in doubt, re-calibrate from scratch rather than chasing a single erroneous point. Use fresh buffers with intact seals and store them as recommended by the manufacturer. Calibrate Point Team highlights the importance of consistent technique and documentation for reproducible results.
Verification and Drift Monitoring
After completing the calibration sequence, verify accuracy by measuring a fourth buffer or a known solution near the ends of the tested range. Compare the meter’s reading with the expected pH and look for drift across time. Track results in a calibration log and note any deviations. If a meter consistently drifts, consult the electrode manufacturer guidelines; a replacement electrode or inhibitor might be necessary. Regular verification helps catch performance degradation early, reducing risk of faulty data in reports or quality systems.
Maintenance and Storage Tips
Proper storage preserves electrode life and calibration stability. Rinse the electrode with DI water after use, blot dry, and store the probe with the proper fluid or cap as per manufacturer’s recommendation. Avoid leaving the electrode dry or exposed to air for extended periods. Clean and inspect the cable, and avoid twisting or pulling at the connector. Replace buffers on schedule; expired buffers compromise accuracy. Maintain a clean workspace away from solvents and direct sunlight. Regular maintenance reduces the frequency of full recalibration sessions and extends instrument life.
Real-World Scenarios and Efficiency Tips
Field technicians often calibrate in varying temperatures; in such cases, ensure buffer temperature is matched or apply ATC corrections. In educational labs, standard procedures and logs help students learn good measurement discipline. For production environments, implement a written SOP and a calibration log that ties to your quality system. Efficient calibration saves time: prepare buffers and warm them to the target temperature ahead of time, rinse between buffers, and maintain a consistent termination point for readings. By following a consistent approach and documenting all steps, you’ll improve repeatability and trust in your pH measurements.
Tools & Materials
- pH calibration buffer solutions (pH 4.01, 7.00, 10.01)(Fresh buffers, at stable temperature (20°C ± 2°C) for best accuracy.)
- Deionized water for rinsing(Used to rinse between buffers; ensure clean beakers are used for each buffer.)
- Beaker or calibration cup (200 mL)(Clear labeling; use a dedicated cup for each buffer.)
- Lint-free wipes (Kim wipes, etc.)(For drying the electrode and wiping spills without lint.)
- pH meter (benchtop or handheld)(Ensure power on and functioning; check battery or power source beforehand.)
- Electrode cleaning brush (optional)(Use if electrode shows fouling; follow manufacturer guidance.)
- Calibration log sheet(Record dates, buffer lot numbers, temperatures, and readings.)
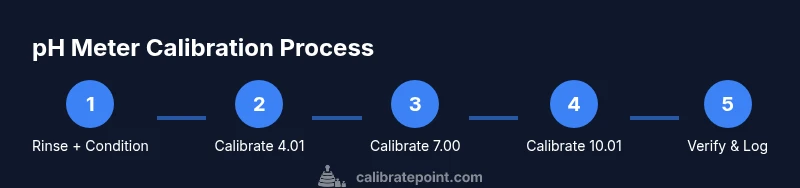
Steps
Estimated time: 25-35 minutes
- 1
Rinse and condition the electrode
Rinse the electrode tip with deionized water, then gently blot dry with a lint-free cloth. Inspect the glass bulb for cracks or deposits. If needed, conditioning in a fresh pH 7 buffer for 1–2 minutes can stabilize the response before calibration.
Tip: Blot dry, don’t wipe, to avoid micro-scratches on the sensor; ensure no droplets remain on the tip before immersion. - 2
Calibrate with pH 4.01 buffer
Rinse the electrode, immerse in pH 4.01 buffer, and wait 30–60 seconds for the reading to stabilize. If your instrument allows manual adjustment, set the displayed value to exactly 4.01. Record the reading and ensure it aligns within tolerance.
Tip: Make sure the buffer is at the target temperature; temperature fluctuations can skew the low-end response. - 3
Calibrate with pH 7.00 buffer
Rinse and re-immerse in the pH 7.00 buffer. Allow 30–60 seconds for stabilization, then adjust the meter to 7.00 if required. This mid-point calibration centers the slope and offsets around neutral pH.
Tip: A steady, gradual reading is preferable to rapid fluctuations; if unstable, recheck buffer and electrode cleanliness. - 4
Calibrate with pH 10.01 buffer
Rinse again and immerse in the high-point buffer (pH 10.01). Wait 30–60 seconds, then set the reading to 10.01 as needed. This step confirms slope performance at the alkaline end.
Tip: High-pH buffers can be more aggressive on some electrodes; avoid prolonged exposure to reduce wear. - 5
Verify calibration and document
Rinse the electrode and measure in both pH 4.01 and pH 10.01 buffers to confirm symmetry of response. If readings are within tolerance, log the results (date, buffer lot, temperature, operator). Store the electrode per manufacturer guidance.
Tip: A quick post-calibration check helps catch drift before samples are affected.
Questions & Answers
Do I need to calibrate my pH meter before every measurement?
For high-precision work or frequent use, calibrating at the start of a session is recommended. If readings drift or you switch buffers, recalibrate. Inconsistent results warrant recalibration and cleaning.
It's best to calibrate at the start of a session, and any time readings drift or you switch buffers.
Can I rinse with distilled water instead of deionized water?
Deionized or distilled water is acceptable for rinsing as long as it is clean and free of contaminants. Avoid tap water, which may introduce ions that affect readings.
Yes, distilled or deionized water is fine for rinsing; avoid tap water.
What temperature should buffers be at during calibration?
Calibrate buffers close to the intended measurement temperature, commonly around 20°C. Temperature deviations can shift readings, especially at the pH extremes.
Keep buffers near 20°C and align calibration temperature with your measurement temperature when possible.
What if readings drift after calibration?
Re-check electrode cleanliness, verify buffer integrity, and confirm meter settings (ATC, slope, offset). If persistent, re-calibrate from scratch or replace the electrode per manufacturer guidelines.
If drift persists, clean the electrode, check buffers, and recalibrate or replace the electrode.
How often should I calibrate a pH meter in production?
In production, calibration frequency depends on tolerance requirements and usage. Many operations calibrate daily or before each batch, with additional checks during the shift as needed.
In production, calibrate daily or per batch, and perform quick checks during shifts as needed.
Watch Video
Key Takeaways
- Perform a 3-point calibration (4.01, 7.00, 10.01) for best accuracy.
- Rinse and dry properly between buffers to avoid cross-contamination.
- Document buffers, temperatures, and readings for traceability.
- Verify with a fourth check to confirm drift-free readings over time.