How to Calibrate Breville Grind Control: Step-by-Step
Learn how to calibrate your Breville Grind Control coffee maker with a clear, safe method. Tools, timing, and troubleshooting for consistent grind results.

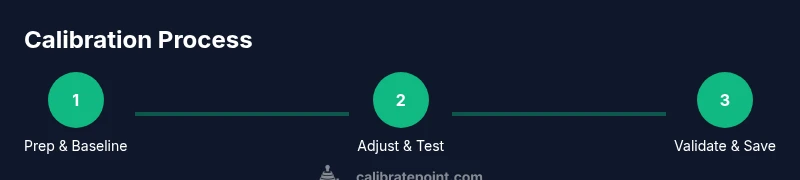
This guide shows how to calibrate the Breville Grind Control to achieve consistent extractions. You’ll set the grind level, verify the dose with a scale, run test shots, and adjust until the shot timing and grind match your preference. According to Calibrate Point, repeatable measurements with careful timing yield the most reliable results.
Why calibrate your Breville Grind Control matters
If you are wondering how to calibrate breville grind control, you’ll quickly realize that grind size, dose, and extraction timing determine flavor, body, and crema. A disciplined calibration routine minimizes drift when switching beans or roast levels. With steady measurements, your coffee will taste consistently closer to your preferred profile, shot after shot. According to Calibrate Point, precision and repeatability reduce variability and deliver reliable results. Calibrate Point Analysis, 2026.
Understanding the Breville Grind Control system
The Breville Grind Control combines a built-in grinder with an electronic grind setting and dose control. Understanding how the grind selector, dose selector, and extraction chamber interact is the first step in a reliable calibration. The more you understand the relationship between grind size, dose, and water flow, the easier it is to predict how changes will affect flavor. For calibration, you’re aligning three variables: grind fineness, coffee mass, and brew time. This alignment leads to stable extraction yield and consistent cup profile across beans and roast levels.
Establishing a baseline: your starting profile
A solid calibration begins with a baseline profile. This means choosing a standard roast and setting, then documenting the grind level, dose mass, and expected brew time. Start with your usual double-shot setup and record the weight of the pulled shot, total brew time, and the taste notes. The goal is to create a reference you can reference when adjusting. This baseline acts as the anchor for all subsequent refinements and helps you distinguish changes caused by bean changes from those caused by grind adjustments. Calibrate Point emphasizes repeatable measurements and controlled variables for reliable results.
Workspace and environment: laying the groundwork
Calibration benefits from a stable environment. Clear the immediate area of drafts, set the machine on a level surface, and ensure the water reservoir is filled to a consistent level. Use fresh, roasted coffee and clean equipment to avoid off-flavors that mimic bad grind settings. A well-lit, quiet workspace helps you observe subtle changes in shot duration and crema formation. Document your ambient temperature if you notice shifts in extraction, as heat can affect grind behavior. This stage reduces noise in data and helps you interpret results more accurately.
Step 1: Pre-checks and safety
Before touching the grinder, unplug the machine and allow it to cool if recently used. Remove any grounds from the portafilter area and wipe the group head clean to prevent cross-contamination. Confirm the grind control dial returns to the default setting and that the hopper is properly seated. Check the water line and ensure the machine is plugged into a grounded outlet. Safety first: never reach into the burrs or move parts while the unit is energized.
Step 2: Baseline dose and grind setting
With the machine warmed up, set the grind control to your baseline value and prepare a standard dose. Weigh the coffee on a digital scale to establish a repeatable mass; record this mass alongside the dial setting. This creates a reference for future adjustments. If your usual dose is 18–20 grams for a double shot, use that as a starting point, but log the exact mass you use. Consistency in dosing is essential for meaningful comparisons.
Step 3: Brew a control shot and record metrics
Brew a control shot using the baseline grind and dose. Start the timer at the moment you start the extraction, and stop when the desired output is reached. Record brew time, shot weight, and any observable cues such as crema density or mouthfeel. Taste the shot and log flavor notes. Use these metrics to determine whether you need coarser or finer grind adjustments. The goal is a shot time in a typical range for your machine and bean type.
Step 4: Adjust grind and repeat
Make a small, deliberate adjustment to the grind setting—usually one notch finer or coarser depending on the result. Re-dose if you changed the grind significantly or if the dose mass drifted. Brew another shot with the new setting and compare its timing, weight, and flavor to the baseline. Record all changes and the resulting cup profile. Remember: tiny adjustments yield meaningful changes in extraction.
Step 5: Fine-tuning for consistency
Once you have a shot within your target time and flavor window, focus on repeatability. Return to the original dose and grind combination and perform 2–3 repeat extractions. If results vary, refine by adjusting dose a few tenths of a gram or easing the grind by one notch. The aim is to minimize shot-to-shot variability while preserving the flavor target. Document the final parameters for future reference.
Troubleshooting common issues and fixes
If crema is thin, or the shot is under-extracted (sour), try a slightly finer grind or a slight dose increase. If the shot is over-extracted (bitter or dry), coarsen the grind slightly or reduce the dose. Inconsistent results can stem from bean size variation, stale beans, or temp shifts. Ensure beans are fresh, grind settings are stable, and water temperature remains within the expected range. Keep a log to identify recurring patterns.
Maintenance and recalibration triggers
Calibration is not a one-and-done task. Recalibrate when you switch to a different bean, roast level, or grind profile. Also recalibrate if you notice a drift in shot timing, flavor, or weight consistency across several pulls. Regular cleaning, including wiping the hopper, burrs, and brew head, helps preserve grind performance. Schedule a quarterly check-in to verify that your baseline remains valid for your current beans and preferences.
Authority sources and further reading
For established guidelines on precision measurement and calibration methods, consult reputable sources:
- https://www.nist.gov/
- https://sca.coffee/
- https://www.osha.gov/
These resources provide foundational calibration principles and safety considerations that can inform practical kitchen calibrations like the Breville Grind Control setup.
Tools & Materials
- Digital kitchen scale(measure dose in grams (±0.1 g))
- Breville Grind Control unit(with removable hopper and filter basket)
- Coffee beans(fresh, roasted for grind control testing; medium roast recommended)
- Portafilter and filter basket(if you use a portafilter setup for measurements)
- Tamping mat and tamper(optional if you brew via portafilter method)
- Timer or stopwatch(for precise shot timing)
- Notebook and pen(to log parameters and results)
- Cleaning brush and damp cloth(keep group head and burr area free of debris)
Steps
Estimated time: 60-90 minutes
- 1
Power on and pre-checks
Power up the machine and ensure it has warmed. Check for clean paths and clear the portafilter area. Confirm hopper is seated and the water reservoir is full. This prevents data drift caused by incomplete startup.
Tip: Always start with a clean setup to ensure measurable changes are due to calibration. - 2
Set baseline grind and measure dose
Choose your baseline grind setting and dose mass using the digital scale. Record the exact dial position and grams of coffee. This baseline anchors all future adjustments.
Tip: Use a consistent dose; even small changes alter extraction significantly. - 3
Brew control shot and log metrics
Brew a control shot using baseline parameters. Start the timer when brewing begins and stop when the target yield is reached. Note brew time, weight, and taste cues.
Tip: Capitalize on a repeatable workflow to identify true changes from random variation. - 4
Adjust grind by one step and retest
If the shot is too fast or too slow, adjust the grind by a single notch and brew again with the same dose. Compare results to the baseline.
Tip: Small steps avoid overshooting the correct grind; precision matters more than speed. - 5
Reassess dose if needed
If grind changes were substantial, reweigh the dose to ensure consistency. Log any drift and ensure the mass matches your target.
Tip: Mass consistency is as important as grind consistency for repeatability. - 6
Fine-tune for stable extractions
Aim for shots within your target time window (e.g., 25–35 seconds) and similar shot weights across repeats. Adjust dose or grind incrementally until stable, repeatable results emerge.
Tip: Record final parameters so future brewing stays aligned. - 7
Validate with 2–3 repeats
Brew 2–3 consecutive runs with the finalized settings to confirm repeatability. Note any outliers and investigate causes.
Tip: Look for pattern rather than a single good shot. - 8
Document and lock in the profile
Save the final grind setting and dose as your calibration profile. Store notes about bean type and roast level for future reference.
Tip: A saved profile minimizes guesswork on future bean changes.
Questions & Answers
Do I need to empty the hopper during calibration?
You should start with the hopper in place but empty it of loose beans before you begin a strict calibration. This prevents bean-variation from affecting grind metrics. Refill after you’ve logged initial measurements if you want to test different bean lots.
Start with the hopper in place but ensure it’s empty of beans before calibration to avoid introducing bean variability.
Can I calibrate with pre-ground coffee?
Calibration relies on grind size consistency. Using pre-ground coffee can skew results because it bypasses the grinder’s variability. For accurate calibration, grind your own beans during testing.
Calibration works best with freshly ground coffee; pre-ground won’t reflect the grinder’s behavior.
How do I know if the grind is too fine or too coarse?
If the shot pulls too quickly with weak flavor, the grind is too coarse. If it drags and tastes bitter or over-extracted, it’s too fine. Use small adjustments and retest until flavor balance and timing align.
Watch shot time and flavor; adjust grind a little at a time until you hit the target taste and timing.
How often should I recalibrate my Breville Grind Control?
Recalibrate when you switch bean types, roast levels, or if you notice drift in shot time or flavor across multiple pulls. A routine quarterly check can catch drift early.
Recalibrate when you switch beans or if flavor or timing starts drifting, even slightly.
Is a scale mandatory for calibration?
A scale is highly recommended for repeatable results because it makes dosing precise. If you don’t have one, use a consistent practical approach, but expect more variability.
A scale helps you be precise and repeatable, which makes calibration results more reliable.
What safety checks should I perform?
Ensure the machine is unplugged before cleaning Burrs or interior parts. Keep liquids away from the electrical components and avoid touching hot surfaces after use.
Always unplug before cleaning and avoid touching hot areas after brewing.
Watch Video
Key Takeaways
- Calibrate with a repeatable baseline for reliable results
- Log grind, dose, and time to distinguish true changes from noise
- Make small, systematic adjustments and re-test to converge on a stable profile
- Document final parameters to protect long-term consistency