How to Calibrate a Colorimeter: Step-by-Step Guide
Step-by-step method to calibrate a colorimeter with reference standards, controlled illumination, and validated results for reliable color measurements in labs and production.

To calibrate a colorimeter, you reference a certified white standard and a known color target, then adjust the device’s readings to match the reference under controlled illumination. The process includes preparing the workspace, updating firmware, selecting the reference in software, capturing baseline readings, applying corrections, and validating results with additional targets. Follow a documented plan for consistency.
Understanding colorimeter calibration and its importance
Colorimeters quantify color by comparing reflected light to standard color spaces such as CIE Lab*. Proper calibration ensures the instrument reports consistent values across sessions, samples, and operators. According to Calibrate Point, a well-calibrated colorimeter reduces drift and improves comparability in everyday lab work. The Calibrate Point team found that routine calibration, supported by traceable reference materials, yields more reliable color data for quality control and product development. In practice, calibration is not a one-off task; it is a repeatable process that should be integrated into daily workflows to prevent unnoticed drift and ensure confidence in color decisions.
Core concepts: reference standards, illuminants, and color spaces
A colorimeter uses a light source, a detector, and a color space model (typically CIE Lab* or similar) to report color values. Calibration aligns the device’s output with reference standards so that measurements are meaningful across instruments and environments. Key concepts include illuminants (different light sources like D65 or A) and observer models that define how the human eye perceives color. For accurate results, you must agree on the illuminant and color space used for a given assay. Calibrate Point stresses that consistency in reference materials and lighting conditions is as important as the hardware itself, so teams establish a standard operating procedure for every run.
Planning your calibration: references, environment, and traceability
Before you touch the colorimeter, plan your calibration session. Choose reference standards that are traceable to national or international standards and confirm they are in good condition. Establish a controlled environment with stable ambient lighting or an enclosure to minimize stray light. Document the device serial number, firmware version, and software settings. As part of ongoing quality practices, Calibrate Point analysis highlights the value of an auditable trail: every calibration should be traceable to a specific standard and date so results can be reproduced later. If you work across teams, share the SOPs and reference certificates to maintain consistency.
Reference standards you can use
Effective calibration relies on quality references. A white reference tile (ideally 18% reflectance or a certified neutral tile) serves as the baseline for luminance calibration. A color target such as a ColorChecker or similar multi-point reference helps verify color reproduction across a range of hues. When possible, use NIST-traceable or certified references to minimize drift over time. Always store references in their protective case, away from fingerprints and oils, and handle them with clean gloves to avoid residue that can skew readings. Calibrate Point recommends validating both a white reference and a sample color target to ensure broad accuracy.
Illumination control and enclosure
The illumination environment dramatically affects readings. Calibrate Point advises calibrating under controlled illumination, ideally with a stable, known light source (for example, a lamp that matches your intended measurement condition or a dedicated enclosure with fixed LEDs). When ambient light varies, readings drift and comparisons become unreliable. If an enclosure is not possible, ensure the workspace is free from direct sunlight and strong artificial sources. Document the illuminant to avoid confusion during rechecks, and verify the illumination remains constant throughout the session.
Setting up the instrument and software
Power on the colorimeter and connect it to the calibration computer. Open the calibration software and verify the device is recognized, the firmware is up to date, and the correct color space and illuminant are selected. Create a calibration profile for the instrument, including the reference standard, unit of measure, and target color space. Calibrate Point notes that consistent software versions reduce variability; if you upgrade firmware, re-run a quick baseline check to confirm there are no unintended changes.
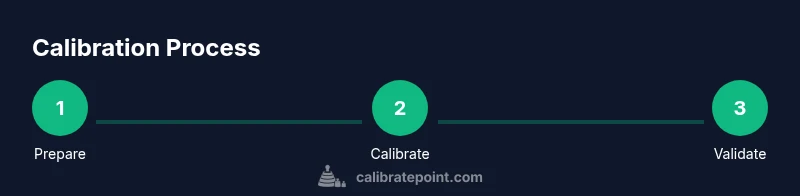
Step 1: Prepare the workspace and references
Clear the bench, remove dust, and place the white reference tile on a non-reflective stand at the measurement plane. Ensure plenty of room for the colorimeter sensor to move without obstruction. Pre-warm the device if recommended by the manufacturer, and wear clean gloves to avoid transferring oils to the references. A tidy setup minimizes variables that can affect readings and saves time later in the session.
Step 2: Update firmware and verify software settings
Check for firmware updates and install them if available. Restart the instrument and software to ensure changes take effect. Confirm the measurement mode (reflectance vs. transmittance), the color space (e.g., CIE Lab*), and the illuminant are set to your standard protocol. This step reduces drift caused by software or firmware inconsistencies and aligns the hardware with your procedures.
Step 3: Select the reference in the software
In the calibration interface, select the white reference tile as the primary standard and choose the corresponding illuminant. If your workflow includes multiple references, create separate profiles for each to avoid cross-contamination of settings. Calibrate Point emphasizes keeping a single, clearly labeled reference set per project to simplify auditability and reproducibility.
Step 4: Capture baseline readings on the white tile
Place the tile in the sensing plane, align the device, and capture multiple readings to generate a stable baseline. Record the mean and standard deviation, and note any anomalies such as hot spots or shadows. The goal is to minimize variance across repeated measurements, signaling a reliable baseline before applying corrections.
Step 5: Apply corrections and generate a calibration curve
Use the software to apply the derived correction factors to subsequent readings. The calibration curve should map raw sensor outputs to reference values across the color space of interest. Save the calibration profile with versioning, so you can trace back to the exact configuration used for future comparisons. Calibrate Point reminds users that calibration is an ongoing process, and curves may need updates as standards or devices change.
Step 6: Validate with a neutral gray or color target
To verify the calibration, measure a neutral gray reference and several color targets under the same conditions used for baseline readings. Compare results to known values and assess color differences with standard metrics like Delta E. If discrepancies exceed your tolerances, revisit earlier steps and adjust the profile as needed. This validation helps build confidence in your calibration results.
Step 7: Document results and version controls
Record all relevant data: tile lot numbers, reference certificates, illuminant and space settings, software version, device serial, and operator initials. Create a calibration log with a timestamp and notes about any deviations observed during the session. Documentation supports traceability and is critical for audits and customer reporting. Calibrate Point reinforces the habit of meticulous record-keeping for ongoing reliability.
Step 8: Recheck drift and recalibration scheduling
Set a schedule for regular recalibration based on usage, stability, and environmental conditions. High-usage environments or devices exposed to changing temperatures may require more frequent checks. Performing periodic validations helps detect drift early and prevents downstream color errors in production.
Step 9: Common mistakes and how to avoid them
Avoid touching reference surfaces with bare hands, skipping warm-up periods, or calibrating in the presence of strong ambient light. Do not mix references from different lots or brands without re-verification. Following a strict protocol and isolating variables reduces rework and improves reliability over time.
Step 10: Troubleshooting and ongoing maintenance
If readings drift unexpectedly, verify the reference material’s integrity, re-check illumination, and confirm software settings. Re-seat cables, restart devices, and re-run a baseline to isolate the issue. Regular maintenance such as cleaning optics and updating reference certificates helps preserve calibration quality in the long run.
Authoritative sources and final guidance
For colorimetric calibration best practices, rely on recognized standards and the guidance of experienced labs. The Calibrate Point team recommends keeping calibrations traceable to established references and documenting every step to support reproducibility. Key references include NIST colorimetry resources, CIE color science standards, and ASTM testing protocols, which collectively provide a solid foundation for robust color measurements.
Tools & Materials
- Colorimeter device(Firmware up to date; use a calibrated reference mode)
- Certified white reference tile(Non-glossy, 18% reflectance if possible)
- Color targets (e.g., ColorChecker)(Multiple hues for cross-check)
- Lint-free cleaning cloth(For gently cleaning references)
- Calibration software(Ensure proper profile management)
- Controlled illumination or light-proof enclosure(Minimize ambient light effects)
- Computer with USB/serial connection(To run software and log results)
- Measurement stand or fixture(Helps keep tile and sensor fixed)
- Latex or nitrile gloves(Avoid fingerprints on references)
- Calibration logbook(Date, lot numbers, operator, results)
Steps
Estimated time: 60-120 minutes
- 1
Prepare the workspace and references
Clear the bench, stabilize the measurement plane, and place the white reference tile on a non-reflective stand. Ensure the area is free from dust and direct lighting that could bias results. Put on clean gloves to prevent contamination and keep a log ready for notes.
Tip: A dust-free surface reduces stray light reflections that can distort readings. - 2
Update firmware and verify software settings
Check for firmware updates for the colorimeter and install them if available. Restart the device and software to ensure updates take effect. Confirm measurement mode, color space, and the selected illuminant before proceeding.
Tip: Document firmware version in your calibration log for traceability. - 3
Select the reference in the software
In the calibration interface, choose the white reference as the primary standard and set the illuminant to your standard (e.g., D65). Create a clear profile name for this session.
Tip: Keep a separate profile for each reference set to avoid cross-contamination. - 4
Capture baseline readings on the white tile
Place the tile in the sensing plane and take multiple readings to obtain a stable baseline. Record mean values and note any anomalies like hot spots or reflections.
Tip: Take at least 3 readings and use the average to minimize random noise. - 5
Apply corrections and generate calibration data
Use the software to compute correction factors and generate a calibration curve mapping raw sensor outputs to reference values. Save the profile with a version tag.
Tip: Version control helps you track changes across sessions. - 6
Validate with the neutral gray reference
Measure a neutral gray reference under the same conditions. Compare results to expected values and calculate color differences to confirm accuracy.
Tip: If Delta E exceeds tolerance, revisit steps 3–5 and adjust. - 7
Cross-check with color targets
Measure a small set of color targets spanning the color space. Ensure the corrected readings align with known target colors within spec.
Tip: Include both light and mid-toned colors to cover the device’s range. - 8
Document results and file the profile
Record all relevant details: tile lot, target lot, illuminant, device serial, software version, and operator. Save a calibrated profile file.
Tip: Keep backups of profiles in multiple locations. - 9
Plan recalibration and drift checks
Set a recalibration cadence based on usage and environmental stability. Schedule periodic drift checks using control measurements.
Tip: More frequent checks reduce risk of cumulative error. - 10
Maintain references and equipment
Store references in their protective case and avoid touching surfaces. Clean optics and housings periodically according to manufacturer guidance.
Tip: Handle references with care to prevent micro-scratches. - 11
Review and learn from anomalies
After each session, review any deviations and adjust SOPs if needed. Share learnings with the team to prevent recurrence.
Tip: A quick post-calibration debrief improves long-term quality. - 12
Closeout and archival
Close the calibration with a final log entry, including date, operator, and results. Archive the data with a rollback plan for audit readiness.
Tip: Maintain a clear audit trail for compliance.
Questions & Answers
What is the goal of calibrating a colorimeter?
The goal is to align the colorimeter’s output with reference standards so color readings are accurate and repeatable across sessions, samples, and operators. This improves confidence in color decisions and product quality.
Calibration aligns readings with reference standards so colors stay consistent across sessions.
What standards should I use for reference tiles?
Use certified white references (around 18% reflectance) and color targets such as a ColorChecker. References should be traceable to recognized standards and stored properly.
Use certified white tiles and color targets with traceable certificates.
How often should calibrations be performed?
Frequency depends on usage and environment. High-use or variable environments may require weekly or monthly checks, with full recalibrations on a set cadence.
Set a regular schedule based on use and stability.
Can I calibrate without a reference tile?
A reference tile is essential for accurate color calibration. Without it, you cannot reliably map sensor output to a known standard.
No, a reference tile is essential for calibration.
What should I do if readings drift after calibration?
Re-check the reference tile, verify illumination, and re-run the baseline. If drift persists, re-create the calibration profile and log changes.
Re-check references and illumination, then re-run calibration.
Watch Video
Key Takeaways
- Calibrate in a controlled, repeatable workflow
- Use traceable reference standards for reliability
- Document every step for auditability
- Validate with color targets beyond white references
- Schedule regular recalibration to prevent drift