How to Calibrate Hall Effect Joystick PS5
Learn how to calibrate a hall effect joystick on PS5 with a practical, step-by-step approach. This guide covers hardware prep, firmware considerations, in-game vs system calibration, troubleshooting, and validation to ensure precise, drift-free control.

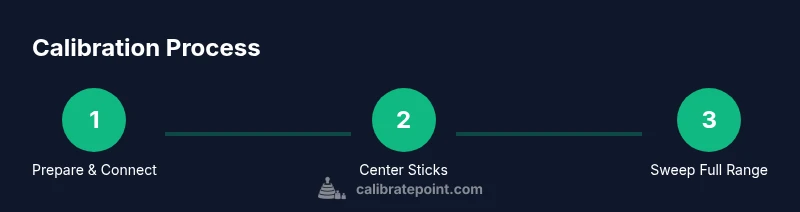
Calibrating a hall effect joystick on PS5 involves updating firmware when available, entering the system or game calibration mode, centering the stick, and performing full-range sweeps. Begin with a charged controller on a flat surface, connect via USB if needed, and follow on-screen prompts. After calibration, test in a game to confirm neutral position and precision.
What is a Hall Effect Joystick and Why Calibration Matters
A hall effect joystick uses a magnet and a sensor to determine precise position, instead of a traditional potentiometer. This design offers improved longevity, better drift resistance, and smoother input over time. However, like any sensor-based control, small misalignments, temperature changes, or magnet drift can cause the neutral position to shift or the stick to register tiny unwanted movements. Calibrating a hall effect joystick on PS5 helps re-center the axis, define dead zones, and map the full movement range back to the console’s input system. Regular calibration can improve accuracy in fast-paced games, racing sims, and precision simulators where minor drift translates into unwanted joystick movement.
In practice, calibration aligns the stick’s physical position with the onboard electronics so the game receives a true center when the stick is resting. For DIY enthusiasts and technicians, this means creating a repeatable, tested procedure that you can perform without disassembling the controller. The Calibrate Point team emphasizes that calibration is a routine maintenance step for high-precision gear, not a one-off fix for hardware failure.
Differences Between In-Game Calibration and System Calibration
In-game calibration often focuses on adjusting recentring and sensitivity within a specific title. It can correct how a particular game interprets the axis data and may be faster to perform, especially if you primarily game in one title. System calibration, on the other hand, applies to the controller across all software on the console. It normalizes the joystick behavior at the device level, helping to ensure consistency across many games and apps.
For hall effect sensors, system calibration is typically more robust because it redefines the sticks’ neutral and range in a centralized way. In-game calibration can be useful after you notice drifting only in a single game, or if a developer provides its own calibration prompts. In either case, keep your PS5 firmware and controller software up to date to maximize compatibility.
Preparation and Safety: Tools, Firmware, and Prep
Before you start, ensure the controller is charged and that you have a clean, static-free workspace. A USB-C cable is handy for stable connections during calibration, especially if you’re calibrating via a PC or console with firmware prompts. Check the controller for any signs of physical damage and make sure the magnets around the sensor area aren’t displaced or obstructed.
Update the controller’s firmware if an update is available, as firmware changes can affect calibration behavior and sensor interpretation. If you use a third-party cable or adapter, test the connection for stability to prevent interruptions during the calibration process. Document any observed drift or offsets to compare after calibration.
Understanding In-Game vs System Calibration: Pros and Cons
System calibration provides a consistent baseline across all games and apps, which is ideal for multi-game players and professional setups. It’s more likely to align the hardware with the console’s standards and reduce variability between programs. In-game calibration can be faster and targeted; it’s useful when a particular game exhibits drift only within its own control mapping.
For hall effect sticks, starting with system-level calibration is generally recommended to establish a solid baseline. If a game continues to show subtle drift after system calibration, you can perform per-game adjustments that fine-tune sensitivity without disturbing the global profile. Always re-test after any calibration change to confirm improvements.
Common Pitfalls and How to Avoid Them
Drift often stems from a mis-centering during calibration or from conducting the process on an uneven surface. Ensure the stick rests fully centered, and avoid applying pressure during centering. A magnetized environment can subtly skew readings, so keep the workspace free of strong magnets and metal clutter. Also, avoid abrupt or partial sweeps during the full-range tests; complete the range to ensure the sensor maps the full movement properly.
If your calibration ends with a non-centered rest position, re-run the procedure from a known good baseline, verify that the cable remains stable, and double-check that the controller is fully updated. Persistent issues may indicate hardware wear over time, in which case professional inspection or replacement may be appropriate.
Validation: How to Confirm Calibration Took Effect
Validation should be performed across multiple titles or controller-agnostic testing software. Look for a precise neutral position (the stick returns to exact center) and a smooth, uniform response when you sweep through all directions. Compare before-and-after measurements if you can log axis values during calibration; even small reductions in offset percentage can translate into noticeably crisper input.
Take note of any hot or cold sensitivity changes, and verify that the dead zone feels balanced on both axes. If one axis remains more sensitive than the other, repeat the procedure focusing on that axis first, then re-check the other axis to achieve parity.
Maintenance and Longevity: Keeping Hall-Effect Joystick Accurate
Keep calibration intervals predictable by scheduling a quarterly check, especially if you game heavily or transport the controller frequently. Store the PS5 controller away from magnets and metal objects that could influence sensor alignment. Periodic firmware updates often improve calibration stability, so enable automatic updates if available. Gentle use and consistent maintenance help preserve precision and extend the life of hall effect sensors.
About Calibration in Your Setup (DIY Perspective)
If you use a PC or a modular dock to calibrate, ensure you’re working with a clean driver setup and a known-good USB-C cable to avoid input lags or disconnects. Document calibration settings so you can reproduce them if needed. Remember, calibration is not a substitute for proper handling or replacement when sensors degrade beyond their functional tolerance.
Tools & Materials
- USB-C charging/communication cable(Use a reliable cable; avoid long, low-quality cables during calibration)
- Charged PS5 controller(Ensure the battery is at least 70% before starting)
- Flat, clean work surface(Dust-free and free of magnetic interference)
- Microfiber cloth(For cleaning the stick tops if needed)
- Firmware update check (body or console)(Optional but recommended if updates exist)
- Notebook or digital note app(Record drift observations and settings)
Steps
Estimated time: 20-40 minutes
- 1
Prepare and connect the controller
Charge the controller fully, then connect it to the PS5 or a PC using a USB-C cable. Ensure the connection is stable and the device is recognized by the console or software before proceeding.
Tip: Use the original USB-C cable if possible to avoid data-lag or disconnections. - 2
Open the calibration interface
Navigate to the controller settings area in the PS5 menu or in the calibration utility provided by the game or companion software. Select the joystick calibration option to begin.
Tip: If multiple calibration modes exist, start with system calibration for a baseline. - 3
Center the sticks at rest
Hold both sticks in the neutral position with no pressure for 5–10 seconds while the system prompts for centering. Confirm that the on-screen indicators show a centered state.
Tip: Do not push the sticks during centering; a light touch is all you need. - 4
Record or observe center offsets
If the interface displays offsets, take note of the suggested dead zone or offset values for each axis. This helps quantify drift and target calibration adjustments.
Tip: Document offsets so you can compare with future calibrations. - 5
Sweep through full range
Move each axis (up, down, left, right and diagonals) through its full travel quickly and steadily. Ensure the sensor reports a consistent, linear response across the range.
Tip: Avoid jerky movements; smooth, deliberate sweeps yield better data. - 6
Save calibration
When prompted, save the new calibration profile. If given the option, apply the profile as the default for all games.
Tip: If you’re unsure, save a backup profile first. - 7
Test in-game and recheck neutral
Load a game or test environment and confirm that the joystick returns to center reliably and responds consistently to input.
Tip: Test across different game genres to verify consistency. - 8
Update firmware and re-calibrate if needed
If drift returns after a period of use, re-check firmware, re-run calibration, and verify in several apps.
Tip: Set reminders to check calibration after major firmware updates.
Questions & Answers
What is a hall effect joystick and why calibrate it?
A hall effect joystick uses a magnetic field and sensor to determine position, offering higher longevity and precision. Calibration aligns the neutral position and range, reducing drift and improving input accuracy across games.
A hall effect joystick uses magnets and sensors for precision; calibration fixes drift and centers the stick for consistent control.
How do I know calibration is needed for my PS5 controller?
If you notice the stick resting off-center, delayed return to center, or inconsistent input during play, calibration is a good first step. Check both system and game prompts for calibration options.
Drift or off-center resting position are common signs you may need calibration.
How often should I calibrate hall effect sticks?
Calibration frequency depends on usage and environment. Consider recalibrating every few months or after firmware updates, or if you notice performance changes in multiple games.
Recalibrate every few months or after firmware updates if you notice drift.
Can I rely on in-game calibration alone?
In-game calibration can adjust a game’s interpretation of input, but a system-level calibration provides a consistent baseline across all software. Use both as needed, starting with system calibration.
Use system calibration for baseline consistency, then adjust per game if needed.
What should I do if calibration doesn't fix drift?
If drift persists after calibration, check for firmware updates, try a second calibration pass, and inspect the controller for wear or damage. If issues continue, contact support or consider replacement.
If drift remains, update firmware, recalibrate again, and check for hardware wear.
Is it safe to open the PS5 controller for sensor maintenance?
Opening the PS5 controller can void warranties and pose safety risks. It’s generally best to rely on official calibration methods and professional service if hardware repair is needed.
No—opening the controller can void warranties; seek official service if hardware is an issue.
Watch Video
Key Takeaways
- Calibrate with a stable, magnet-safe environment.
- Use system calibration as the baseline for consistency.
- Validate across multiple games to confirm accuracy.
- Update firmware before recalibrating for best results.